
Bf 110G-4
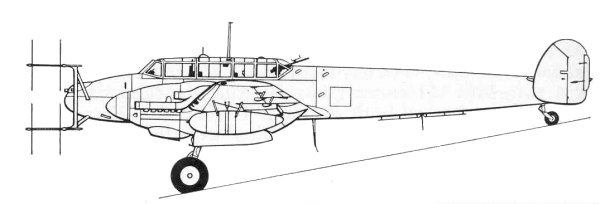
The Bf-110 first flew in May of 1936 however due to delays in the development of the planned engines, production models were not delivered until July of 1938. The 110 is probably most famous for what it didn't do and that was live up to Herman Goring's grand idea that the heavily armed fighters could escort bombers all the way to the target fending off attacks of single engine fighters. Its failure to do so lead to a common belief the aircraft itself was to blame when in reality it the thinking of those in charge that was faulty. Following the Battle of Britain the 110 fulfilled tasks that it was more suited to and with the failure of its replacement, the Me 210, it was upgraded and soldiered on through the war being utilized as a ground attack, reconnaissance, heavy fighter, night fighter and liaison craft. It was in the role of night fighter that it perhaps found its niche. Not that it was by any stretch of the imagination an ideal night fighter but by 1942 standards it was considered entirely adequate. The G-4 version began to leave assembly lines in the Summer of 1942 was intended from the outset to carry airborne intercept radar. At the beginning of 1943 the night fighter squadrons numbered 15 with some 390 serviceable fighters, most of which were 110F's and G's. Production of the 110 in 1943 totaled 1,509 aircraft of which approximately half were F-4 or G-4 night fighters. During 1944 an additional 1,518 were built.
The Kit
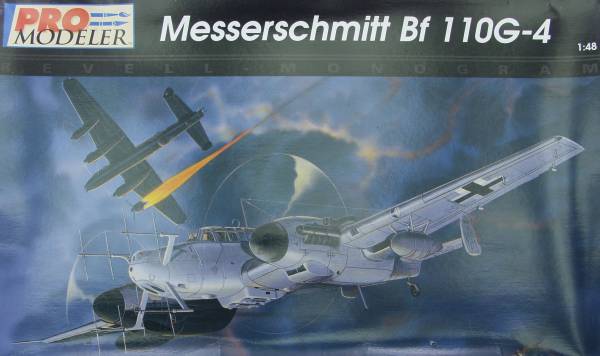
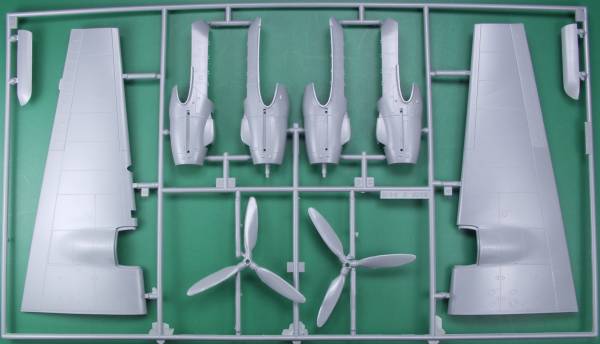
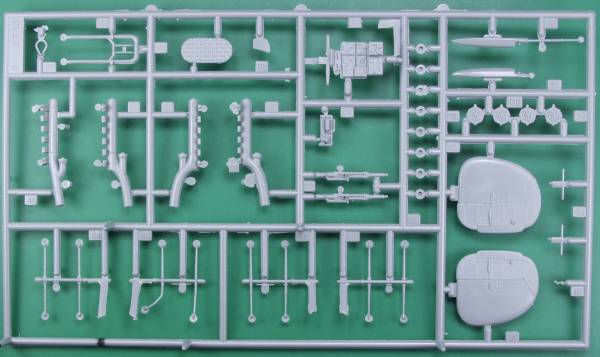
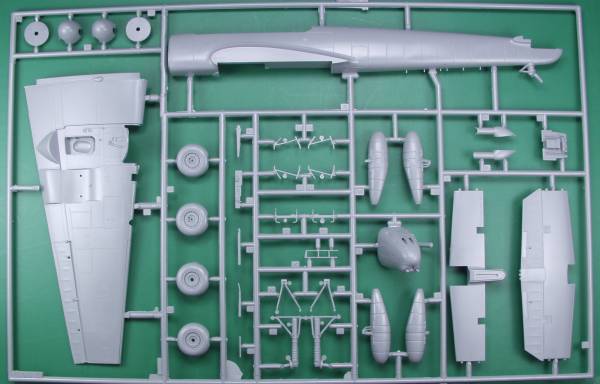
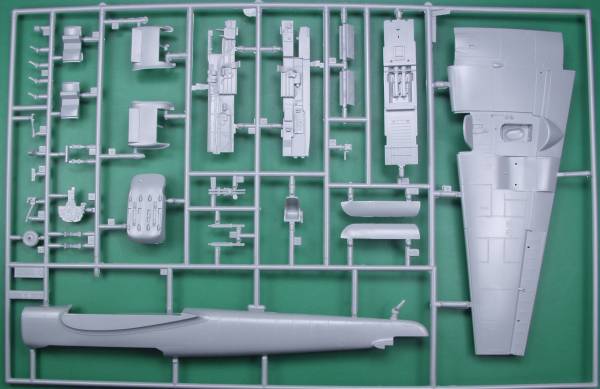
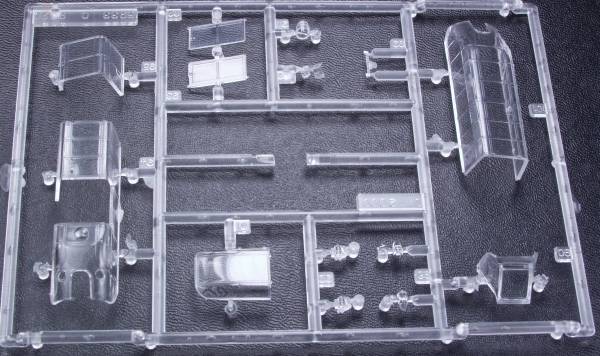
The Promodeler kit comes in a rather large and flimsy two part top open box with nice artwork of the aircraft on the top. Inside the box we find three bags, two of which contain all the parts molded in a medium gray plastic and the third bag containing the clear parts. The parts have a shiny finish with recessed panel lines and fastener detail that is all very nicely done. I did not find any sink holes and only a slight ripple effect on the lower rear portions of the engine cowlings where they form the landing gear bays due to ribs that are molded inside the bays. The parts in my kit were virtually flash free with only some parting lines to be cleaned up on the smaller parts. Ejector pin marks seem limited to places not seen after assembly except for one on each side of the inner fuselage that may show, although even these may be covered by interior detail. The cockpit is actually quite nicely done and a lot of modelers will be happy with it just as it is. All of the control surfaces are fixed and the fabric areas have subtle rib detail but the surface seems a bit to coarse to me, but will probably look OK under a coat of paint. The wheels are weighted and include manufacturer name and tire size molded in. The wheel wells are boxed in and include some detail. The kit includes two crew members with slightly different postures and pose able arms. Drop tanks and a bomb rack are included as are the two 30 mm cannon for the so called "schrage Musik" installation. The radar antenna seem relatively close to scale which means delicate and one of mine was bent when received. The cockpit glazings are clear and reasonably thin and sectioned so that they can be posed open or closed. An optional piece is included for use with the schrage Musik cannon if they are used. The kit contains 120 parts in gray and 15 clear parts for a total of 135 parts. These can be seen in the photos below.
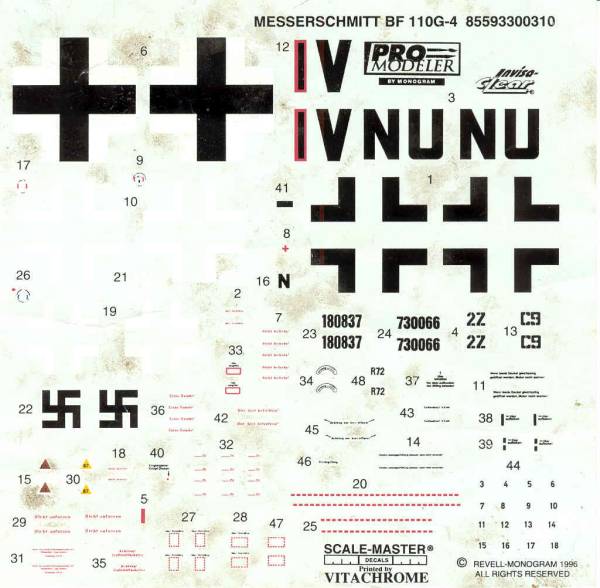
The decals included markings for two aircraft, one each from NJG 5 and NJG 6. They include the work number, lots of stencils and swastikas. Mine were a little out of register but this was only noticeable on the lower wing crosses, the one fuselage call letter that is outlined, the swastikas and the small octane and oil grade stencils. My sheet was exposed to some humidity at some point in its life and has some mold stains on it which is what you see in the photo that looks like dirt so I will most likely not be able to use them on my kit. See below
The instructions are typical for Promodeler, a 24 page booklet 8 1/2" x 11" in size. The first page has history the second a paint chart in several languages, the next twenty cover assembly with twenty detailing photos of the prototype from a museum bird. The last three pages cover painting and markings.
After Market Goodies
There are a number of after market items available for this kit and a couple are reviewed below. One fixed a rather glaring error in the original kit parts and the others provide extra detail and aid in painting.
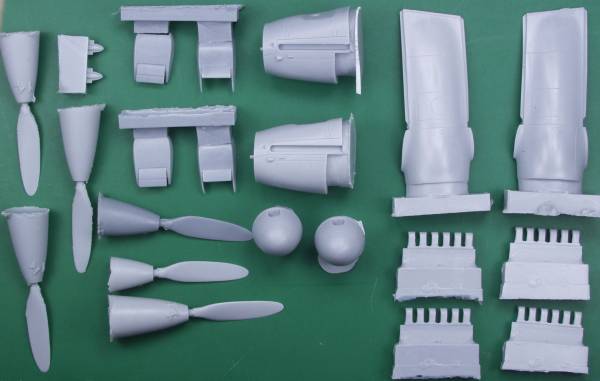
Cutting Edge (CEC48416) Engine correction set.
This set is available as a result of Revell - Monogram getting the shape of the engine nacelles wrong. While they may not be off enough for many modelers, when the set below is used it does make a noticeable difference. One of the links below has comparison photos. The set includes 22 parts in gray resin. Typical of parts from Cutting Edge they are nearly flash free, only the propeller blades had any noticeable flash. I found no pin holes, voids or short shots. The kit comes with both normal and tropical oil coolers and a new set of exhaust stacks. This set was made for several different versions so some of the parts will not be used on this kit. The instructions are on an 8 1/2" x 11' page printed on one side and though brief seem to be adequate. One of the links below takes you to a build including this kit and you can read the author's comments which were favorable. See photo below for the parts included.
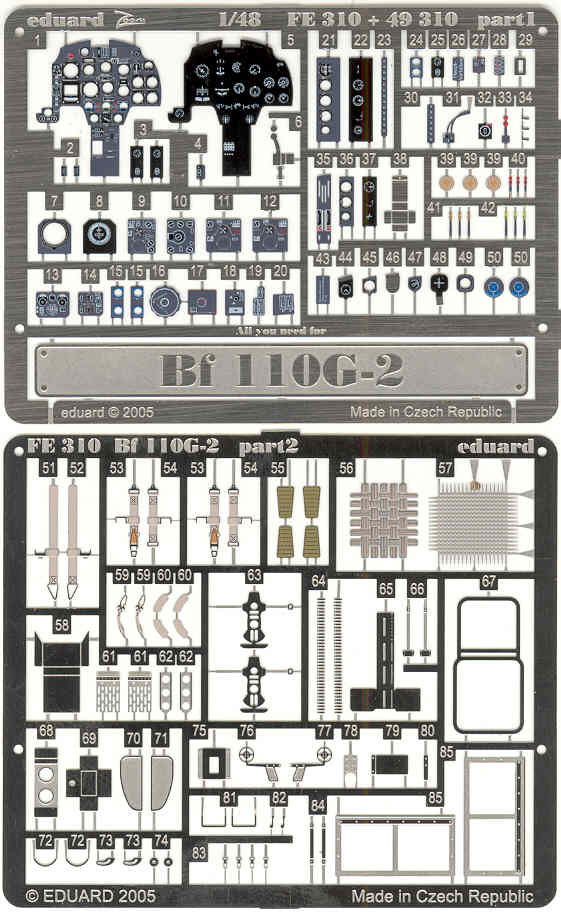
Eduard (FE 310) Photo etch detail set.
As usual Eduard includes all those extra parts detail hounds can't live without. In this case it includes the already colored instrument panel, radios and a few other bits which saves my bacon as I'm terrible with these multicolor German panels as I can't dry brush worth a hoot ! The instructions are typical Eduard with one A4 sheet printed on both sides and all pictorial instructions. See photo below. Note Eduard seems to be changing some of their part numbers so check before buying.
True Details (TD48046) Replacement wheel set.
I'm not going to use these, I know some modelers swear by them but the kit wheels look OK to me and it comes down to dressing the seam on the kit parts or sawing the TD wheels off the casting blocks and cleaning them up, the first choice gets my vote.
Black Magic [CEBM 48035] Canopy and wheel hub masks.
With a green house like this kit has a mask set is a god send even if it may require some tweaking.
A resin and photo etch cockpit set is also available from Verlinden(VE1252)
Conclusions
This kit looks really nice to me and even the correction kit doesn't put me off but I have read review / builds that seem to go both ways and as a result would only recommend the kit to experienced modelers. For more information check out the links below.
Links to kit build or reviews
A review / build using the engine correction set can be found here and here. A couple other builds can be found here and here.
References
"War Planes of the Third Reich" by William Green
Back to the Night Fighter page
Updated 5/11/08