
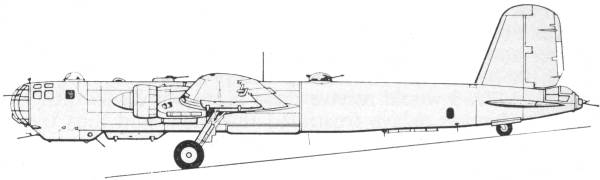
He 177A-5
The He 177 was probably one of the German aircraft industry's biggest failures during World War II and though they are not totally to blame, the failure of Heinkel to quickly solve the most serious problem with the aircraft in a timely fashion certainly is to their discredit. The aircraft's long development time was a result of vacillation on the part of the RLM, conflicting military and political policies and petty jealousies and commercial rivalry within the industry itself.
The He 177 was developed to meet the "Bomber A" requirement which required carrying a 2,000 lb. bomb load over a range of 4,160 miles with a maximum speed of not less than 335 mph and be capable of under taking medium angle dive bombing. The most radical feature of the He 177 and the one that would result in the bomber never being produced in numbers large enough to support a major bombing campaign was its coupled power plants. Two DB 601 engines mounted side by side driving a single propeller through a common gear casing, hence making the 177 a four engine aircraft with only two propellers.
From the very first flight of the prototype on November 19, 1939, the engines overheated. The reasons for the overheating and propensity to catch fire are many and beyond the scope of this brief history. Eight prototypes were built and several were destroyed due to engine fires and structural failures. Thirty A-0 machines were ordered in July of 1939. Most of this group was used for conversion training. In spite of adopting a number of fixes to alleviate the tenancy to catch fire, the aircraft was still considered dangerous. The A-1 version was essentially the same as the A-0 and used a variety of different armament sets. It was also found that the A-1 had structural problems with the wings and that they one third below the strength estimated by Heinkel.
The next variant was the A-3 of which several sub-types were produced. The A-3, which first left the assembly line in Autumn of 1942, differed from the A-1 in having the power plants moved forward and a section inserted in the fuselage to balance the engine change. It also added a second upper turret. In April of 1943 the R2 sub-type of the A-3 was introduced. It featured an improved electrical system, modified nose gun position and a redesigned tail gun position which allowed the gunner to sit rather than lay prone. The R3 sub-type was the first Henschel Hs 293 missile carrier, two which could be mounted beneath the wings and one beneath the fuselage. The R4 sub-type had the ventral gondola lengthened by 3 feet to provide more space for the controls for the Hs 293. The R5 sub-type, of which only 5 were produced, had a 75 mm cannon mounted in the ventral gondola for ground attack. The R7 sub-type, of which only three were built, evolved for the torpedo bombing role.
The final version of the He 177 was the A-5. The A-5 was intended primarily to carry external loads such as the LT 50 torpedo, the Hs 293 radio guided missile and the FX 1400 Fritz X radio guided bomb. It standardized on the DB 610 engines, had a strengthened wing, shortened undercarriage legs and the flaps altered. Several sub types of the A-5 were also produced but in relatively small numbers. During 1944 565 He 177A-5's were completed before all production halted in October in favor of the emergency fighter program. While this number sounds impressive many were just parked for lack of fuel and went to the scrappers after the end of the war without ever having been used.
A sad footnote to all of this is that the Test Section at Rechlin modified an He 177 which corrected all 56 possible sources of fire identified by an investigation team and the engines performed perfectly giving no problems at all over a protracted test period. Unfortunately the order to modify all aircraft on the assembly lines came too late as it would have seriously disrupted production deliveries.
The Kit
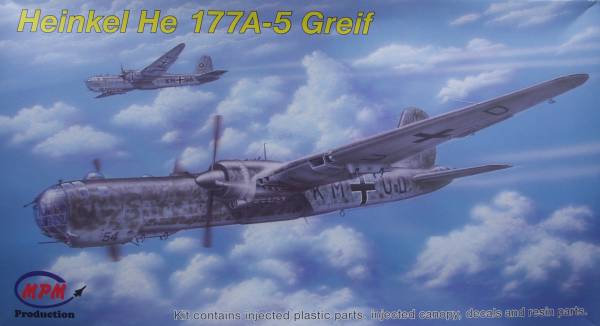
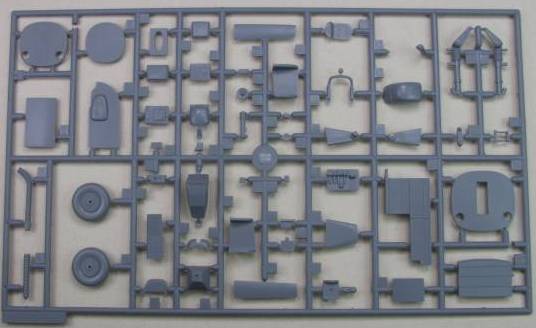
The MPM He 177A-5 appears to do the prototype justice and who would have ever thought we'd see an injection molded kit in this scale. The kit comes in a goodly sized box with nice artwork on the front. Inside the box all the parts except for the fuselage halves are bagged. There are three bags with all the colored parts. The clear parts were included in one of these bags, never a good thing, and two small bags with resin parts. Each of the three bags have several sprues in them, one having five. Altogether there are 10 sprues of parts molded in a dark gray color. The upper and lower wing halves were not on sprues and were bagged together. The surface detail is mostly recessed panel lines and some raised detail that looks like it might have been external stiffeners and a few access panels. The panel lines are uniform and about typical in size as seen on most better kits. The finish is smooth and has a semi gloss finish. Typical of a short run and Czech made kits the parts have no alignment pins.
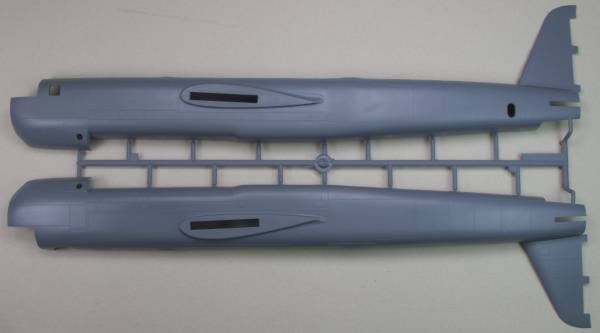
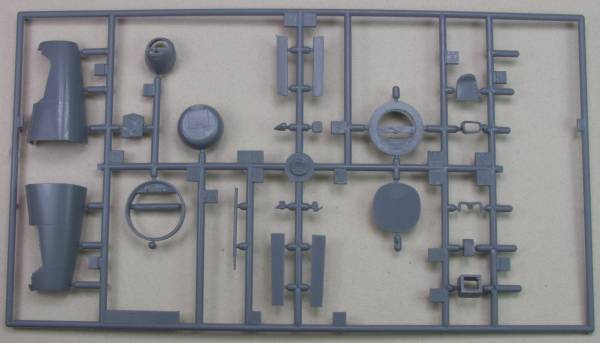
The fuselage halves have internal structure detail where it will be seen such as the upper turret and the rear gunners position. There are a number of raised features along the top upper fuselage, fuel tank filling cover I suspect that will take a beating if any seam work needs to be done. I did not find any sink holes or other defects on the fuselage halves. There was some light flash on the parts. See photo below.
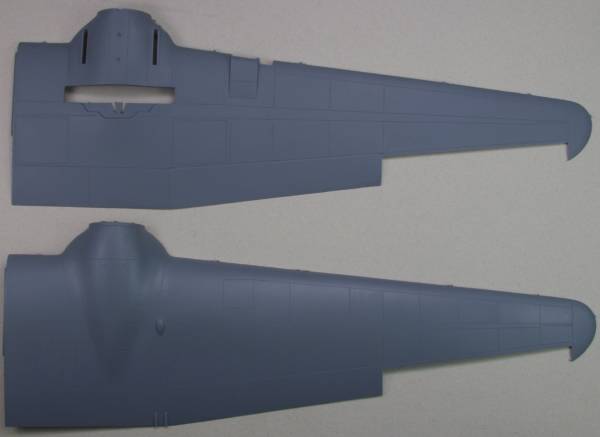
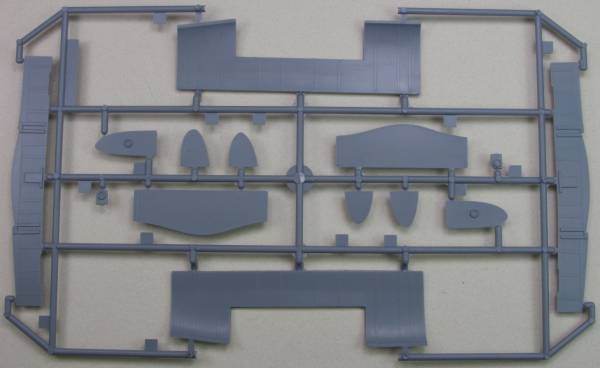
The wings have some raised and recessed fastener detail in addition to the panel lines. These parts have some light flash as well. A test fitting showed the halves should fit together well. The ailerons are separate. No sink marks or other surface defects were found however it is apparent that the parts were cut from a sprue and in at least one spot the cutters let a small divot that will need to be filled. The tabs for mounting the wings seem a little small to me to support such a large wing. See photo below.
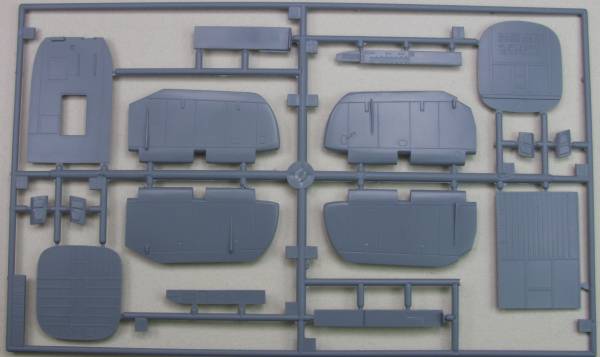
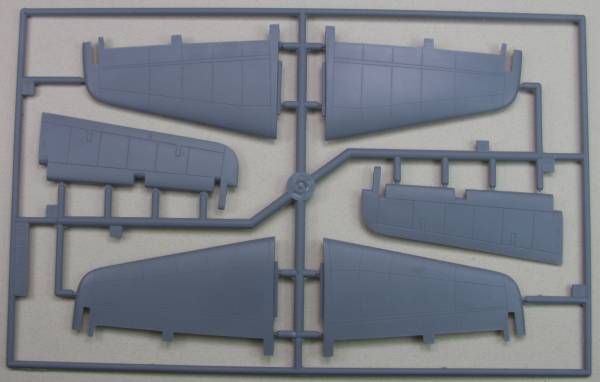
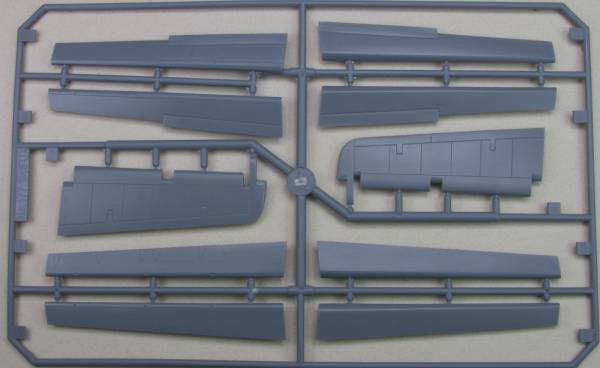
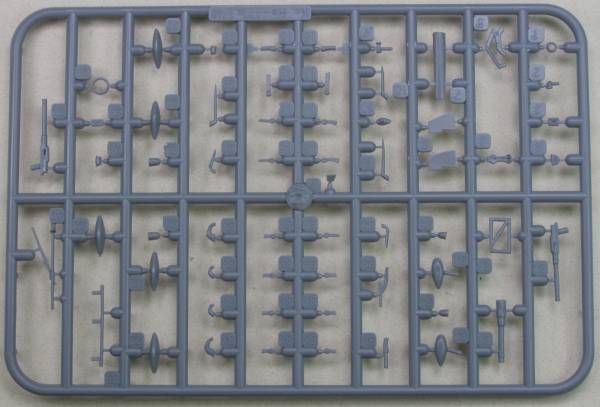
The balance of the gray parts were of good quality with some flash and parting lines on parts that aren't flat. I did find a few sink holes on some of the landing gear parts, on the aileron mass balances and the under sides of the exhaust stacks. The level of cockpit detail should be good enough to satisfy the majority of modelers although I thought some of the raised detail could have had a bit more depth to it and a little more crisp. There were a couple of duplicate sprues and in those cases on one is shown. The gear bays are enclosed and feature a good level of detail and the gear themselves are complex and well rendered. The rear gunners station is a separate assembly that gets attached to the rear of the fuselage. Make no mistake, this is a complex kit with a lot of parts and will require a lot of test fitting as the assembly progresses. By my count there are 327 parts in gray. See photos below.

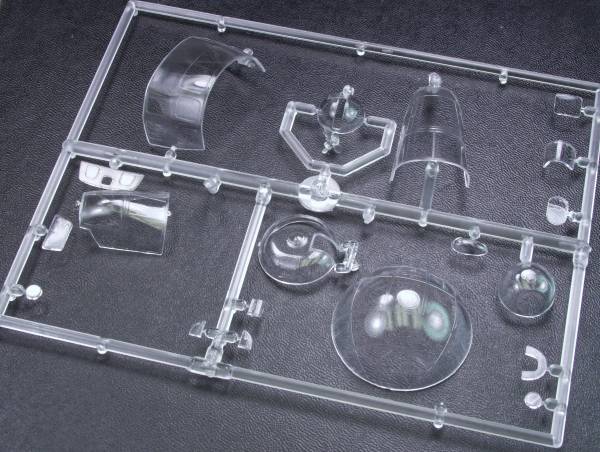
The clear parts are thin and reasonably clear and the frame lines are well defined but not raised. The large front glazing had some light surface scuff marks as it and a couple other clear parts had come off the sprue during shipping. Hopefully a little polish and a coat of Future will take care of it. All together there are 19 clear parts. See photo below.
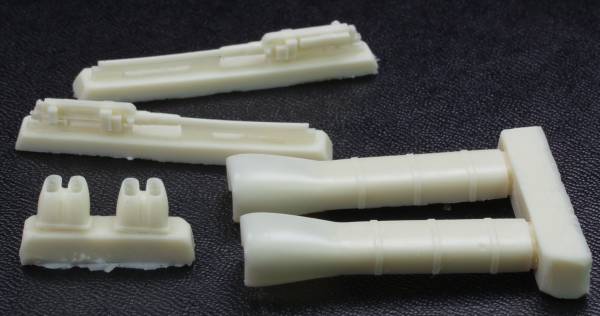
And lastly there are six resin parts, not sure why they did these in resin unless it was an over sight. There are two guns, two sets of intakes and two other parts which aren't shown in the parts map and I could not find them in the instructions either. The parts are crisply molded with no pin holes or short shots. There are a total of six resin parts for a grand total of 352 parts. See photo below. Note: there are a number of parts that are not used, in particular an alternative set of rear gunners fuselage halves, alternative rudder halves, alternative ailerons,alternative glazing for the rear gunners position and the two mystery resin pieces, which probably means additional variants in the future.
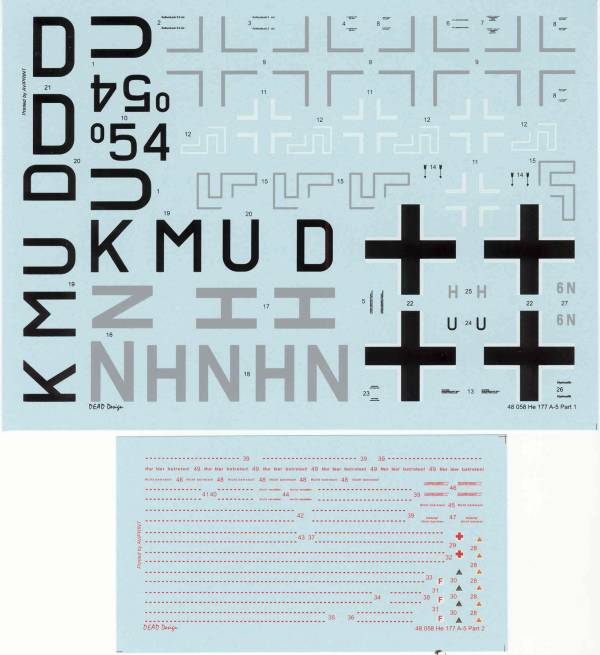
The decals are split into two sheets. The primary sheet has markings for two aircraft. The decals are thin and well registered. the sheet has some stenciling and the swastikas of the two part variety. The secondary sheet is stenciling and wing walk way markings. See photo below.
The instructions consist of a booklet about B5 in size with 18 pages. The first page has history and specifications. The next page and a half is a parts map and assembly icon guide. These are followed by fourteen and a half pages containing 32 assembly steps. The last page has a diagram showing the locations of all the stenciling. In addition to the booklet there is a glossy page printed on both sides in color showing the paint scheme and main markings of the two aircraft covered by the decal sheet.
After Market Goodies
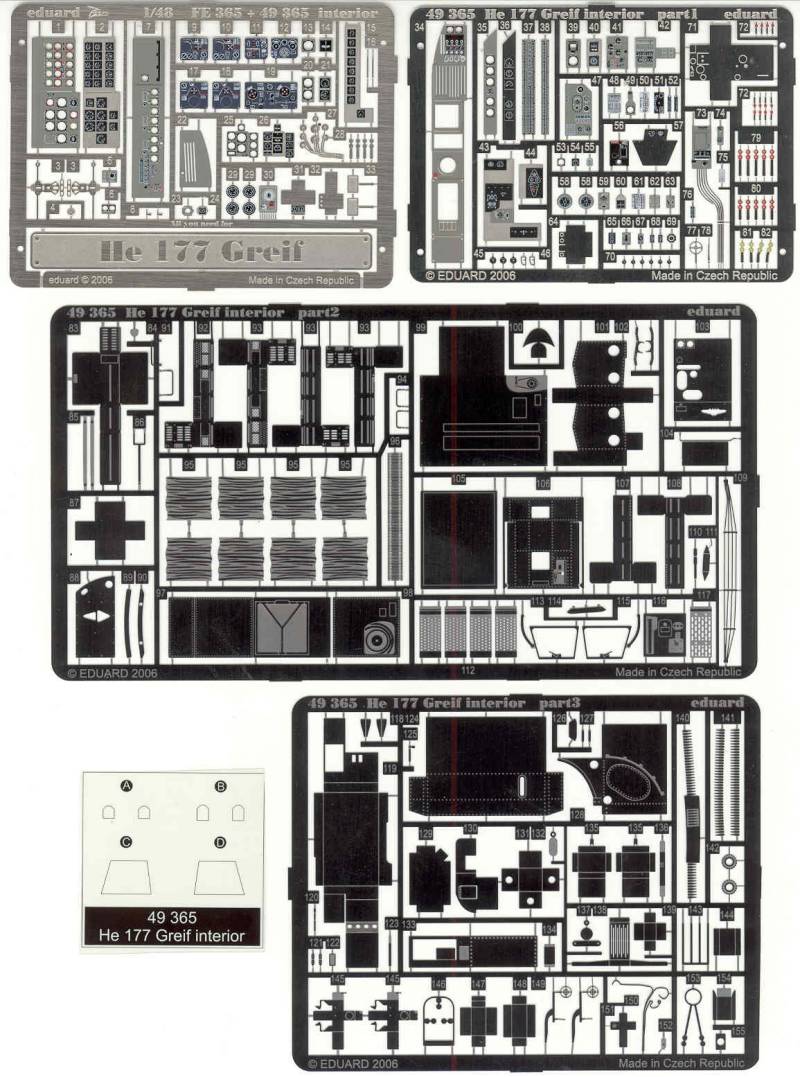
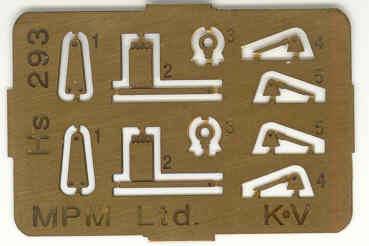
For aftermarket goodies not a lot is needed but I did decide to go for an interior photoetch set from Eduard [49365].
This was the first release of the kit. A later release was a high tech version that included photoetch and other additional details. For those with the first release Eduard produced both interior and exterior detailing sets. I was more interested in the interior set so that was the only one I bought. It consists of just about every imaginable sort of interior detail including some color parts for those of us with less talent at painting up the tiny interior details. See photo below.
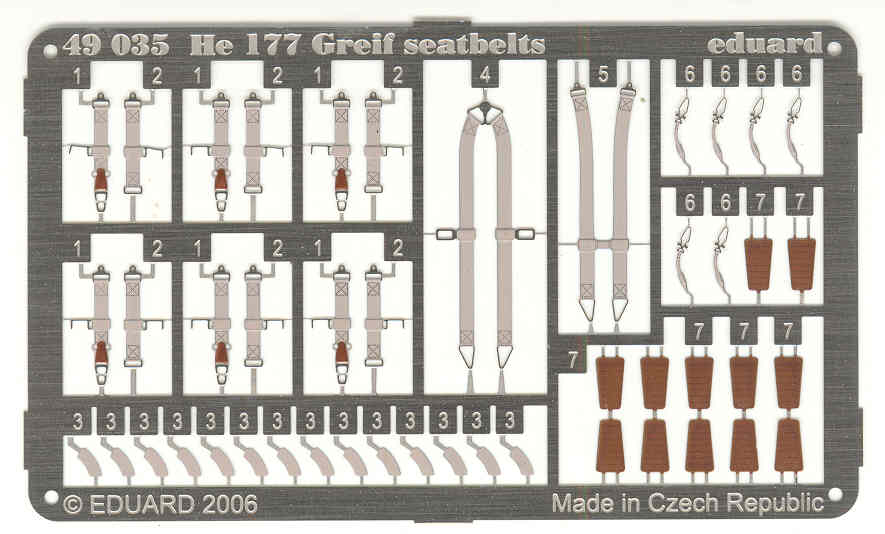
In spite of what it does supply the above set does not include belts and harnesses for the crew, that requires an additional Eduard set [49035]. See photo below.
The kits most glaring omission was not having any external weaponry. To solve this problem I purchased Condor Models [C48003] set of two Hs 293 radio guided missiles with under wing racks.
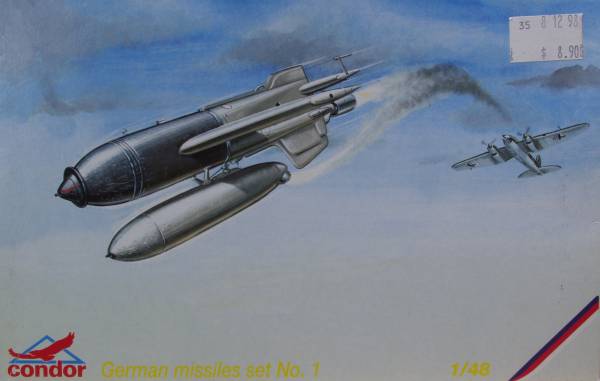
The set comes in a smallish end flap box with artwork of the weapon in action. Inside there is a single bag with a sprue and a small fret of photoetch. The parts are molded in a light gray plastic. They have some flash but most should be easy to remove. The surface detail is recessed and the panel lines are consistent and and a good size for the scale. The surface has a light texture to it but not like the orange peel seen on some limited run kits. Looks like a coat of primer will take care of it. There were no surface defects on the missile parts but the under wing racks had sink marks in a couple of places and a couple of the smaller parts had them as well. Some of the small parts had parting lines to remove. All totaled there are 28 parts in gray. See photo below.
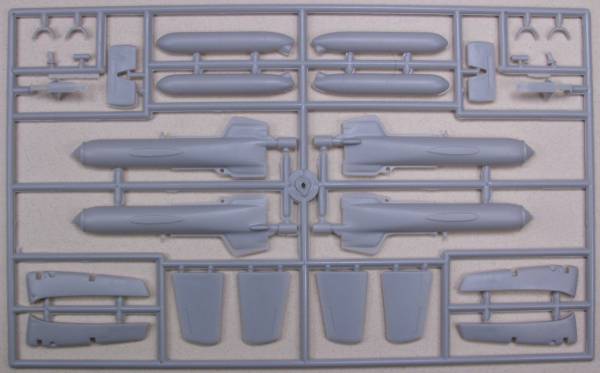
The photoetch fret adds a little more detail to the missiles. See photo below.
There were no decals with the set, the instructions are printed on an A4 sized sheet printed on both sides and folded to make a four page booklet. Page one gives history in four languages, pages two and three have the three assembly steps and painting info and the last page has a parts map, general warnings and paint call outs with RLM number, FS number, Humbrol, Molak and Tamiya numbers. All in all it's a nice little set and could be used on a variety of other aircraft besides the He 177. I suspect the contour of the wing racks will need to be altered some depending on the aircraft there are being used on.
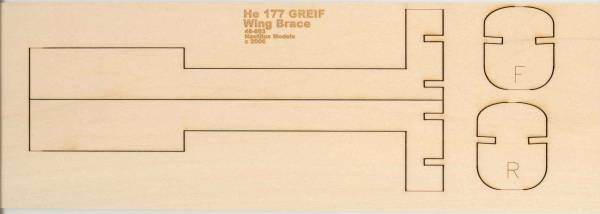
Next, as I mentioned in the review, the wing attachment point is not particularly strong and for that Nautilus Models came to the rescue with a wing brace. Made from aircraft grade 1/8" plywood the parts are laser cut. The bulkheads fit into the fuselage with no modifications required. The wing mounting tabs need to be removed from the wings before assembly. The notch in the spars fits around the landing gear bays.
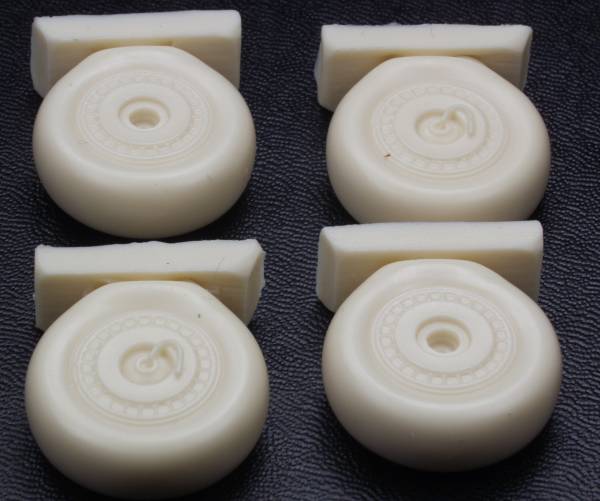
CMK's wheel set for the 177 [48012]. I saw these advertised and hoped that they wouldn't have the flat tire look that the Squadron sets have however, while maybe not quite as bad they still look too flat to me. I have them but am not sure that I will use them when push comes to shove. See below.
And lastly I'm going to use an Eduard mask set [EX186] to save myself some "Greif" from masking all those glazing.
Conclusions
While I have no illusions that this is going to be a shake and bake kit it certainly way better than anything available in the past as well as being much more affordable and available than MPM's all resin release. Those purchasing the newer "Hi Tech" release will get some of these goodies already in the box. It is also assumed that later releases will include other versions and may include weaponry as well. I'd have to say that due to the complexity this kit is not for wimps, however I don't see any problems that couldn't be over come by someone with a modest amount of experience as long as they take their time and do a lot of trial fitting as they go. While there are no alignment pins, more and more I find that to be an advantage during assembly rather then a detriment.
Links to kit build or reviews
References
"Heinkel He 177, 277, 274" by Manfred Griehl and Joachim Dressel