
Fw 190D-9
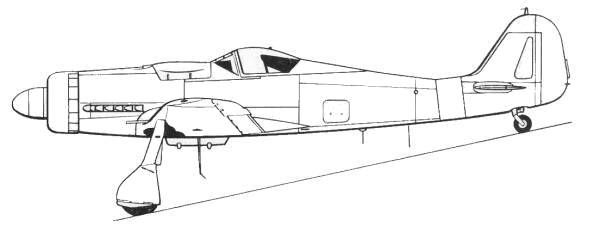
I'm not going to provide an in depth history here as there are plenty of resources available and the Internet is loaded with information on this aircraft. The Fw 190D-9 was developed from the Fw 190V17 and V19 prototypes. Small batches of the 190D-0 and D-1 fighters for service evaluation were delivered and tested during the spring and summer of 1943. These were powered by Junkers Jumo 213A-1 twelve-cylinder inverted -Vee liquid-cooled engines rated at 1,776 h.p. for takeoff. This could be boosted to 2,240 h.p. by water / methanol injection. The engine improved the fighter's performance with the maximum speed being 432 m.p.h. for the D-1 version. To compensate for the lengthened nose, the rear fuselage was also lengthened, the overall length becoming 33 feet 11 inches. The vertical fin was increased in width. The standard Fw 190 wings and tail plane were retained. Armament consisted of two 13-mm. and two 20-mm. guns.
The first service version of the D series, the 190D-9, became operational with Jagdgeschwader Udet stationed at Detmold in the winter of 1943-44. The D-9's were even faster that the D-0 and D-1 series attaining 440 m.p.h. at 37,000 feet.
The Kit

The Hasegawa
Fw 190A-6 comes in a box whose size reflects the scale. The box is the
top open style with Hasegawa's usually lovely artwork on top. The box
is nice and sturdy with the bottom half made from corrugated
cardboard.
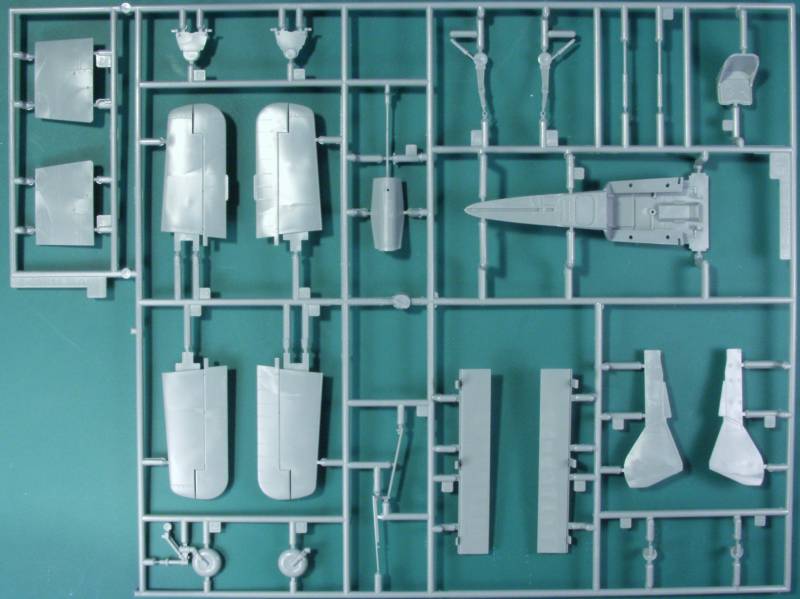
Inside the box we find three bags full of sprues. One large one
with three large sprues in gray, one medium sized one with three
sprues
in gray and one small one with the clear parts. The
surface
finish is smooth and glossy and the detail is mostly recessed,
panel lines and access panels with a few raised fasteners and
other details as applicable. I did not find any surface defects worth
mentioning on any of the air frame parts in my kit.
Except for
the flaps, all of the other control surfaces are
molded in the neutral position. If you plan to leave the flaps down
you
will have six ejector pin marks to clean up. Fabric
control
surfaces
are smooth and provided with rib tapes with stitching detail.
These are probably a little large for the scale but I think will look
OK
under a coat of paint. The piano hinge detail on panels that are
hinged
look nice. There
are
also some ejector pin marks on the inside of the
main gear doors but the will be mostly hidden but the struts and
wheels.
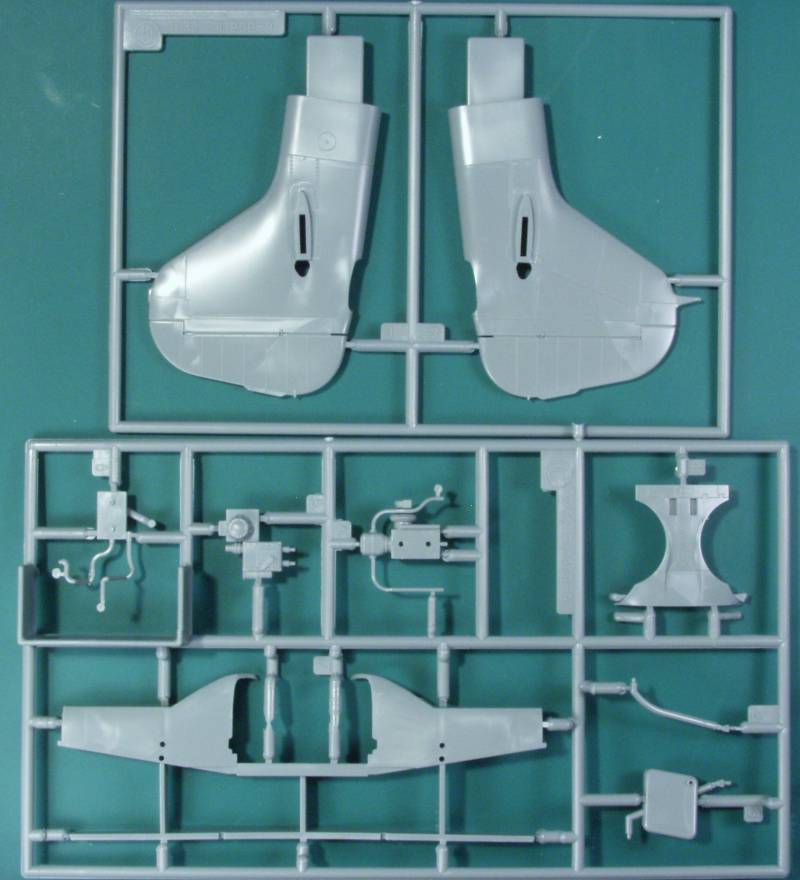
The cockpit
looks a little sparsely populated but the 190 did
have a much less cluttered cockpit than many of its contemporaries. In
this scale one can go nuts adding extra detail if you are so
inclined
and talented. A
pilot figure that is common with most of the 1/32 Hasegawa kits is
included. The
instrument
panel and the side consoles have nice raised
detail and there are decals supplied for them. The main gear struts
are
cleanly molded but do have some small ejector pin marks but again they
are on the side next to the gear doors so they shouldn't be an issue.
The gear struts positively locate in the wheel wells so one does not
need to worry about getting the mounting angles correct.
The tail
wheel and strut
are molded in two halves and are not all that convincing looking, I
would have rather seen a separate wheel in this scale.
The gear
wells
are molded separately with nice internal detail. This was the first
kit
of the D-9 to accurately depict the open wheel wells that allow you to
see the back end of the Jumo engine. This was done to improve engine
cooling while on the ground.
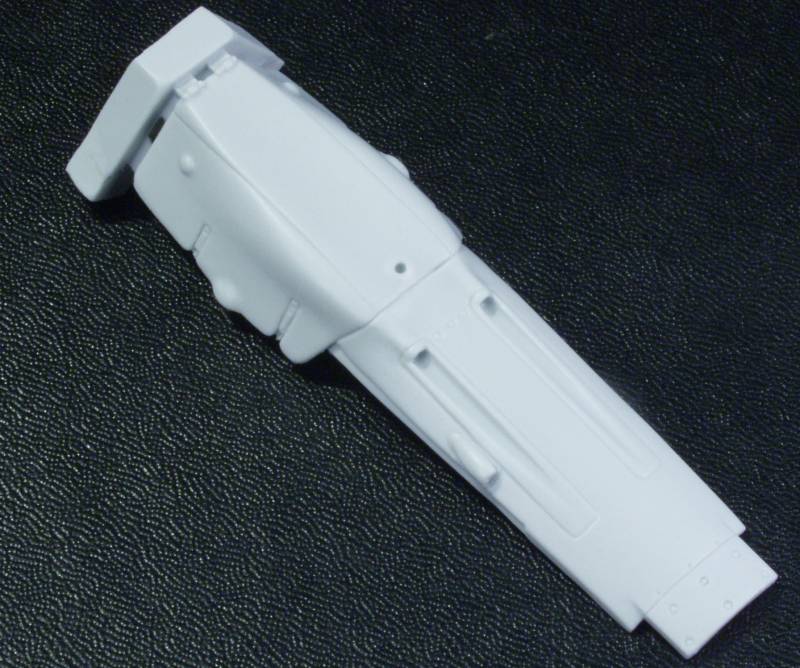
A wing spar is incorporated to keep the dihedral proper and provide a solid mount for the wing. The kit includes a drop tank. There are a number of holes that need to be opened up before the wings and fuselage are glued together so check the instructions to see which ones are needed. In order to accommodate additional variants the fuselage was split at the point where the fuselage extension was added to counter the longer nose required for the liquid cooled engine. Since this occurs at a normal panel line it should reduce the seam work required. The wheels are nicely molded in two halves and are not weighted. It appears for a change that all parts supplied in the kit are used. Sprue photos follow...

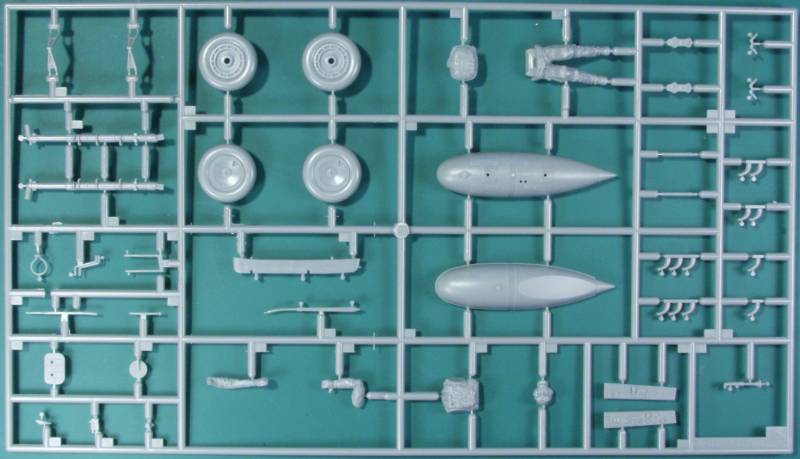
The clear parts are thin and clear. A dip in Future should make them even better. The frame lines are well defined. Glasses for the gun sight are also included. See below.
![]()
The decals have a semi gloss finish and a bit more excess film that I like to see. They seem to be mostly in register, the exceptions being the fuel markings and the first aid cross. Markings are supplied for to aircraft. Markings are supplied for three aircraft, two from JV44 (Waldemar Wubke and Heinz Sachsenberg) and one from JG3 (Oskar Romm). See below.
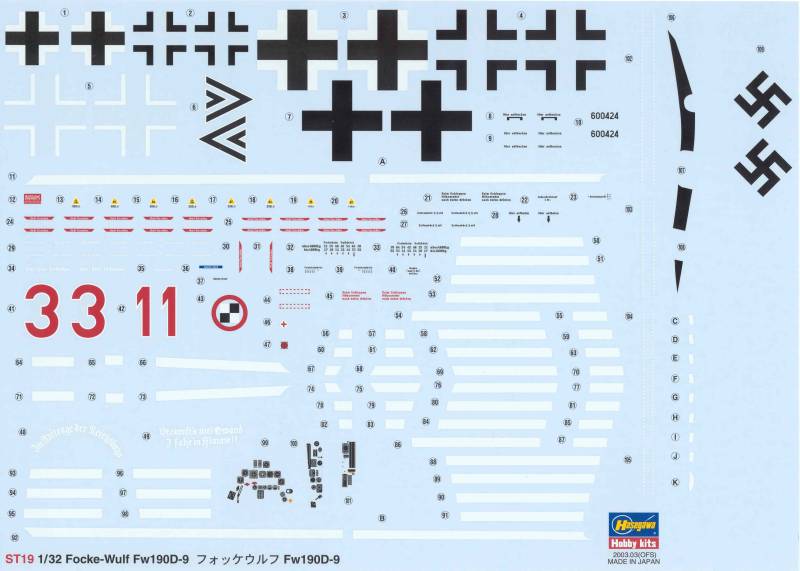
The instructions are printed on a long sheet folded to create panels, in this case 8 of them. The front panel has history and specifications in Japanese and English, the second, third and fourth panels have the assembly steps divided into 16 steps. The fifth panel has a parts map and color chart calling out colors by generic names and some by RLM numbers and Gunze paint numbers. The sixth and seventh panels have the painting and marking diagrams and the eighth panel has basic assembly information, safety warnings and decal application instructions.
After Market Goodies
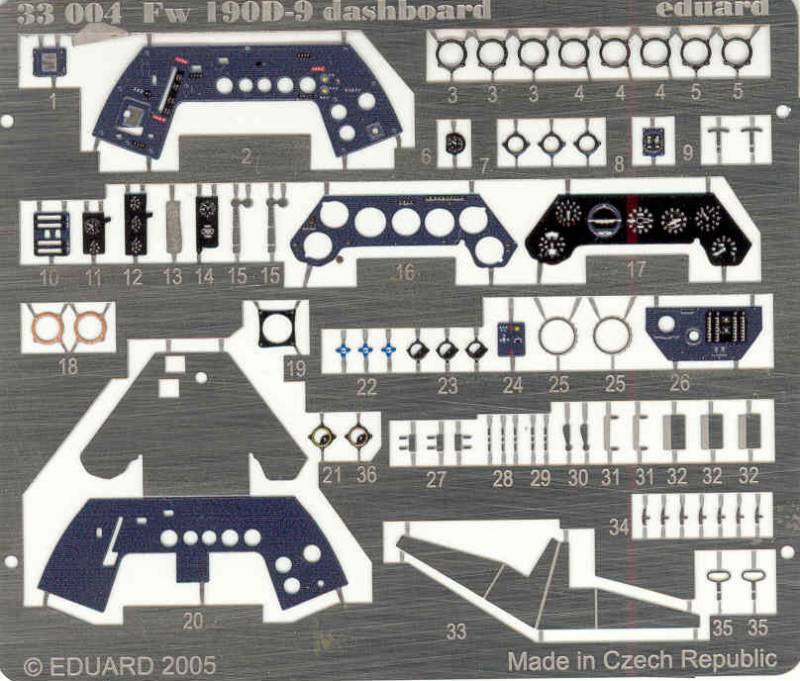
Untalented at hand painting and unsure about decals I opted for the Eduard dashboard, Eduard # 33004. while I tend to find these a little one dimensional for 1/32 scale, the separate bezels should give it more depth but may be a killer to assemble. See below.
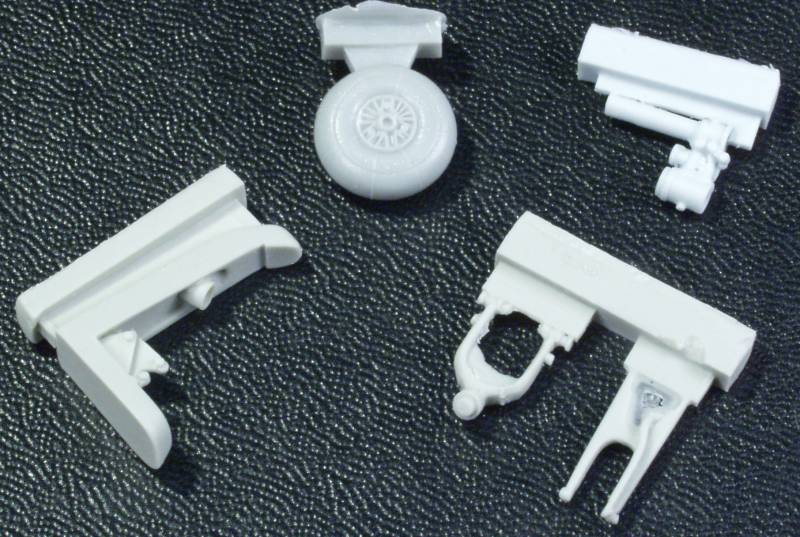
Since I'm not really crazy about the way Hasegawa did the tail wheels on their 109s and 190s I decided on this one to use the Eagle Parts # 44-32 tail wheel assembly which I think will be a great improvement in the looks of this area. A couple of the parts have some light flash that should clean up easily, other than that they are well molded an free of defects. See below.
Conclusions
By all accounts the kit is a fairly easy build with no serious assembly issues and therefore I give it a highly recommended rating for all but the most rank beginners in the hobby.
Links to kit build or reviews
Build/ reviews can be found here, here and here.
References
I have more 190 references than I care to list and the Internet is loaded with information, let Google be your friend.
Back to the 1/32 German
Aircraft Page