
Horten Ho 229
This aircraft, to me anyway, is one of the most
interesting to have reached the flight test stage during WWII. Not only
for the futuristic design but the way in which it was conceived and
built. The fact that Walter and Reimar Horten built the first prototype
right under the noses of the RLM without any official sanction is a
story worthy of the History Channel. There are a number of references
available on this craft but the best one in my opinion is the Monogram
Close-Up series volume 12. The author, David Myhra, interviewed both of
the Horten brothers prior to their deaths and shares the story as it
was told to him.
The Kit
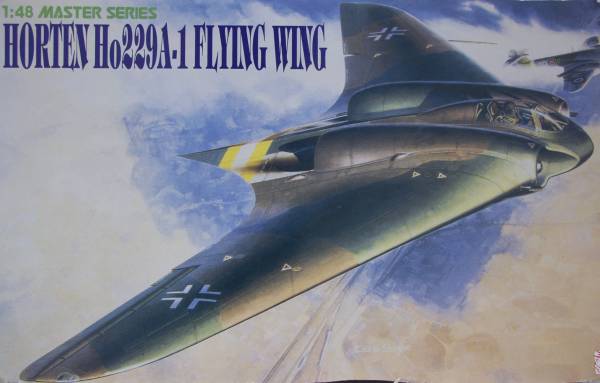
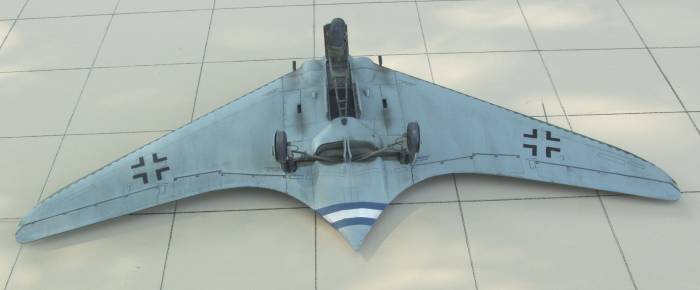
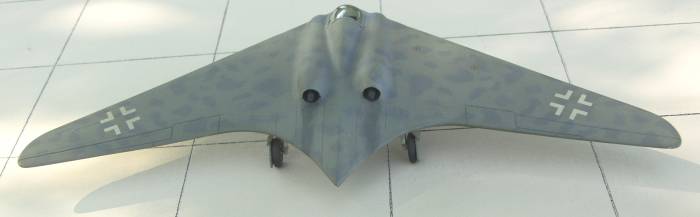
Dragon has, at various times, released two versions
of a kit for the 229, a day fighter and a night fighter. Both of these
are basically "what if" aircraft as the 229 never made it past the
prototype stage and only one of those, the V1, actually flew. So most
of the kit is based on plans or details existing on the surviving
prototype in the Smithsonian Air and Space collection. I started my kit
prior to starting this website so no photos were taken of the sprues.
It has been reviewed favorably several times and two of
these are listed in the links below. The one I chose to build was the
day version.
Links to kit build or reviews
References
"Monogram Close-Up 12 Horten 229" by David Myhra
Back to the Jets page
The Build
This
kit, like many other Dragon kits, has a number of fit issues. I decided
early on, based on another review, that since I wasn't planning to make
the wings removable (one of the available options) that I would
assemble the upper wings to the upper fuselage and lower wings to the
lower fuselage. These two assemblies were then mated. This reduces but
does not totally eliminate all of the alignment issues.
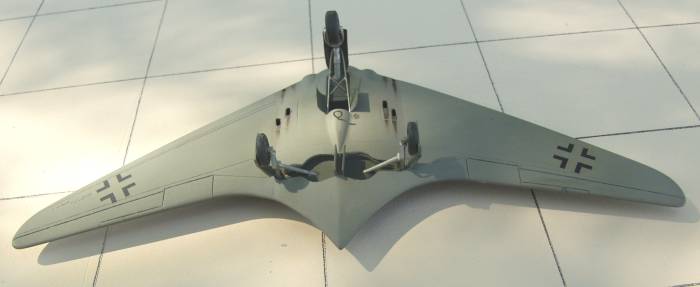
Prior to that the internal parts were painted and assembled. These
included the cockpit, engines and gear bays. Since I was not going to
open the engine covers the only parts of the engines that would be seen
were painted, basically the intakes and exhausts. The cockpit is pretty
spartan but so was the original although it had a bit more than the kit
supplies. Eduard at one time made a PE set for it but I had no luck
tracking one down. I was not happy with the instrument panel as the
detail was very shallow and I'm not good at dry brushing anyway. In the
end I sanded all of the detail off the panel except the bezel for the
artificial horizon and using photos proceeded to redo the panel. I made
bezels by punching holes in .010" thick styrene then cutting out a
square around the hole and then beveling the corners. These were then
glued to the panel. Once this was done the panel was painted RLM 66 and
the bezels flat black. Once dry instrument decals were punched and
inserted in the various dials and glued in place with Future. A drop of
Future was placed over the decals to act as lenses. The final product
is shown below.
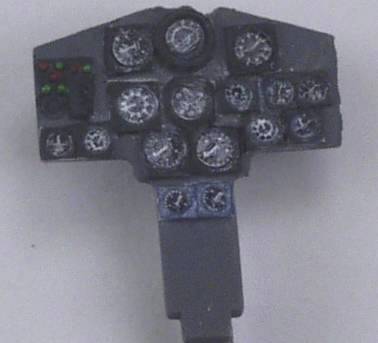
While not perfect it
looked a whole lot better than kit supplied panel.
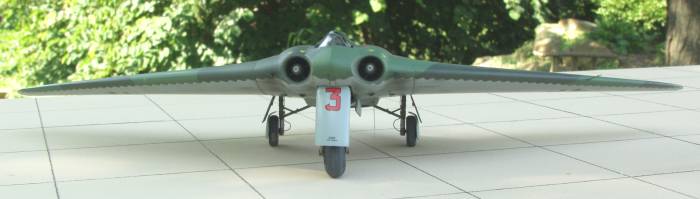
Once the upper and lower halves were joined, I test fitted the engine
bay doors. These too have fit issues and once installed the fill sand
repeat drill began. This tends to delay my projects big time as I get
tired of this real quick. In fact the kit sat on the shelf in a box for
close to year before I finally decided to get back into it. I finished
one more round and decided to give it a coat of primer to see what I
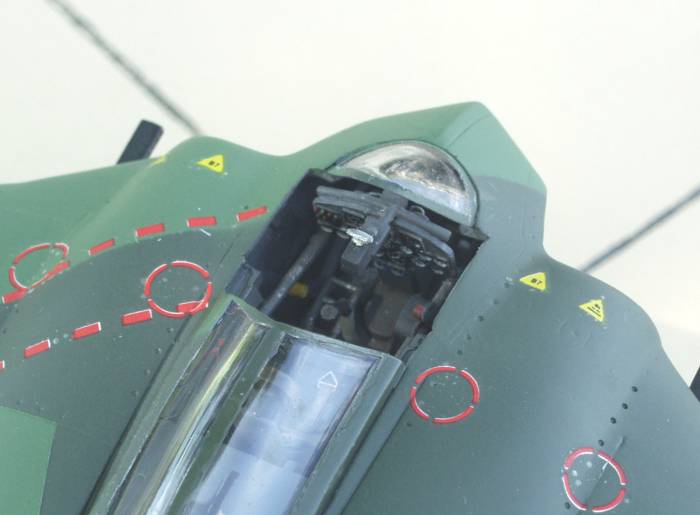
might have missed. Prior to this I masked the canopy and spent another
hour getting it to fit. It looks like it will be displayed in the open
position when complete as the fit in the closed position is nothing to
write home about. The canopy was tacked with clear parts cement to hold
it during painting and the canopy was given a coat of RLM 66 prior to
priming to provide the correct inside color to the canopy frame. Once
this was dry the gear bays and engine openings were filled with damp
tissue and the entire airframe given a good heavy coat of Mr. Surfacer
1200 thinned 50/50 with Lacquer thinner. Naturally it showed that I
still had some filling and sanding to do. Eventually I got a finish put
on and the decals which also gave me fits. Due to the necessity of
sanding due to the rough surface finish and all the fill required
around the engine covers and all the other parts that didn't fit well
by the time it got a couple coats of primer and finish coats the
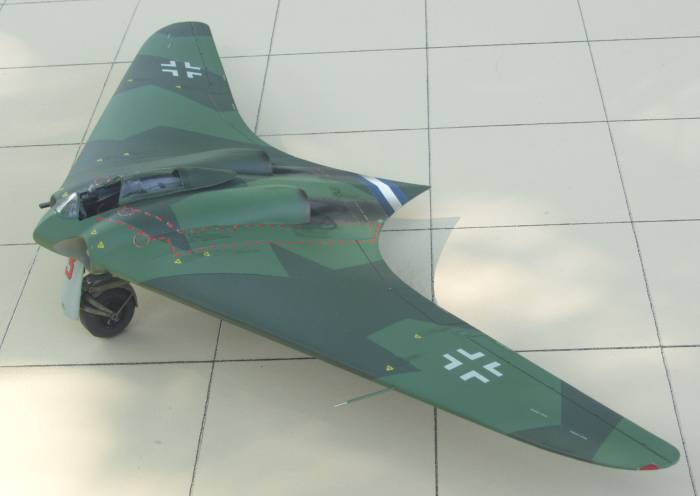
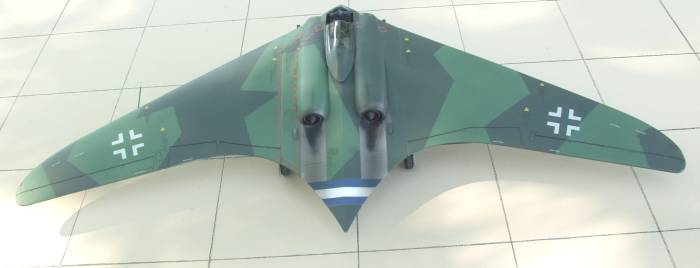
surface detail was too shallow to take a good wash so the upper
surfaces ended up looking clean. The bottom was not as bad so it has a
bit more weathering on it. The kit bedeviled me to the very end as one
of the wing seams popped and required filling and sanding. Finally all
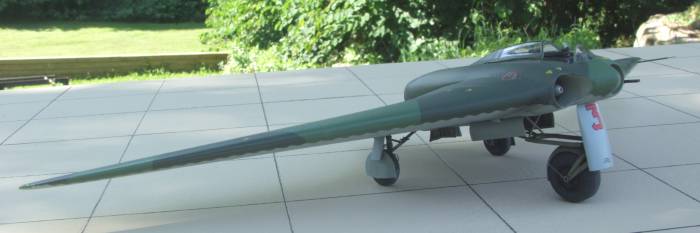
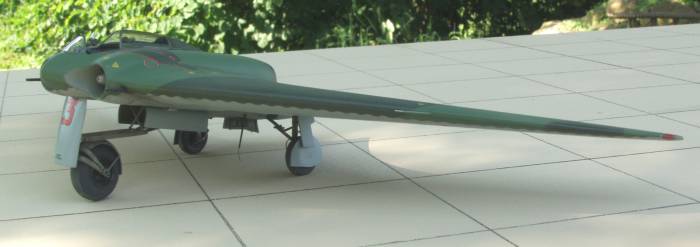
the fiddly bits were on and it was ready for display. Below is the end
result.
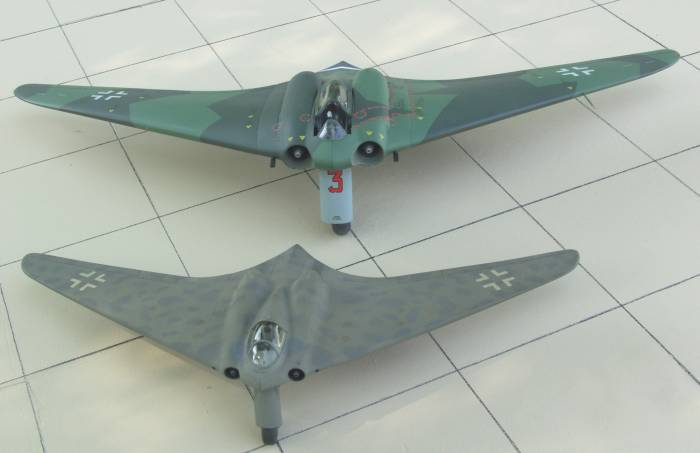
I had intended for this build to be my first after getting back into
the hobby but it was not to be. My reason for that was that the last
kit I finished before leaving the hobby behind was a 1/72 scale Ho 229.
It was a vacuform kit by Rare Planes if my memory serves me correctly.
It has survived the years and I have included a few photos of it below.

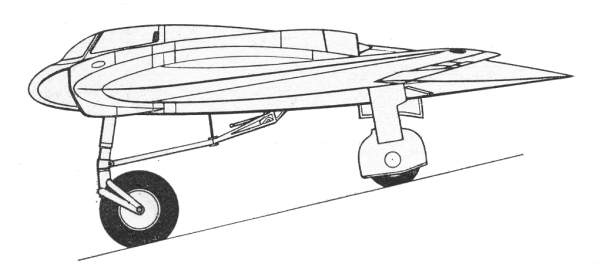
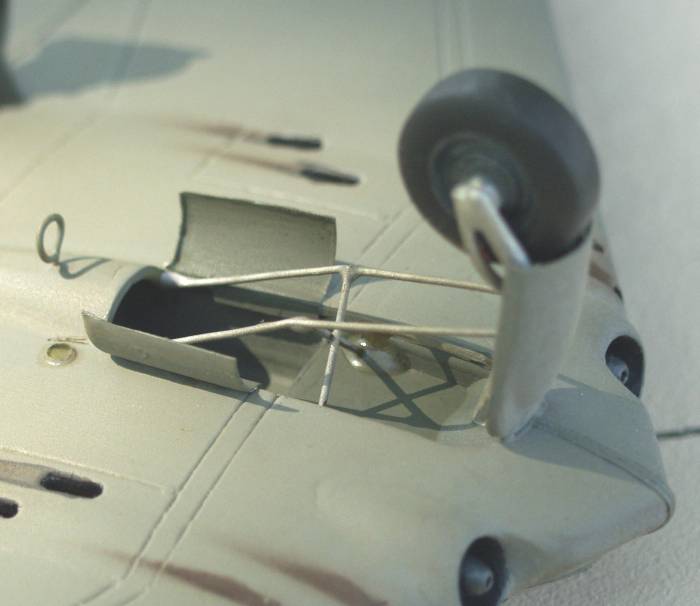
The nose gear was rather simplified in the kit so I fabricated some
additional struts from thin copper wire and solder them together as
shown below.
Other than some slight yellowing of the surfaces and decals from the Dullcoat used as a flat finish it has held up well.
Conclusions
While it didn't turn
out that bad the kit was a real pip to build. The complexity of the
removable wings and the poor fit of such things as the engine bays and
gun bays made what should have been an enjoyable build into a nightmare
of fill, sand and repeat. I would recommend the kit only to experienced
modelers with a lot of patience.
Back to the Jets page
Updated 8/5/08