
Do 317 V1
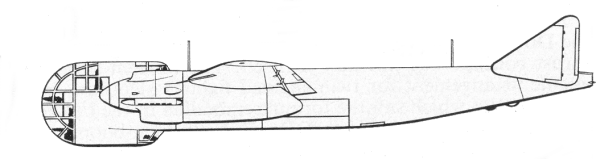
The Do 317 was Dornier's entry in the "Bomber B"
program. Dornier's proposal was based broadly on the Do 217 which was at
the time undergoing prototype trials. It consisted of a pressurized
cabin for four crew members located in a detachable compartment ahead
of the wing and the most noticeable departure for Dornier was the
triangular shaped tail fins. The more technically advanced projects
that Junkers and Focke-Wulf tendered were found to be more promising by
the RLM and Dornier was instructed to embody some of the features
proposed for the 317 in its new high altitude version of the Do 217P.
Some development work continued on the 317 without priority as a
possible backup for the Ju 288 and the Fw 191 but after reaching the
mock-up stage in 1940, work was stopped to permit concentration on the
217P high altitude reconnaissance bomber. In 1941 the 317 was
resurrected and offered to the RLM as a successor to the Do 217. Six
prototypes were ordered. The first, the 317 V1, commenced its flight
testing in
1943. The V1 was the only one completed with cabin pressurization but
without armament. Trials with the 317 V1 revealed no real performance
advance over the 217P and the decision was made to complete the
remaining prototypes without cabin pressurization and employ them as Hs
293A missile carriers. In this form they were re designated Do 217R and
subsequently saw service with IIIKG 100 at Orleans/Bricy.
The Kit
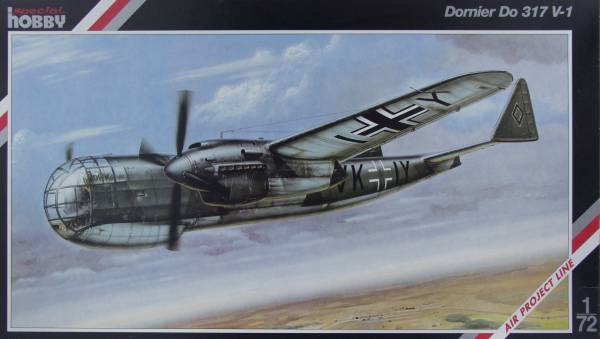
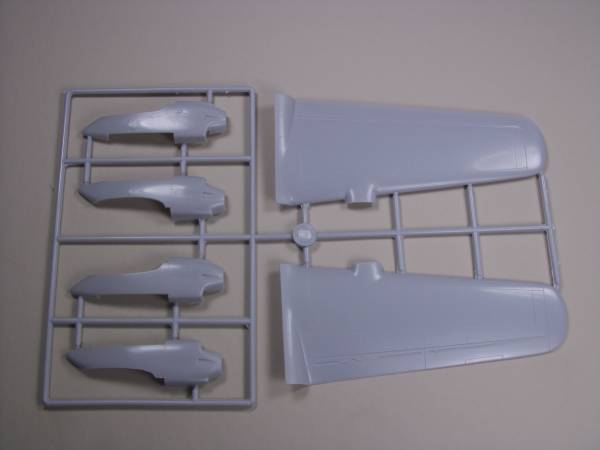
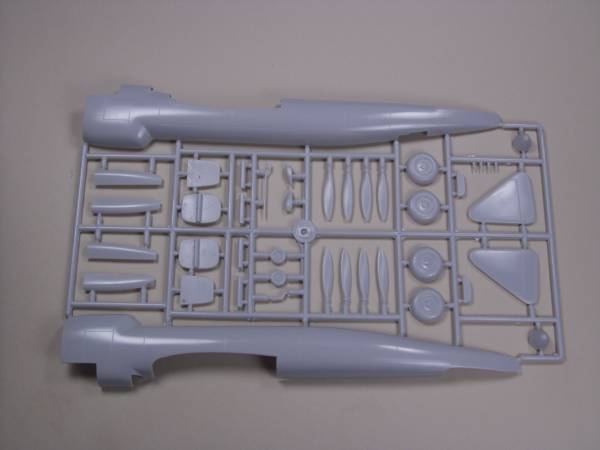
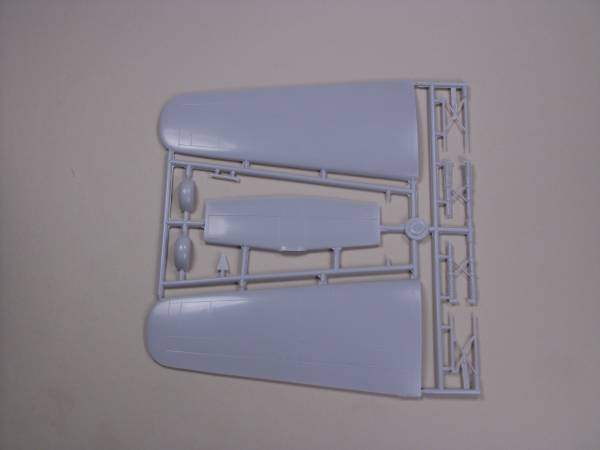
The Special Hobby kit comes in one of the dreaded end flap opening boxes with attractive artwork of the 317V1 in flight. Inside the box are 3 sprues of light gray plastic with nice recessed panel lines and only a few of the smaller parts showing any flash. Most of the ejector pin marks were located where they won't be seen with the exception of a couple on the main gear struts. A couple of the ejector pins on the inside of the wings will need to be removed for proper fit of the wings. Like most limited run kits there are no alignment pins so one must be careful when gluing and dry fit all parts in advance. While most of the parts exhibit a shiny and smooth surface, the upper and lower wing halves and one side of the tail plane are covered with a rough texture almost as if some kind of fine grit was impressed into the surface. This is very fine and should come off with a light sanding. Both wing halves have globs of plastic filling the forward slot of the ailerons, which will need to be carved, chiseled or scribed to remove.
The landing gear struts are more heavily flashed than most of the rest of the pieces and will require some extra time to clean up. The main wheels have no indexing mechanism to locate them in the struts, adding an axle might be handy here. There is no detail in the wheel wells and the method provided for mounting the main gear is not all that positive so some care will be needed in that area. The prop spinners have only small dimples to locate the blades and these will need to be drilled out. The props themselves have only a small mounting nub which may make them difficult to align and certainly weak regardless of choice of glue. The tail fins have only a faint line on them to use to align them with the stabilizer, which is only a butt joint anyway. Looks like a good place for some pins.
Trial fitting indicates that the wing to fuselage joint will be problematic and will most likely require a lot of both fitting and filling. The sprues were all bagged together but didn't show signs of scuffing during shipment. The gates were larger than I would like to see and will require some care when removing parts. Altogether there are 61 parts molded in light gray plastic. See below...
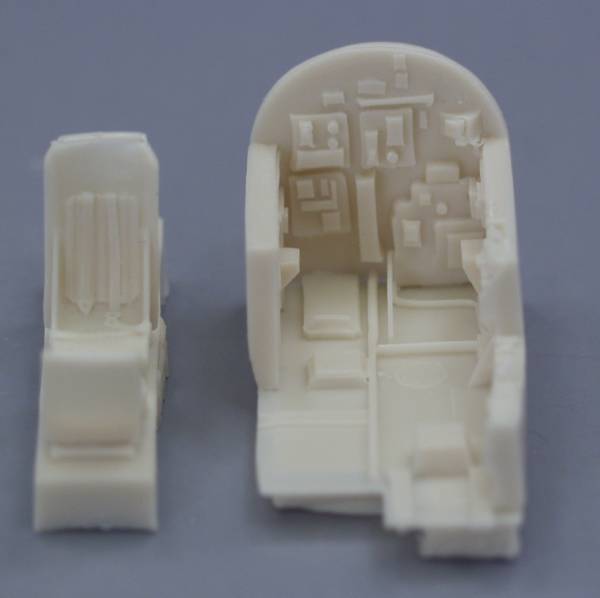
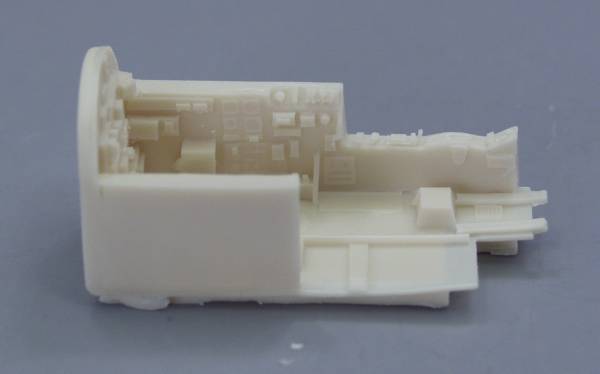
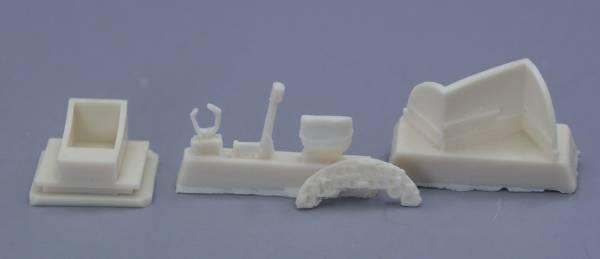
In addition to the plastic parts there was a separate bag of resin parts molded in tan for the cockpit. These include side walls, a seat with belts and harness molded in for the pilot and three seats with belts for the other crew members, control column and yoke, a partition to blank off the area below the cockpit floor that would otherwise be open to the fuselage as seen through the front glazing, instrument panel and a well for the tail wheel. These parts were all nicely molded particularly the cockpit tub itself with nice sharp detail for 1/72. The instrument panel had detail molded on both sides which is nice since the back will be visible through the large nose transparency. Pour stubs range from small to fairly substantial. All tolled there are 10 resin pieces. One glitch is the seat for what would have been the gunner's station had weapons been installed. The instructions show the seat molded to a mount which fits across the rear portion of the cockpit behind the pilot. The resin part supplied is just the seat so it appears that the cross member support will need to be fabricated from a piece of styrene. See Photos below...
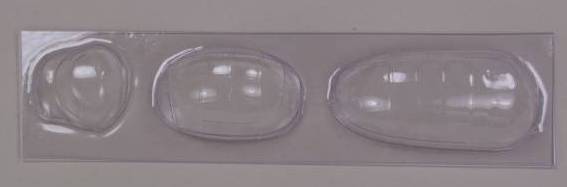
And lastly we have the glassed areas, which are vacuformed. These are reasonably clear. The frame work was distinct but a little light, no room for mistakes though as only one set is supplied. See below...
The three clear parts bring the total to 74 parts all together.
The decals, also bagged separately, cover only one aircraft, the V1 variant and appear to be thin and well registered and with the assemble them yourself swastikas. I have no experience with Special Hobby decals so I can't comment on what to expect from them.

The instructions are two A4 size pages each folded in half and put together to form an eight page booklet. Page one has a brief history in four languages, page two has a parts diagram, pages three through six cover the assembly, page seven paint and markings and page eight shows some other Special Hobby Kits. Primary colors are called out as RLM numbers and names as well as "H" numbers and secondary colors by name and H number.
Conclusions
Links to kit build or reviews
References
Updated 5/10/08