
Beaufighter Mk VI
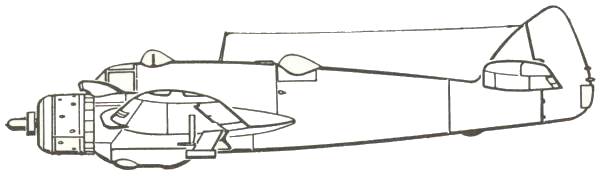
The Bristol Beaufighter was born of a need for a heavily armed fighter in a short period of time and Bristol Aircraft's proposal to create one using many common parts from their Beaufort medium bomber. It proved to be a successful conversion although there were a number of initial teething problems. The Mk VI introduced the dihedral and increased span of the tailplane which improved instability problems with the earlier marks. Although intended as a heavy fighter the Beaufighter proved to be the ideal platform to mount the airborne radar needed for night fighting. The AI Mk IV radar being the first airborne intercept radar to become reliable enough for volume usage. Combining the two lead to success in the night sky's over Britain. Until replaced by the Mosquito the Beaufighter was Britain's premiere night fighter.
When I decided to build a night fighter version of the Beau I wanted to paint and mark it for one of the US night fighter groups that used the aircraft. Over the years I had heard that the US used them but never found much information on the subject until I started doing research for this kit. The book listed in the reference section "Queen of the Midnight Skies" gives a great many details on the US Night Fighter Squadrons which were assigned Beaufighters. After four and a half months of training with the P-70 they were sent to England to transition to the Beaufighter. Although it wasn't totally unanimous, most of the experienced aviators, veterans of the Battle of Britain, who were doing the transition training admitted that the Beaufighter was the most difficult of all British aircraft to fly. So not only did they need to unlearn all the habits they learned flying the docile P-70 but needed to learn new engine control systems, thumb controlled brakes, and handling characteristics of a large conventionally geared aircraft. After conversion training they were sent to the Mediterranean theater, North Africa to be specific. They were given war weary Battle of Britain Beaufighters and ended up losing as many crews to mechanical failures and the fussy handling characteristics of the Beaufighter than to the enemy. They operated under harsh conditions with little in the way of spares and spent most of the war waiting for the P-61. Of four groups only one was re-equipped with P-61's just in time for VE day and their mounts were promptly sent to the Pacific. There are relatively few published photo's of these planes and the ones that have been show very weathered aircraft. Between the sand blasting the finish and the sun these were some sorry looking aircraft. I decided that I would do one as a tribute to those who served in these squadrons.
The Kit
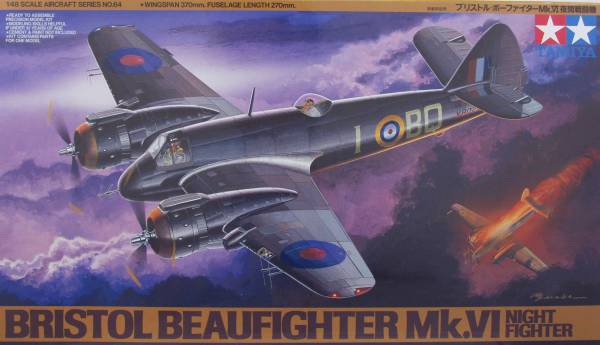
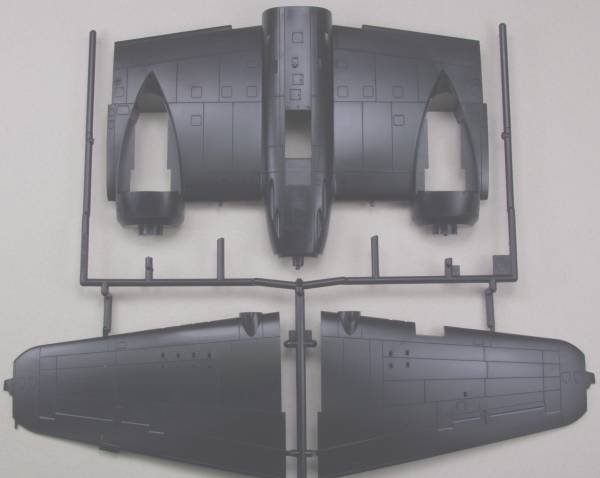
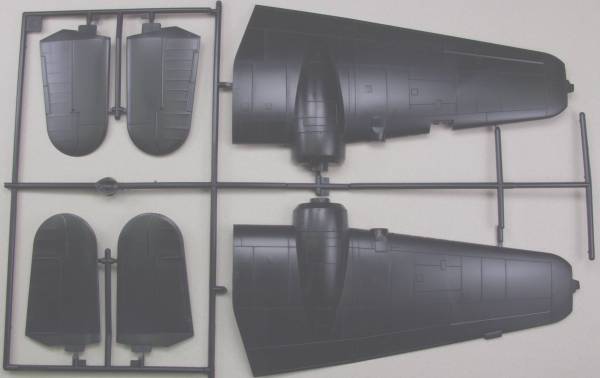
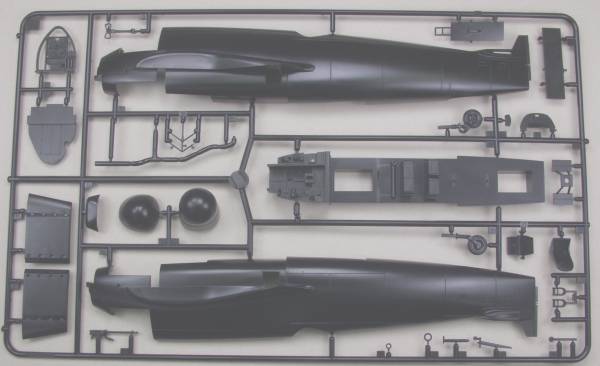
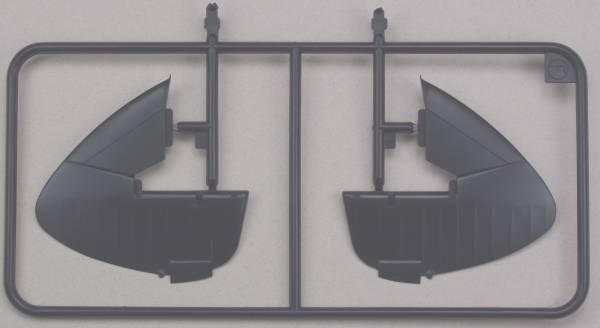
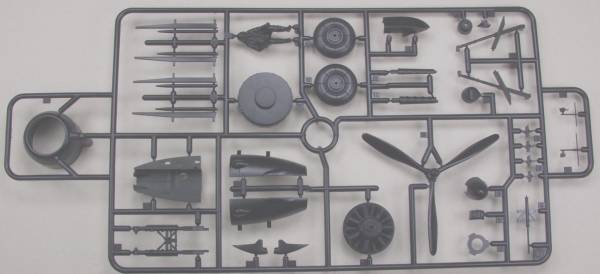
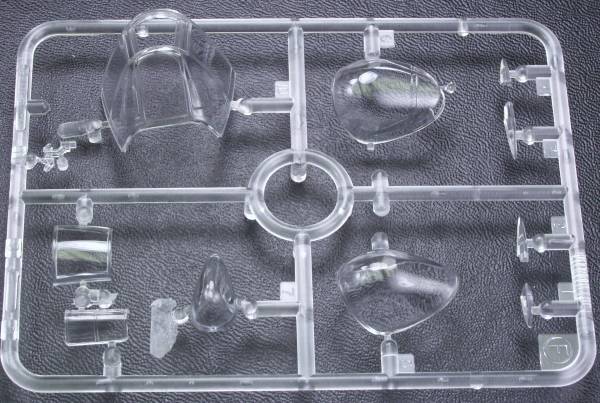
The Tamiya kit comes in at two part top open box with nice artwork of a Beaufighter putting to an end a German night fighter. Inside the box are four bags, three with parts molded in black plastic and one with clear parts. The plastic has a smooth shiny surface and I could find no sink marks or other defects in the major parts which were virtually flash free. The smaller parts exhibit a small parting line that should be easy to clean up. The panel lines and surface detail is recessed and pretty typical for Tamiya kits. Most of the ejector pin marks are where they won't be seen after assembly but there are some on the inside of the gear doors and a few on the undercarriage parts as well. There is a fair amount of interior detail which covers the area from the cockpit back to the radar operators position and interior structure is molded on the inside of the fuselage along with some ejector pin marks. The kit comes with two fair crew members but they are both identical. The wheels are not weighted and the engines are only two dimensional. The wings are a five piece affair but there is no wing spar utilized. All of the control surfaces are molded in position. There are a number of parts included from other Beaufighter versions including rocket rails with rockets, and two different noses. Altogether there are 118 black parts. The clear parts are thin and clear and include two different dorsal glazings, landing light lens, gun sight and wing tip light lenses. Total for clear parts is 11 for a grand total of 129 parts. Note; two of the sprues are identical and only one is shown. See below.
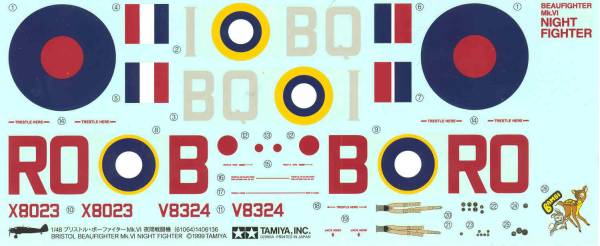
The decals include markings for two aircraft, both in an all black scheme. The decals appear a bit on the thick side and are in register. They includes some stenciling, harnesses for both positions and instruments for the control panel. See below.
The instructions follow the typical Tamiya format. One page 10 1/4" x 27" folded to form 8 pages. Page one has history in several languages, half of page two lists tools, safety warnings and paint colors by name and Tamiya numbers, the second half starts the assembly section which continues for the next four pages and the last two contain painting and decal diagrams.
While for the most part the detail level internally isn't bad it could be better and with that in mind I opted for some after market items.
After Market Goodies
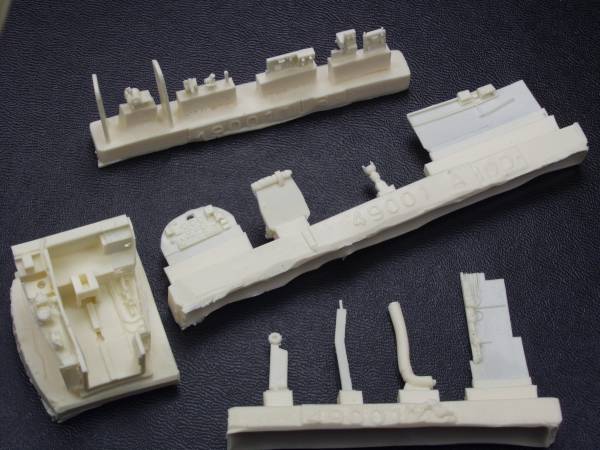
True Details resin cockpit set (TD49001)
This set includes a new pilots section, a seat with molded in harness, side wall detail, instrument panel with better detail,throttle quadrant, gun sight and lots of other goodies to enhance the cockpit. The parts are molded in a tan resin. All were cleanly molded with little flash and I found no surface defects or pin holes. None of the parts were broken when received. With the exception of the main pit casting all parts should be easily removed from their pour blocks. The pit itself will be a challenge requiring some care. The instructions are printed on a 5 1/2" x 8 1/2" sheet printed on one side and should be adequate for the job. See below.
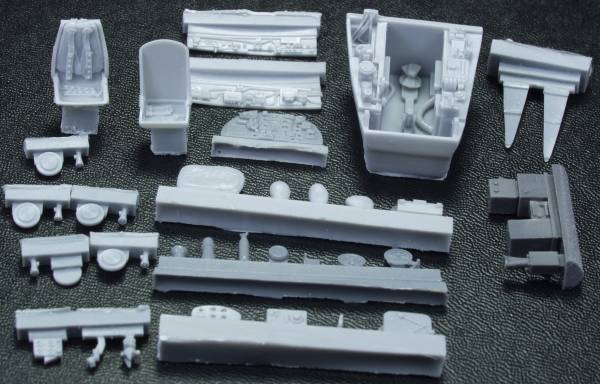
I recently acquired the Cutting Edge Beaufighter cockpit set [CEC 48096] which will now become an option in place of the true details set. I will decide when it comes time which set I'll use or perhaps use parts from both sets. The Cutting Edge set has more parts for the radar operator's area. The parts are cleanly molded in two different shades of gray resin with no short shots or pin holes. The instructions include some small photo's of the prototypes interior but a better reference is the Modelers Datafile listed in the references at the bottom of the page. The instrument panel supplied has raised detail in the instruments but no film or decal supplied for it. See photo below.
Cutting Edge replacement engine set (CEC48416)
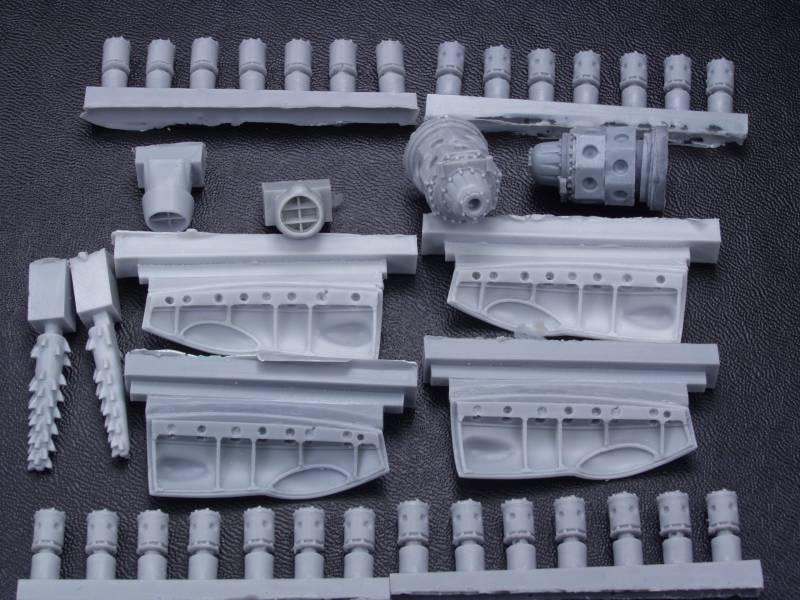
OK you say, AMS time, well yes, I couldn't help myself but this is a really nice set. It consists of two engines with a crankcase and 14 cylinders each, two replacement hedgehog exhausts, four replacement landing gear doors and two replacement oil cooler intakes. The engine, unlike some of the made to scale engines is actually made to fit without major modifications to the cowlings or engines. The Bristol Hercules engines were sleeve valve engines and lacked the push rods normally seen on radial engines. The instructions also include details on how to simulate the exhaust manifold connections to the front cowl collector ring. The hedgehog exhausts are far superior to the halfhearted attempts provided in the kit. The replacement oil cooler intakes include the operating rod for the cooler shutters and better captures the look of the honeycomb radiator which is quite amazing considering how deep into the casting it is. The replacement gear doors have a better depth of detail plus some detail not included in the kit parts plus have the bonus of no ejector pin marks. The parts are molded in a gray resin and are superb. Little to no flash, no pinholes and only one small defect near the top of the gear doors. I certainly feel that this set is well worth the money and will enhance the kit considerably. The instructions are printed on an 8 1/2" x 11" page printed on both sides and includes some detailing photos of an actual engine. See photo below.
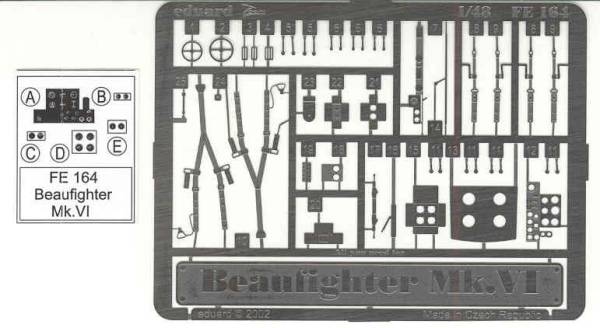
Eduard photoetch detail set (EU4164)
Another item us AMS modelers can't do without. This is actually a rather small set similar to there newer Zoom sets but without the color parts and consists of harnesses, levers and trim wheels and a few other odds and ends for the cockpit. Not all of the parts may be needed with the new parts from the set described above. The backing for the instrument panel is just printed on light card stock instead of a film that needs a coat of white paint behind it. I'm not sure how well that will work. See below.
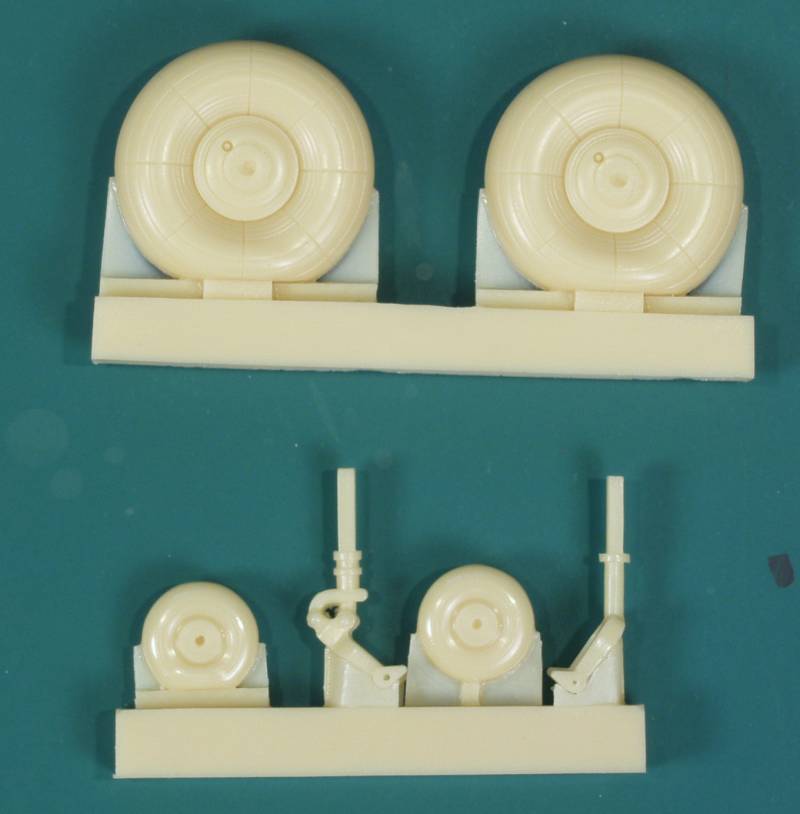
Squadron makes a vacuform canopy set but I was happy with the kit parts. True Details also makes a flat tire set with smooth tread wheels. I did decide however to go with a set of Aries wheel [4198] they are weighted as well but not bulged as bad as the True Details set, includes two different styles of tail wheel struts and wheels and includes a paint mask set. See below.
As I mentioned at the end of the history portion, it's
my plan to
build this as an aircraft used by an American night fighter squadron so
I won't be using the kit decals and may need to make some of my own.
Conclusions
Its hard to find fault with Tamiya kits. While some
areas could benefit from additional detail they certainly are good
enough to satisfy a large percentage of those that build them. The kit
should go together with a minimum of problems and issues
Links to kit build or reviews
A review / build can be found here.
References
Main reference was "Bristol Beaufighter" by Jerry Scutts with addition information about US night fighter units from "Queen of the Midnight Skies" by Garry R. Pape and Ronald C. Harrison
A most valuable resource which is packed with info of the different variants, internal detailing diagrams, photos and renditions is the Modelers Datafile #6 titled The Bristol Beaufighter A comprehensive Guide for the Modeler by Richard Franks and published by SAM Publications
Back to the Night Fighter page
Updated 8/15/09