
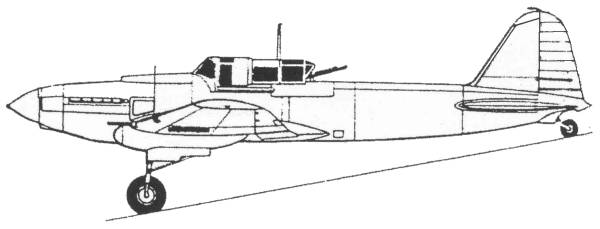
Ilyushin Il-2M3
The idea for a Soviet armored ground-attack aircraft dates to the early 1930s when Dmitry Pavlovich Grigorovich designed TSh-1 and TSh-2 armored biplanes. However, Soviet engines at the time lacked the power needed to provide the heavy aircraft with good performance. The Il-2 was designed by Sergey Ilyushin and his team at the Central Design Bureau in 1938 with the initial design designation TsKB-55. The TsKB-55 was a two-seat aircraft with an armored shell weighing 700 kg (1,540 lb), protecting crew, engine, radiators, and the fuel tank. Standing empty, the Ilyushin weighed more than 4,500 kg (almost 10,000 lb), making the armored shell about 15% of the aircraft's gross weight. The prototype, which first flew on 30 December 1939, won the government competition against Sukhoi Su-6 and received VVS designation BSh-2. However, BSh-2 was eventually rejected in favor of a lighter single-seat design, the TsKB-57, which first flew 12 October 1940. The original Mikulin AM-35 1,370 hp (1,022 kW) engine proved too weak and was replaced by the 1,680 hp (1,254 kW) Mikulin AM-38 before the aircraft entered production. The aircraft entered production in 1941 as Il-2, and 249 had been built by the time Germany invaded the Soviet Union on 22 June 1941. The Il-2 aircraft played a crucial role on the Eastern Front, and in Soviet opinion it was the most decisive aircraft in the history of modern land warfare. The armored tub ranging from 5 to 12 mm (0.2 to 0.5 in) in thickness and enveloping the engine and the cockpit could deflect all small arms fire and glancing blows from larger-caliber ammunition. There are reports of the armored windscreen surviving direct hits from 20 mm rounds.
While Il-2 proved to be a deadly air-to-ground
weapon, heavy losses
resulted from vulnerability to fighter attack, consequently, in
February 1942, the two-seat design was revived. The IL-2M
with a rear gunner under the stretched canopy entered service in
September 1942 with surviving single-seaters were eventually modified
to this standard. Later changes included an upgrade from 20-mm to 23-mm
to 37-mm cannons, aerodynamic improvements, use of wooden outer wing
panels instead of metal and increased fuel capacity. In 1943, the IL-2
Type 3 or Il-2m3
came out with redesigned wings that were swept back 15 degrees on the
outer panels to counter the shift in the center of gravity brought on by
the addition of the gunners position. Performance and handling were
much improved and this
became the most common version of the Il-2.
Close to 40,000 Il-2's were
produced by the end of the war, becoming one of the most widely
produced military aircraft in history.
The Kit
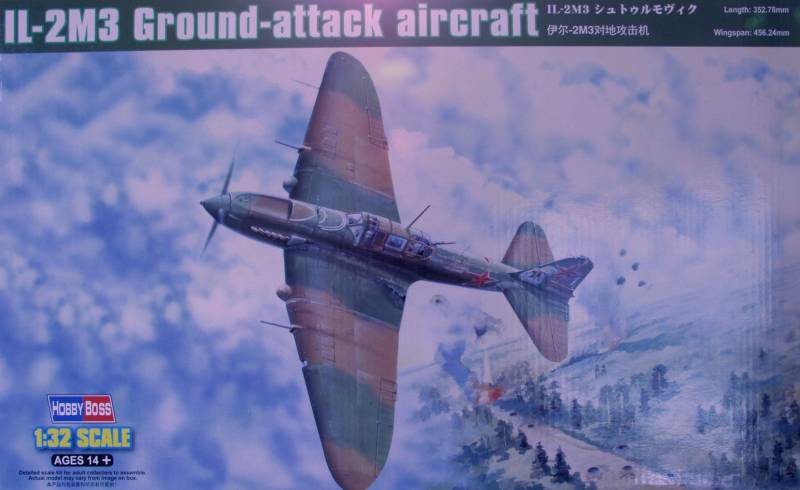
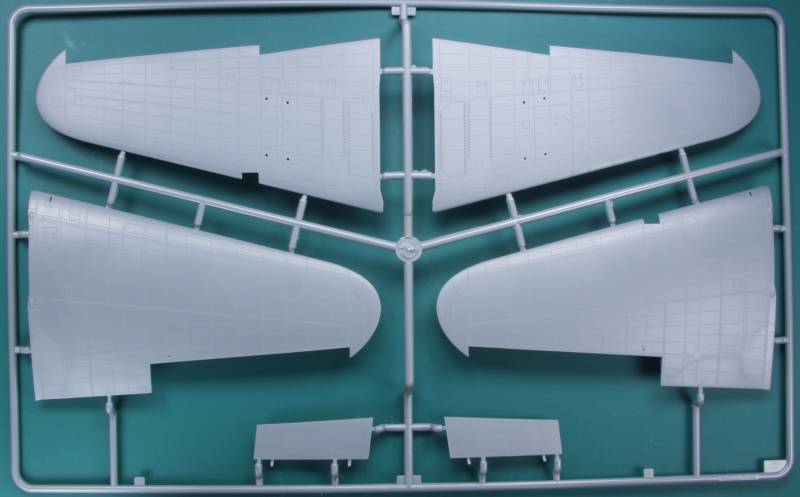
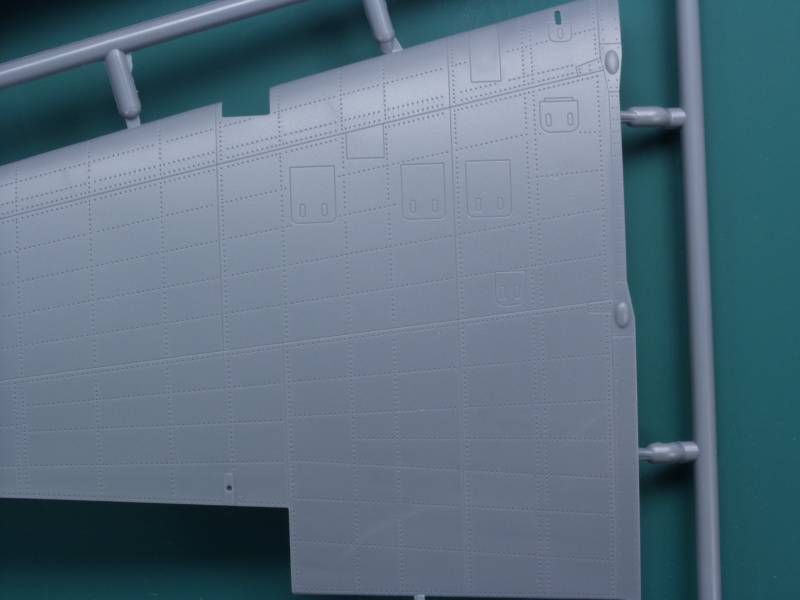
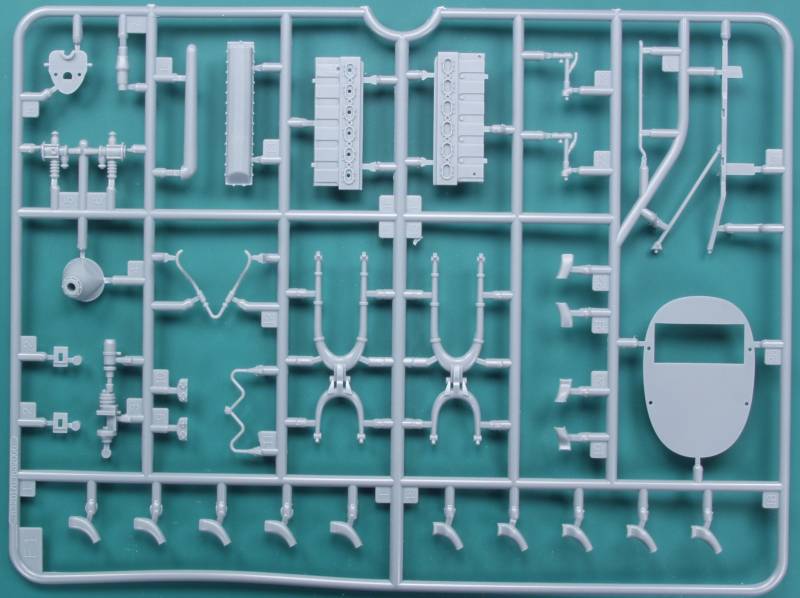
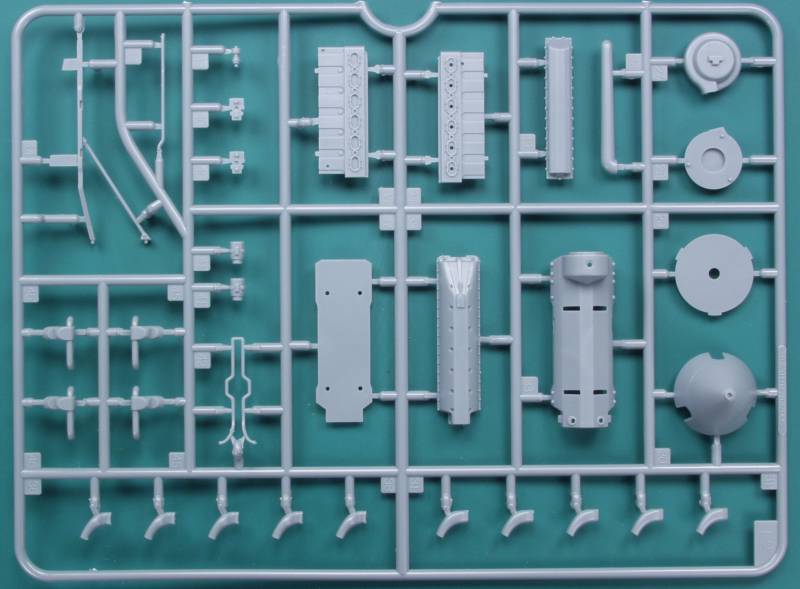
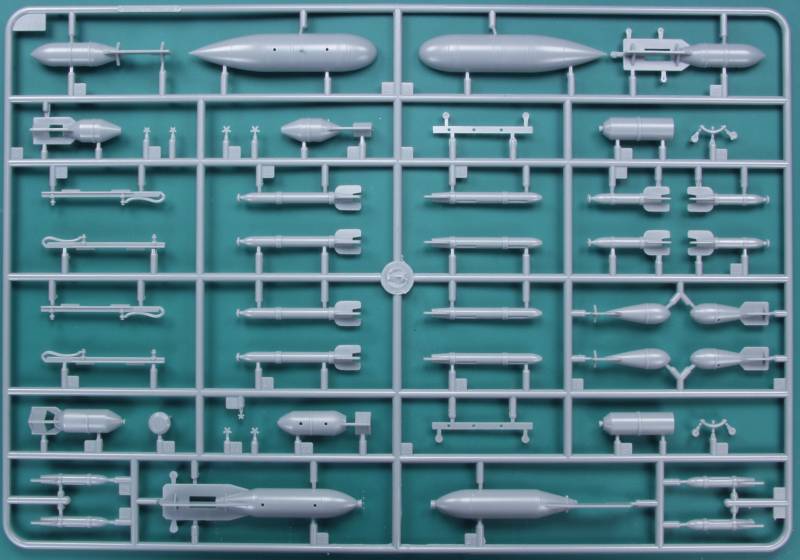
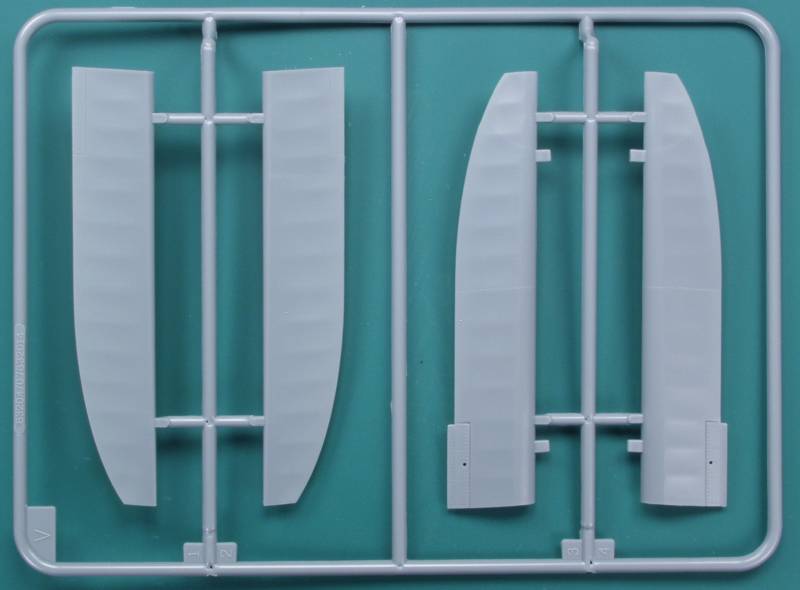
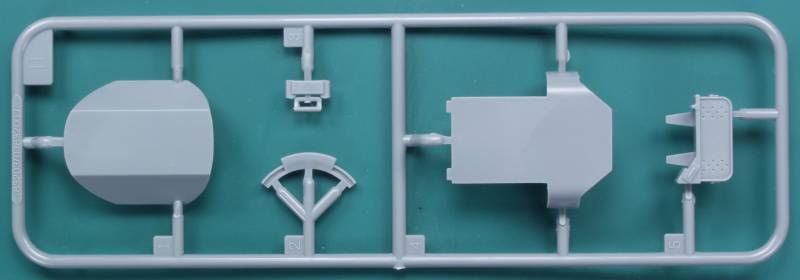
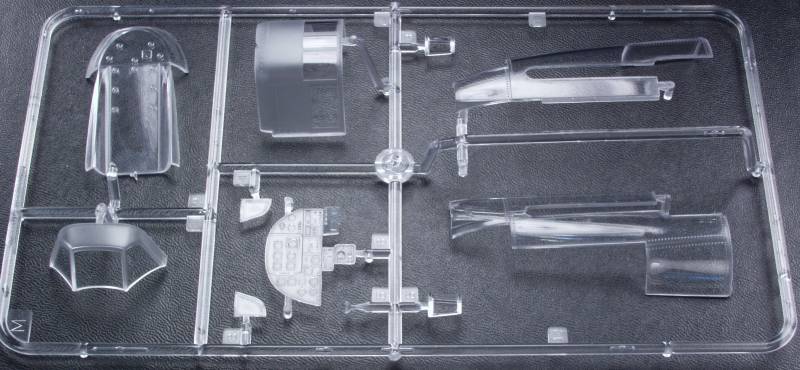
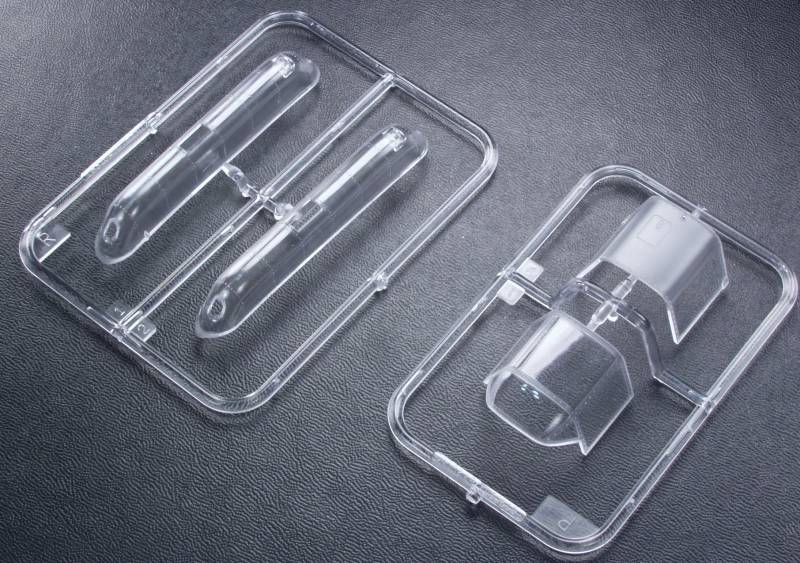
The HobbyBoss Il-2 comes in a large sturdy box with attractive artwork on the front. Inside the box is well packed with goodies. I did not do a parts count before I started assembly so you'll need to look else where i you really need to know. There are a number of parts that won't be used depending on how you configure your kit. Most of the choices are for armament. The kit is molded in a light gray color and the parts are mostly flash free with small parting lines. Care was taken to put sprue connection points on the larger parts on mating surfaces and most of these are fairly small however some of the smaller parts have rather heavy attachment points and more care will be needed on these. The kit comes with a highly detailed engine but unless you chose not to paint the clear cowling parts or decide to open it up it will not be seen when once the fuselage is close up. More invisible detail is provided in the rear fuselage for the radio rack, they are not visible once the fuselage is closed. The cockpit has a level of detail that will satisfy most but in this scale it's a shame not to add some more. The surface detail is recessed both rivets and panel lines, I did not find the rivets objectional but I'm sure some folks will. Examples of the surface detail are shown below in the sprue shots. Duplicate sprues are not shown.
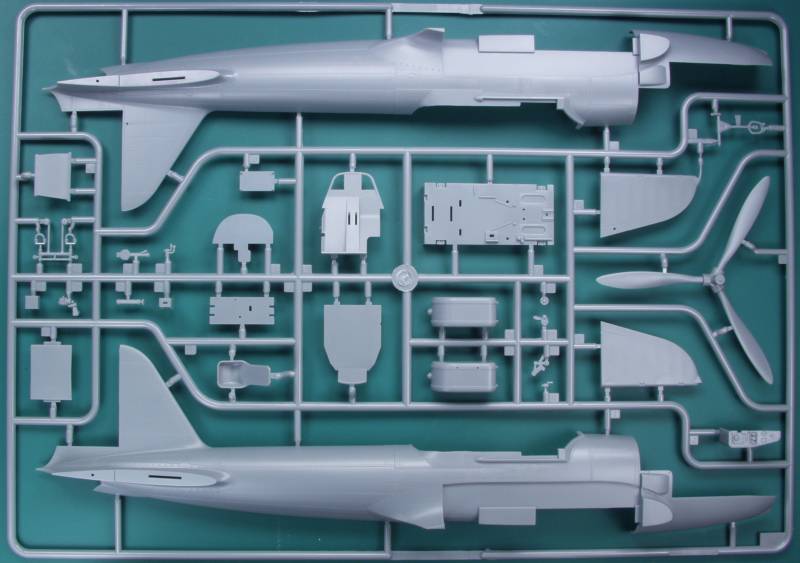
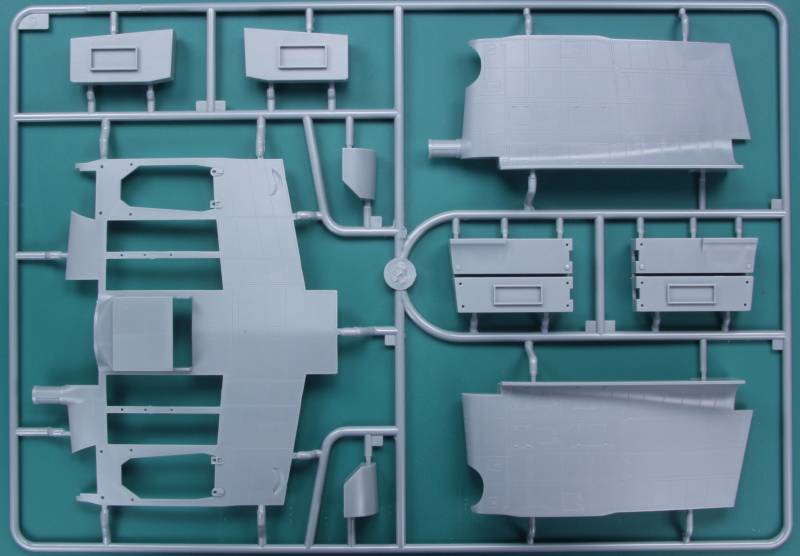
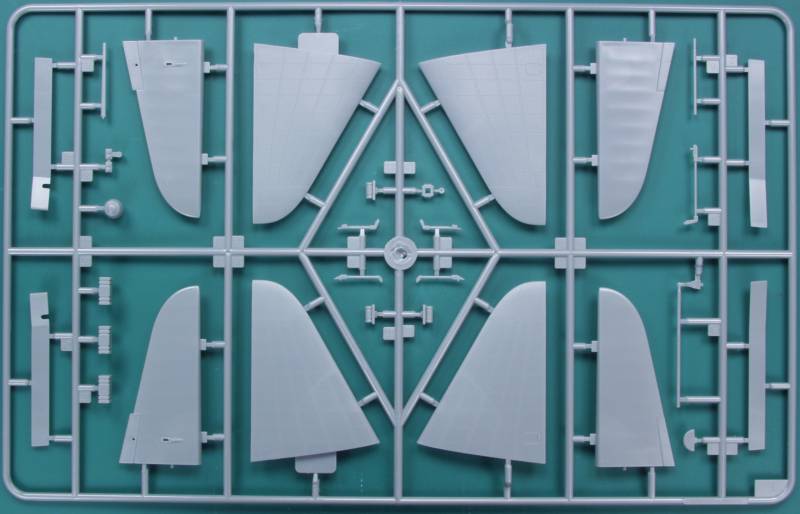
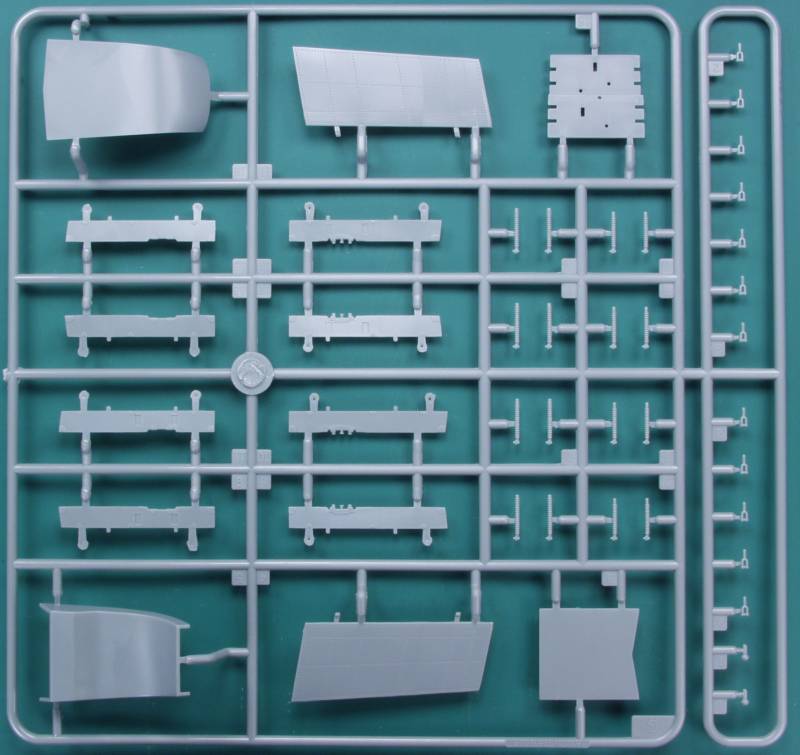
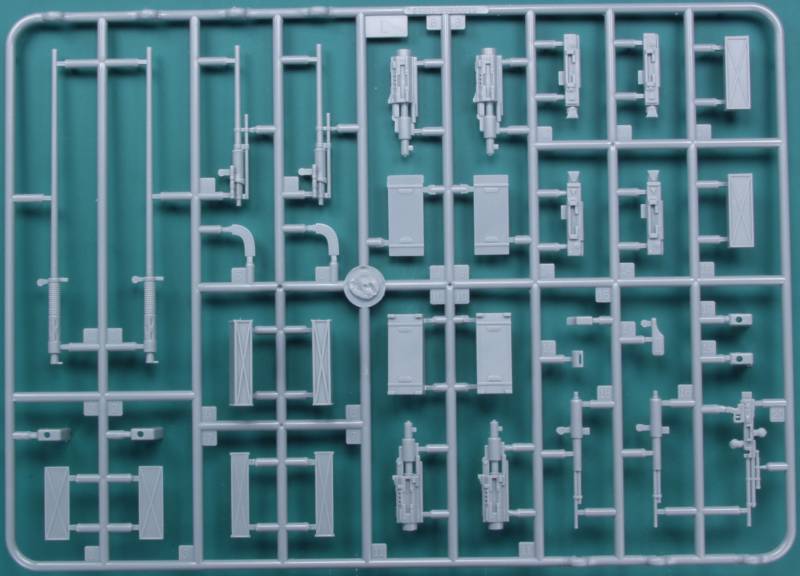
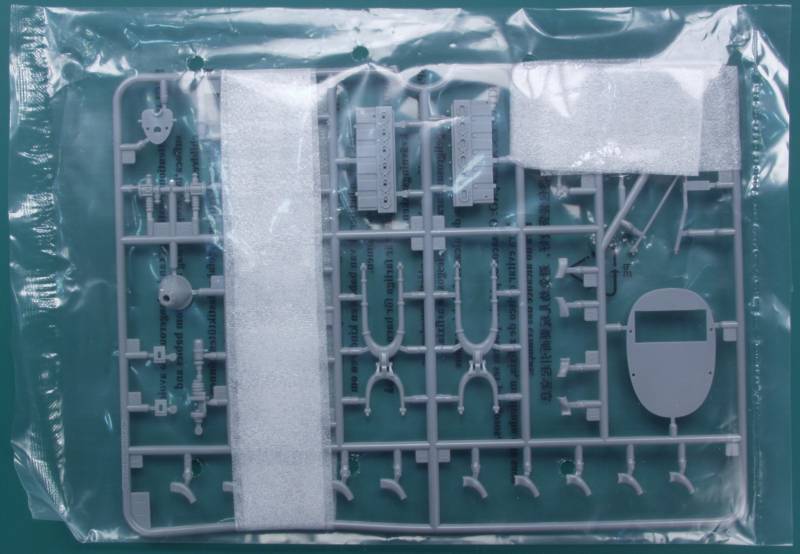
Most of the sprues are individually bagged and some even included strips of foam as additional protection, a nice touch.

One sprue of black flexible vinyl parts are included for the ammo belts and the main gear are made of this as well. The tires are actually very nice looking with no flash line to remove.
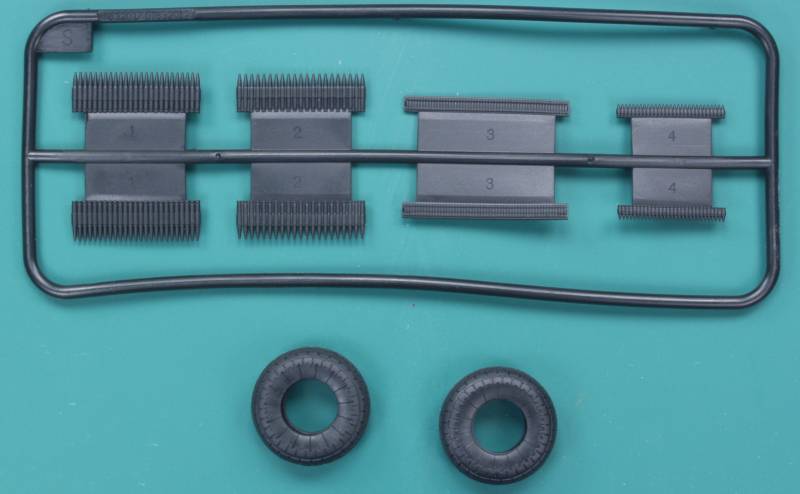
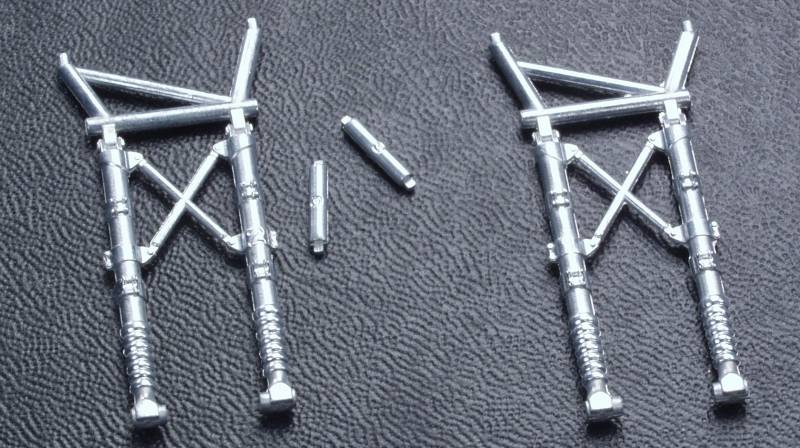
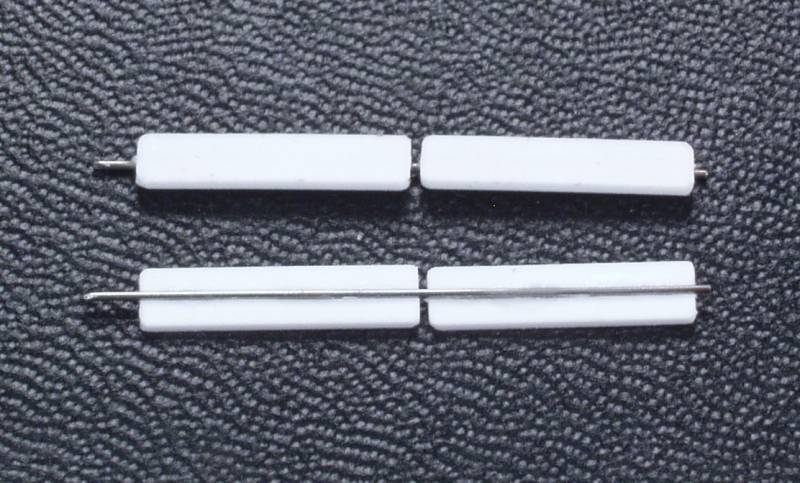
Optional main gear struts are provided , these are handy as the they must be installed early on during the assembly and it's nice to have them be durable enough to stand up to the rest of the assembly process.
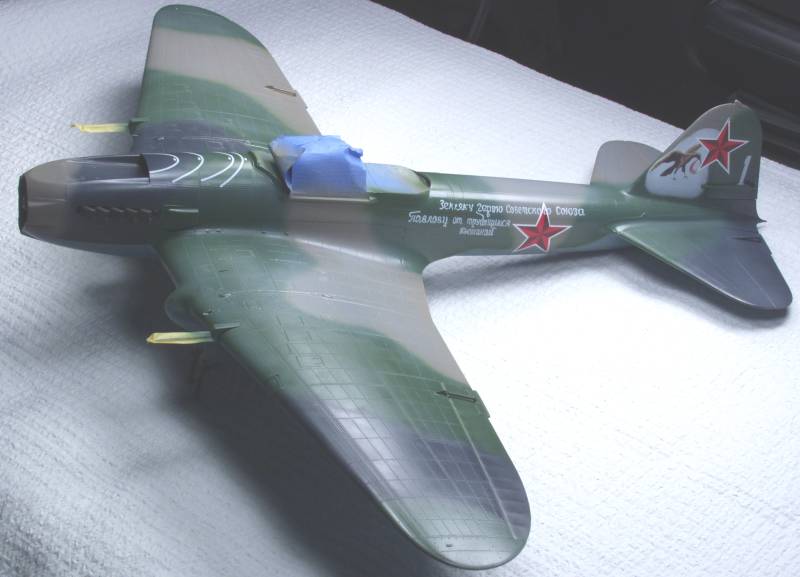
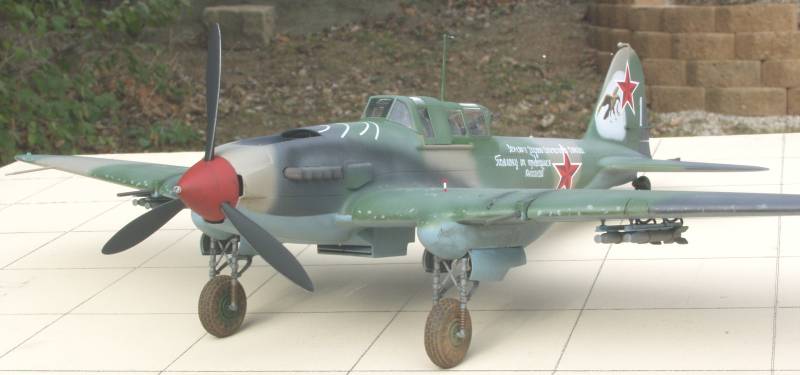
The decals are thin but slightly out of register in my kit. The tail artwork is supplied on a separate sheet but does not match the photos of the original. The markings for that aircraft are also missing a 1 and a small white star for the nose. The decals worked well and settled down well with a minimal amount of Microset. Two of my stars broke during application, the large banner however went on without a hitch and I had no silvering.

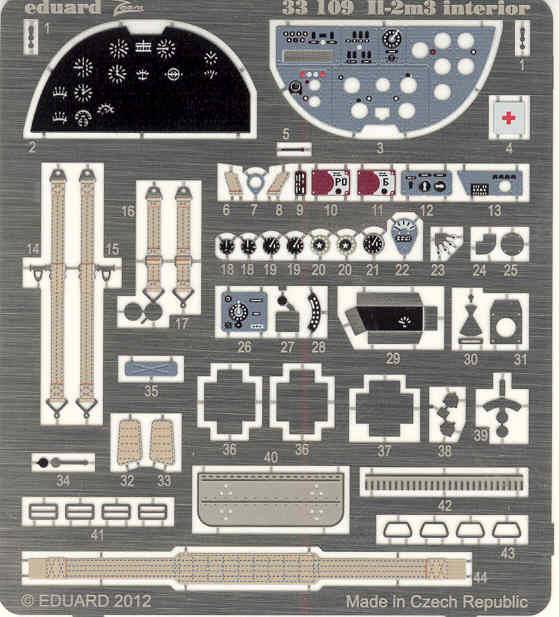
The kit also comes with a small PE fret. Except for the seatbelts and harness and the strap seat for the gunner everything else is used in the bomb bays and can be left out if you leave the bay doors closed.

The instructions consist of a 16 page booklet and like most these days include a sprue map and icon chart. The colors for the internal parts are listed throughout the booklet by both name and what I believe are Gunze paint numbers. the instructions are well sized and for the most part clear. The wheel tire assembly seems to confuse some folks but what you need to do is glue both wheel halves together, paint them first and when dry fit the rubber tire over the wheel much in the same way one puts the tire on the rim of a car. The last page of the instructions has an armament loading chart showing all possible loading configurations. Because of all the armor plate used in the construction the Il-2 is a bit of a light weight when it comes to its carrying capacity. There is a separate page printed in color with decal location and camo info. Ignore the painting info !
After Market Goodies
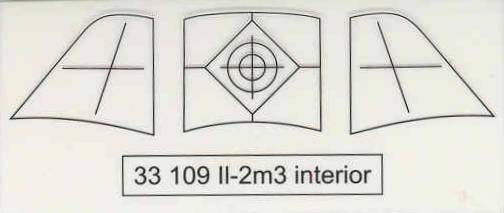
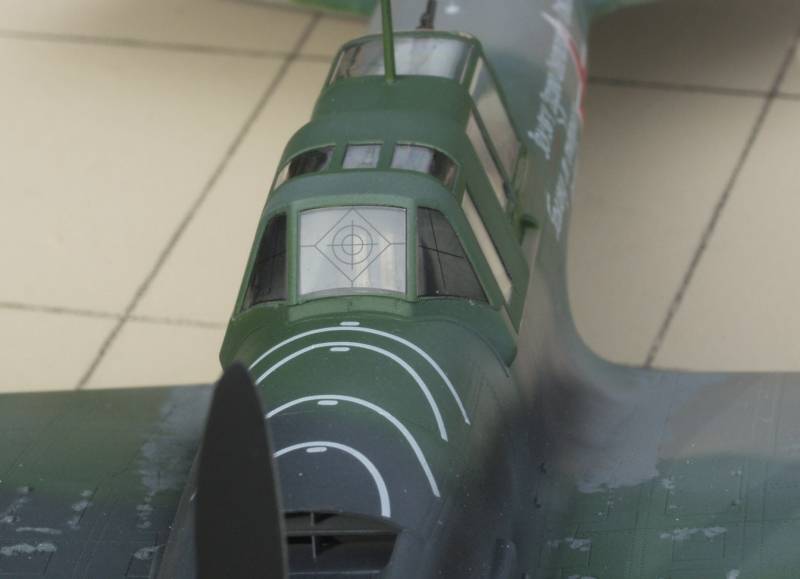
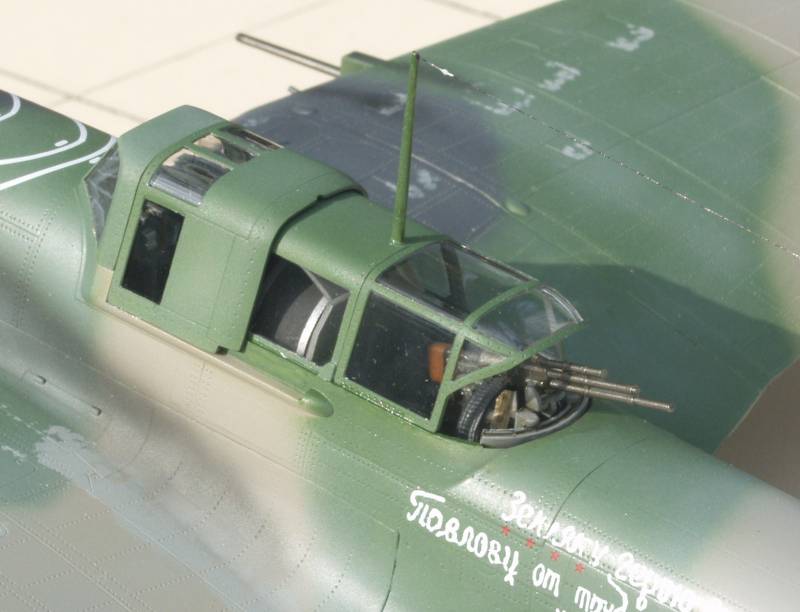
The Eduard Zoom set is a good choice to add some extra detail without going overboard. Like many of their prepainted sets the color is not always a perfect match but it's close and it provides a bit of variation in the pit. Often these items came from different manufacturers and the paint colors did not always match. I ended up using almost every item in this set. The window aiming lines add a nice bit of detail, I just cut them out, they fit perfectly and installed them using future under and over them, when dry they look like part of the original windscreen.
Conclusions
This
kit looks very nice in the box and for the most part it doesn't
disappoint. From a fit and ease of assembly I would give it a B+, not
quite up to current Tamiya standards and I did need to do a bit of
tweaking in few places but overall I used very little filler. It feels
a lot like a Trumpeter kit as it should since they live under the same
roof. That said I recommend you do your home work before starting the
kit as apparently HobbyBoss did not. The instructions take you down a
path that will lead to an aircraft equipped with 37 mm cannons and that
is not where you want to go. Unless I have misunderstood something the
37 mm cannons were only used on the two seat straight winged versions
and the decals provided with the kit are not for aircraft with 37 mm
cannons. To use the correct 23 mm cannons you need to cut open slots in
the front of the wings and install fairings for the cannons. None of
this is mentioned in the instructions, but the guns and fairings are
supplied. Also the markings provided for the aircraft with the artwork
on the tail is not correct and is missing elements as well. To top it
off the paint scheme shown on the color page was never used on Il-2's.
I recommend that you spend time doing research at Sovietwarplanes.com
before starting this kit. The decals were thin and settled down well
with only a minimum of setting solution however two of my stars came
apart when applying and I don't think it was my doing as I didn't need
to move them that much while applying. It was an enjoyable build and I
will probably do another, most likely the straight winged version with
the big cannons. Recommended with reservations !
Links to kit build or reviews
A build can be found here.
References
Ilyushin Il-2 Shturmovik from 4+ Publications
Ilyushin Il-2/Il-10 by Yefim Gordon and Sergey and Dmitriy Komissarov
Sovietwarplanes.com
The Build
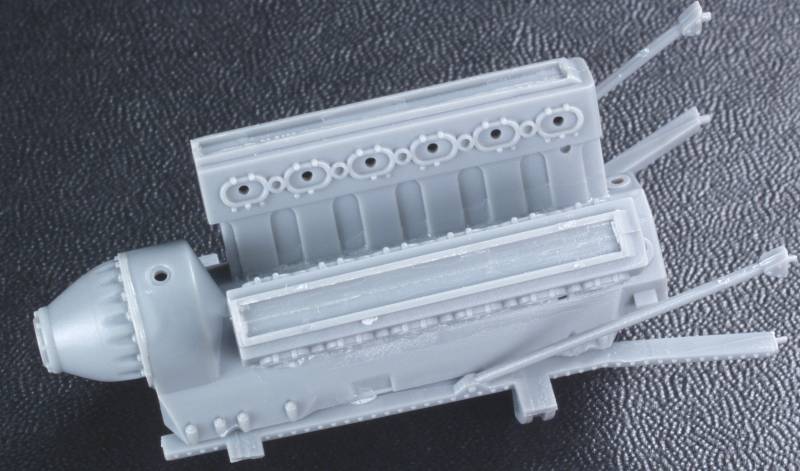
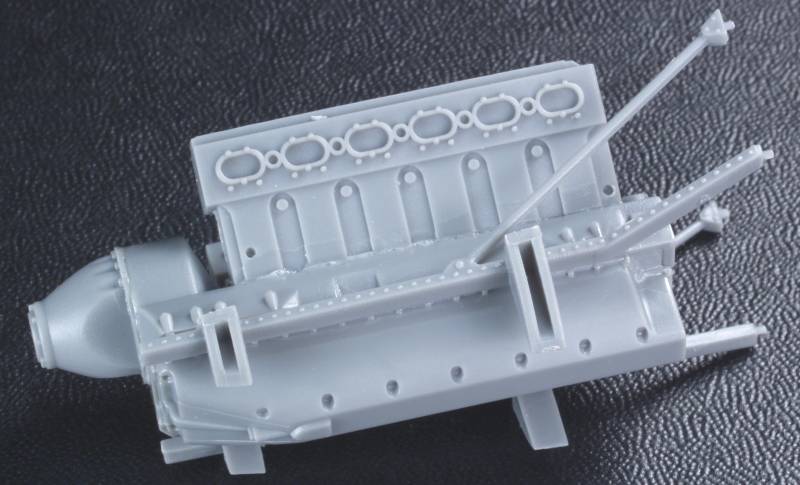
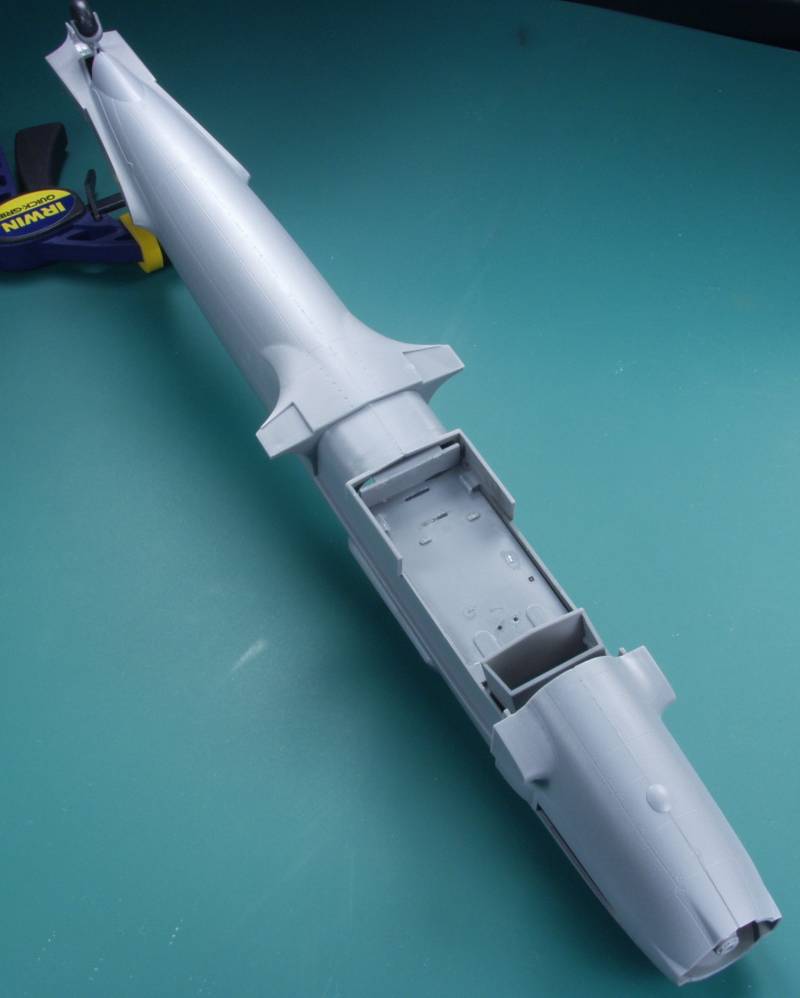
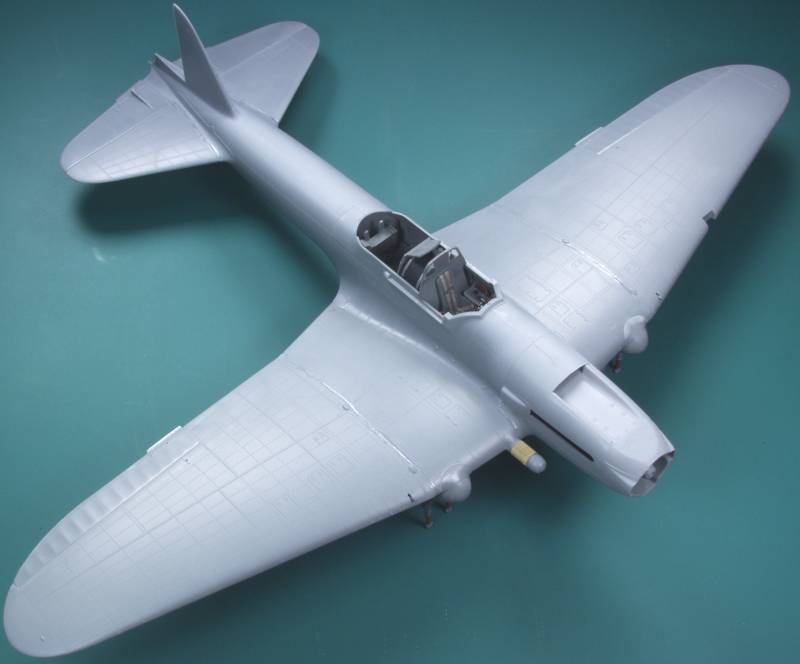
The kit comes with transparent engine cowlings but no way short of slicing and dicing to display them open and I really didn't want to so the engine was built with only the parts necessary to mount the exhaust stacks, propeller, and parts necessary to mount the engine it self. This leaves a lot of detail parts in the box and work that would other wise be wasted once sealed up inside the fuselage. Below is the basic engine parts with mounts. Everything fit as advertised but I used the engine bulkhead to line up the engine mounts and keep them in place while the glue dried as their fitment was a little loose.
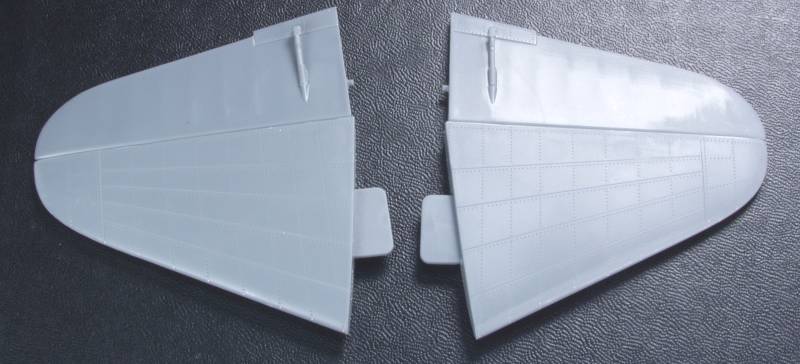
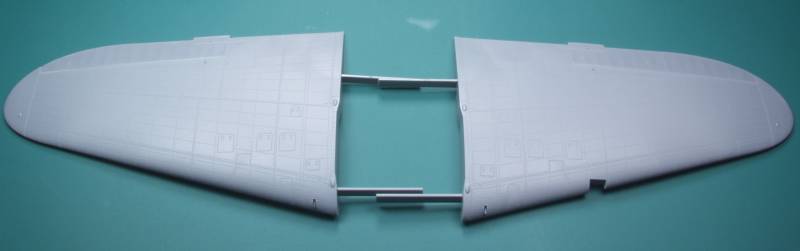
I went ahead and assembled the tail planes. I left the stabilizers in the neutral position as that seemed to be the normal in photos of static aircraft. No fit issues here.
Next I attached the clear cowlings to the forward part of the fuselage. The clear parts are much harder than the gray parts. I also found aligning the pieces to be a bit fussy. They fit well but not a lot of keying surface. I managed to glop them up pretty good with glue, good thing I didn't want them clear.
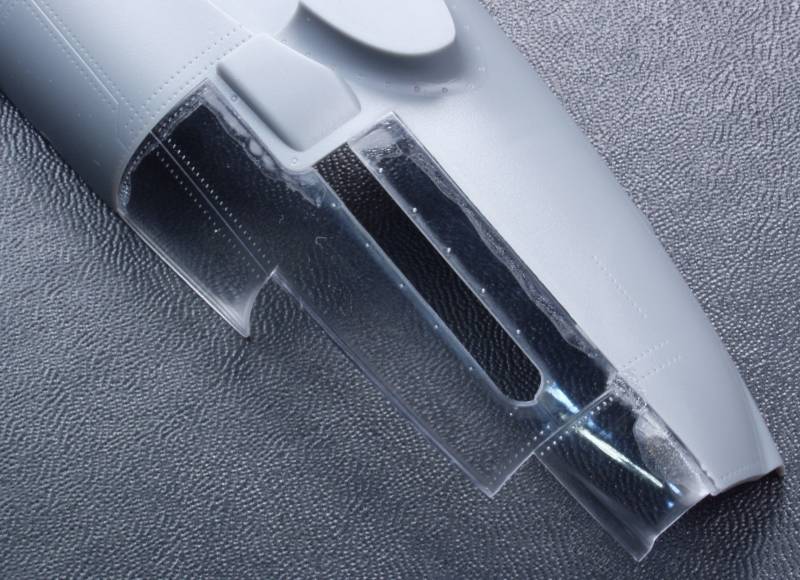
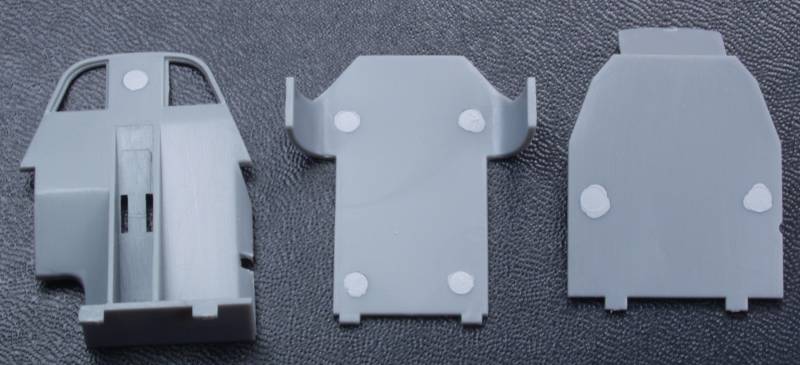
Ejector pin marks are pretty scarce for the most part but a few managed to end up in places where they would be seen.
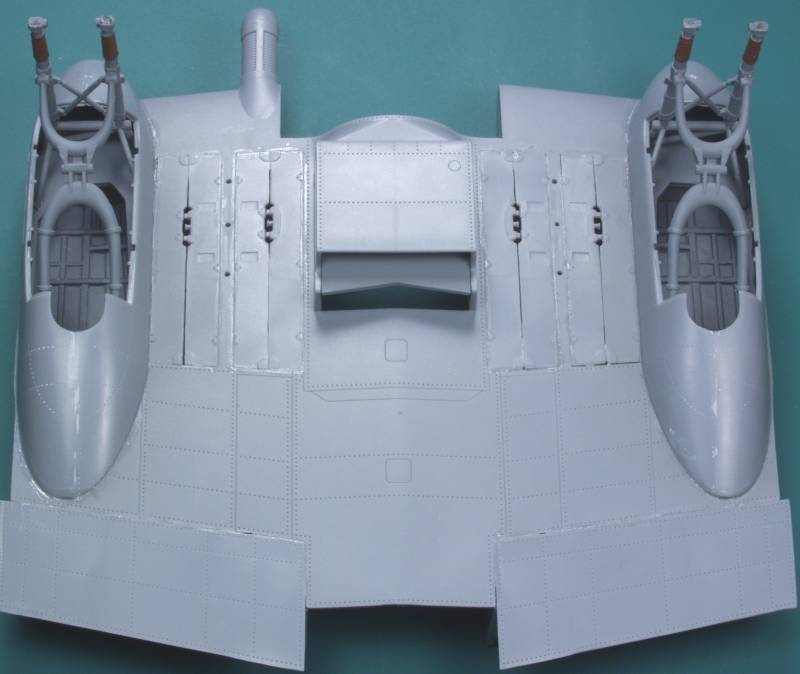
The
wing center section was built up next as test fitting showed what was
probably the worst fit of the kit was here and I wanted to get it over
early. Everything fits well except for where the forward part of the
gear nacelle meets the wing.
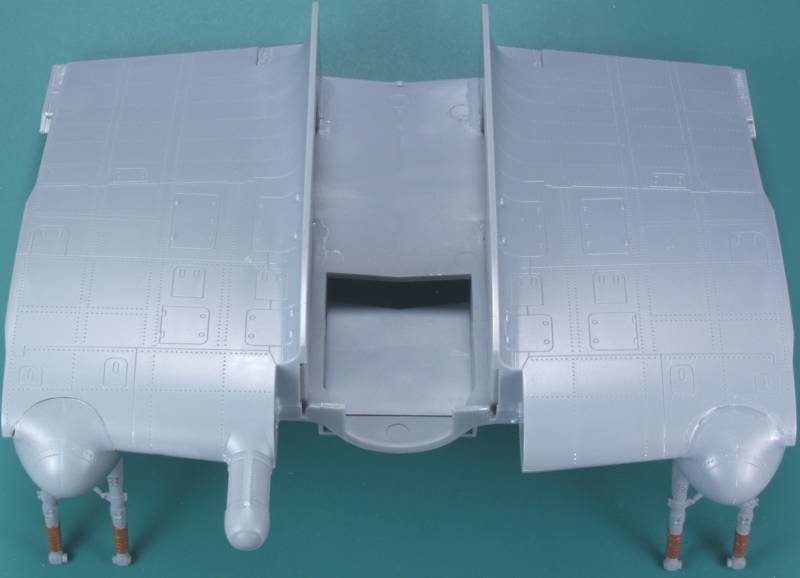
I really didn't like installing the landing gear at this point but it must go on before the nacelle, fortunately it is mounted solidly and you have a choice of metal parts for the main struts.
This was the worst fit of the kit, not really that bad considering but it is in a rather tough place to sand easily.
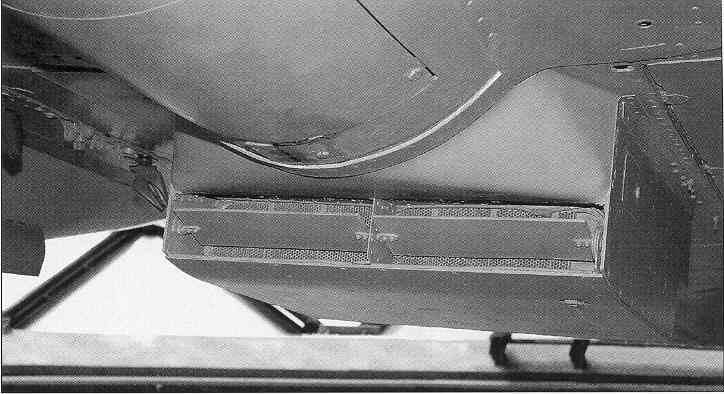
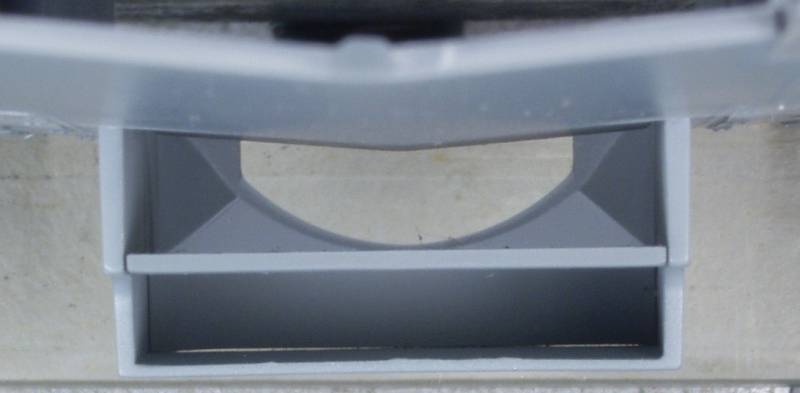
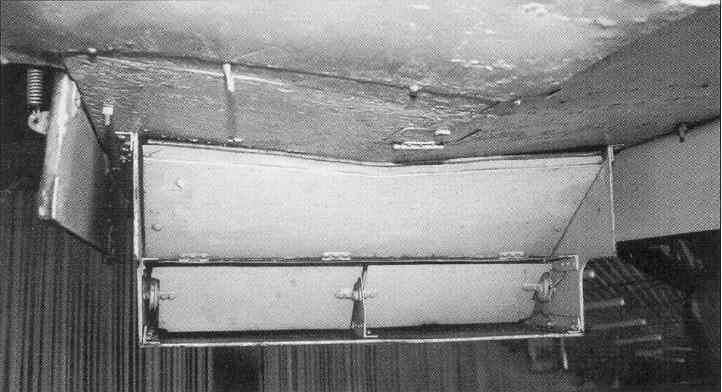
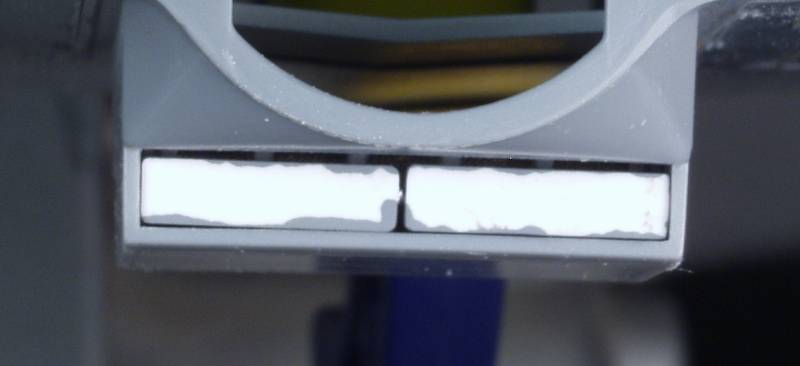
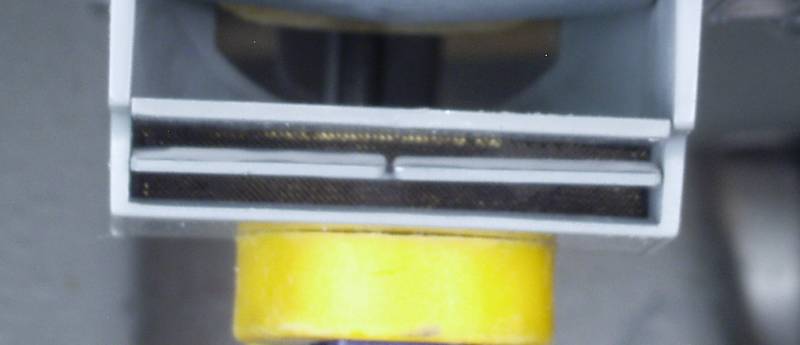
For what ever reason HobbyBoss didn't include the armored shutters on the radiator. That And I really didn't like the look of the radiator itself. The next four shots show the model Vs. the real thing.
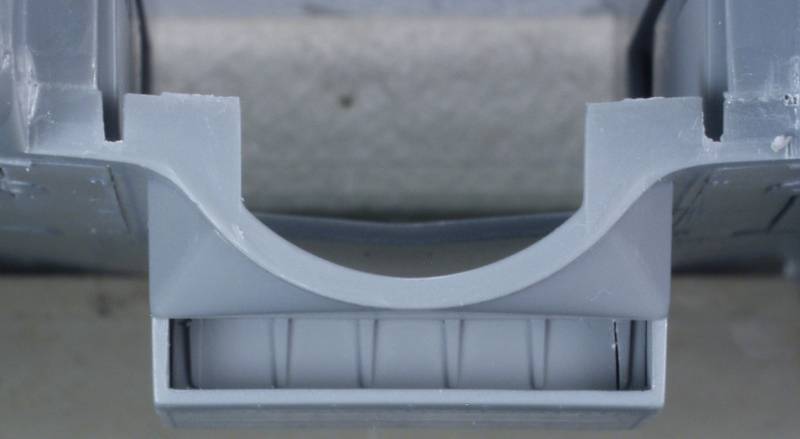
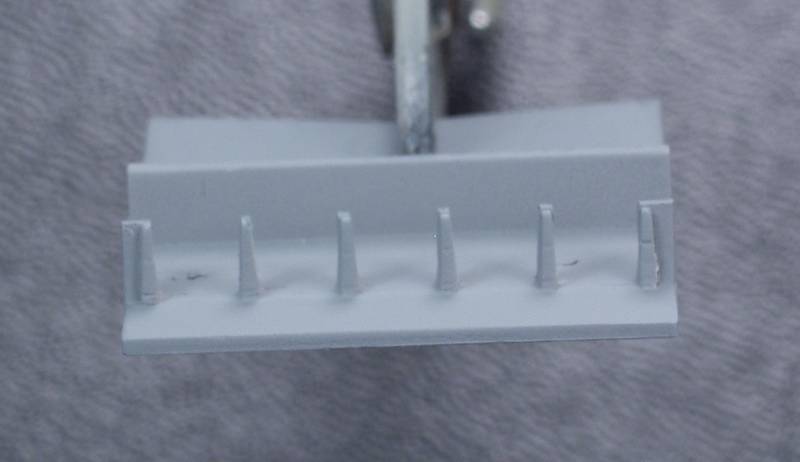
I started by cutting away the radiator sections leaving the supports.
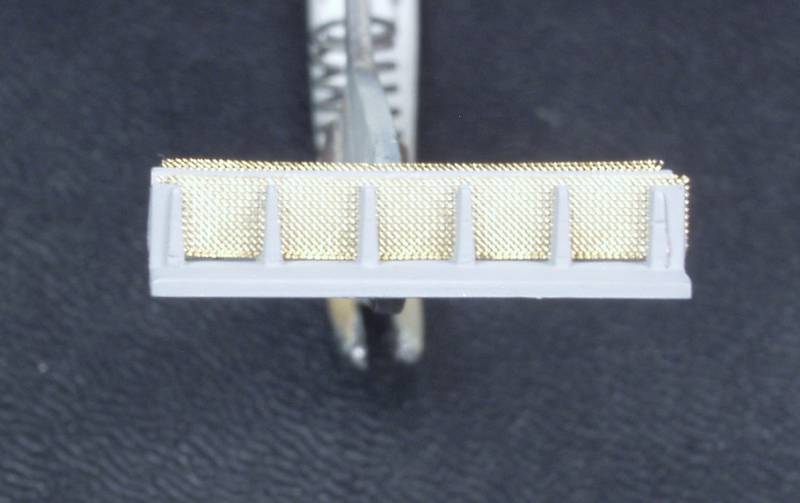
I then used some 100 mesh brass screen to replicate the radiator core, at this point it still needs to be trimmed to size.
I made up a set of shutters from styrene, the central shaft is a small diameter hypodermic tubing.
The wings were assembled at this time, unfortunately at this time I was unaware of the cannon issue.
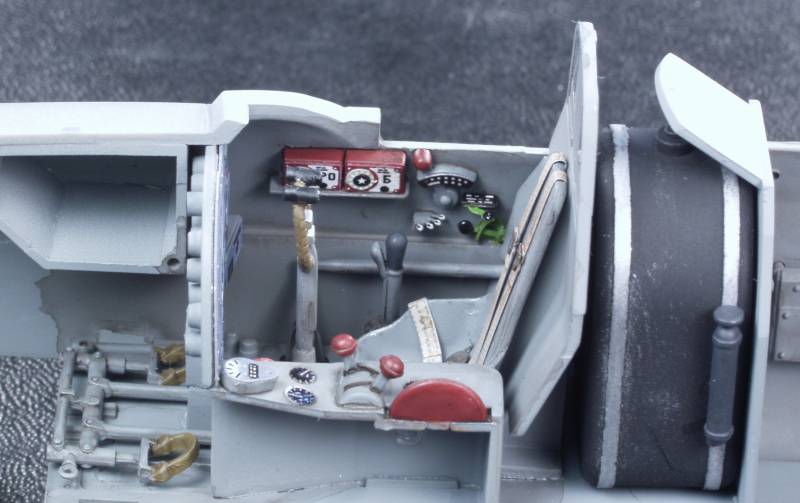
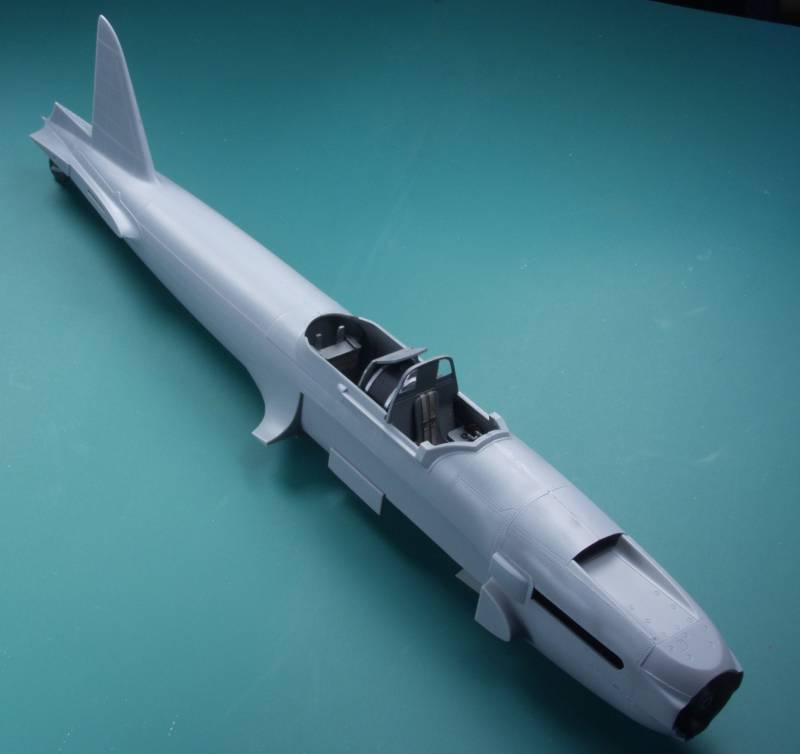
The cockpit was put together next. I used the Eduard Zoom set. I came to the conclusion that some of the parts are over sized as there is no way they could be mounted as in photos and diagrams of the real things. I did the best I could and it's close and looks reasonably busy.
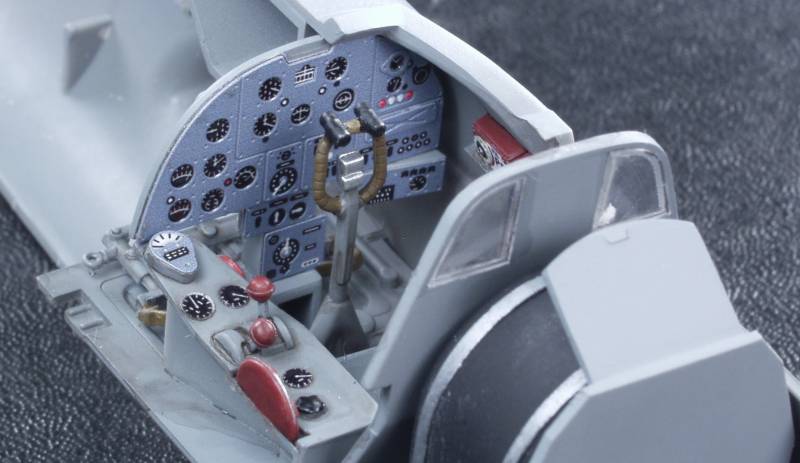
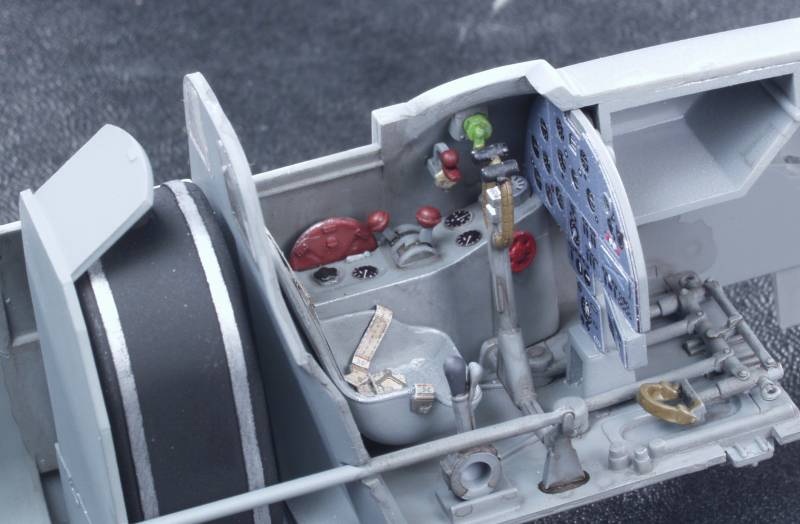
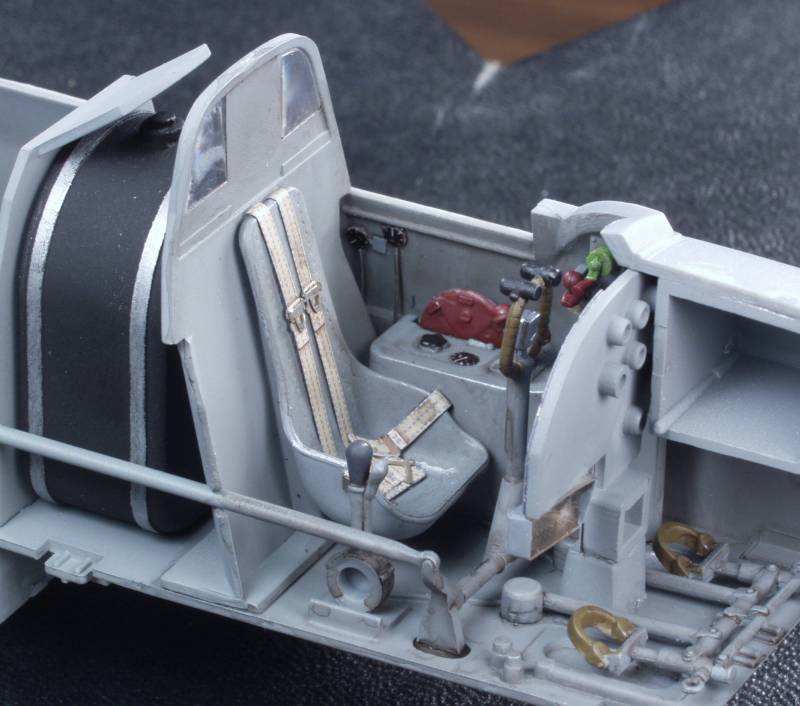
I did use a shadow wash in the pit but the lighting kinda washed it out.
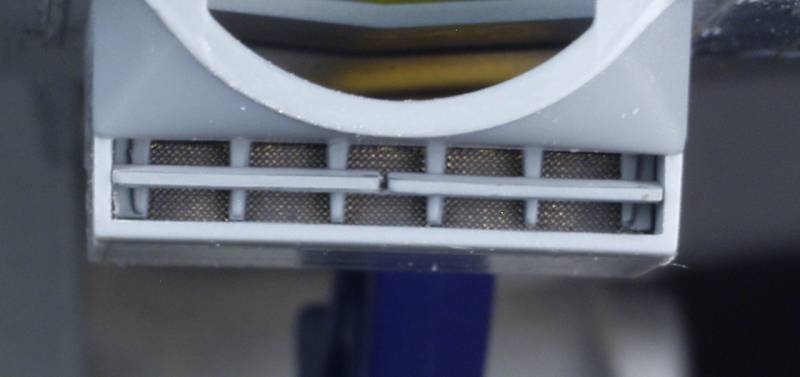
The mesh makes a much better looking radiator in my mind anyway ! The photo below shows the out flow side.
Fuselage together, great fit, very little filler required.
Outer wings were mated with the center wing section, again fit was good.
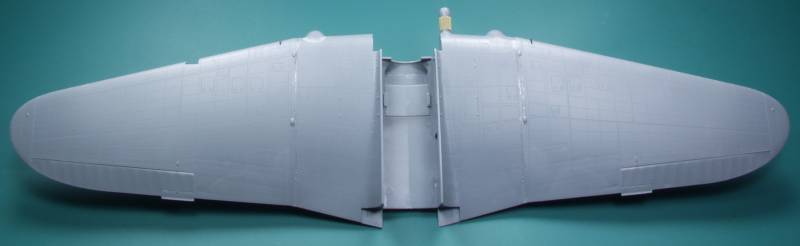
Wings mated to fuselage, again good fit but take your time and work your way around doing a progressive gluing for the best fit.
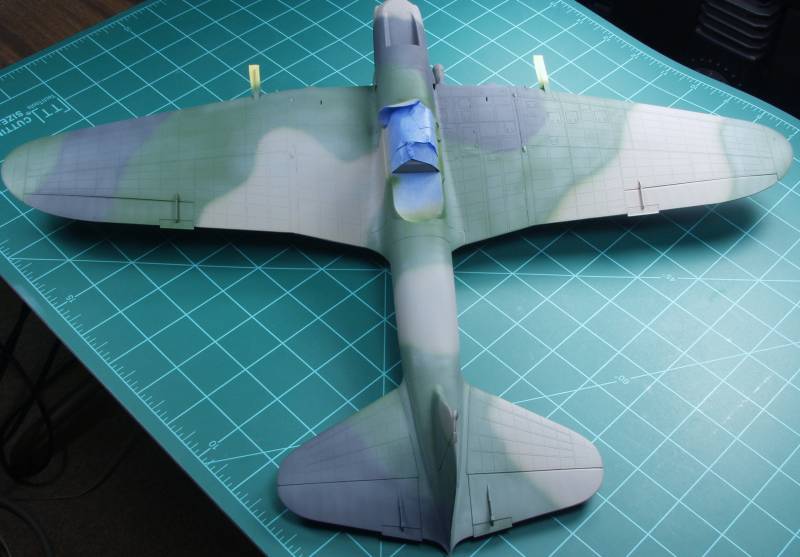
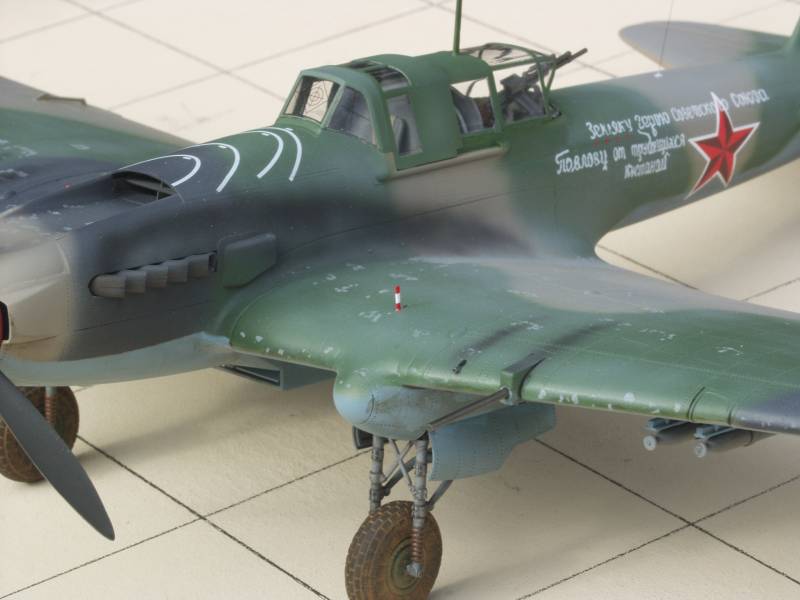
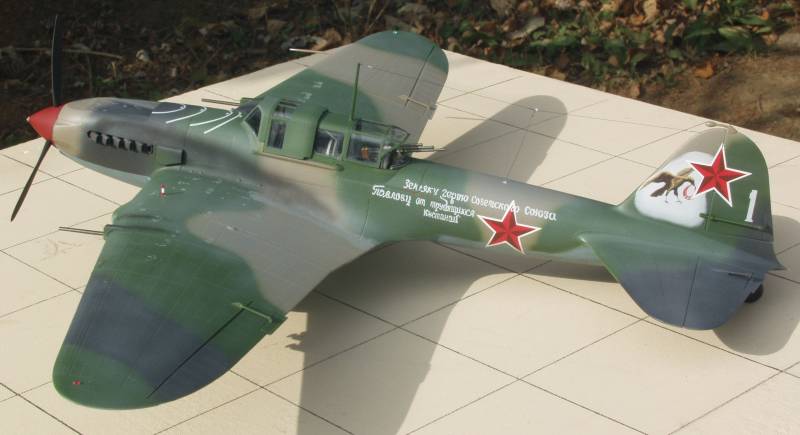
Colors on.
Decals on.
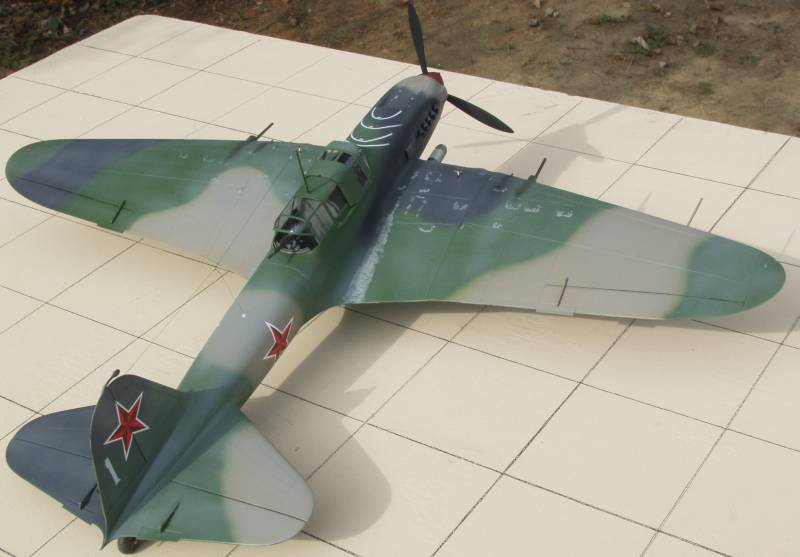
Bottom side thoroughly streaked.
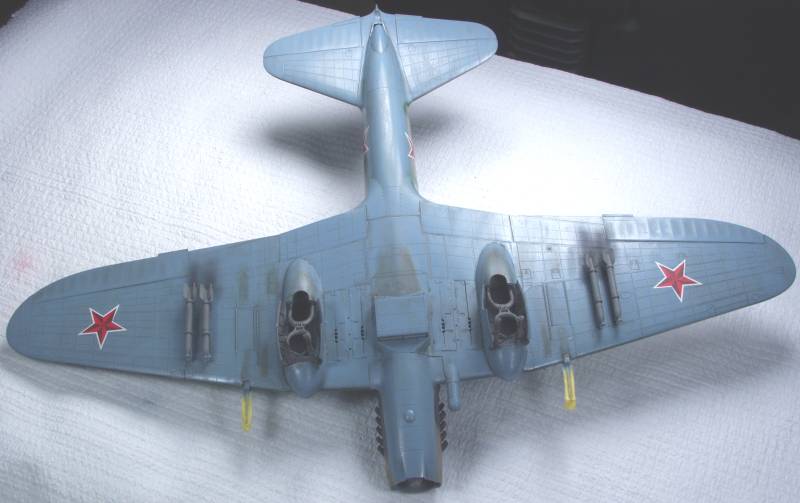
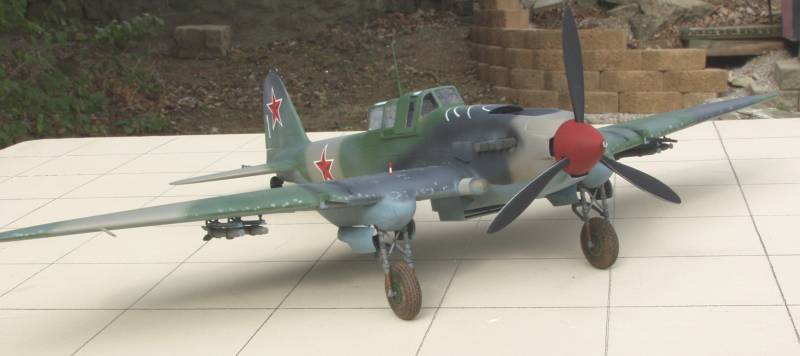
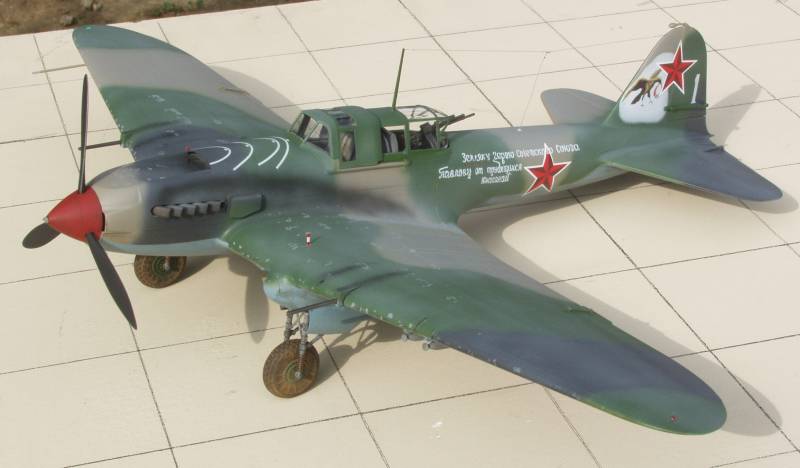
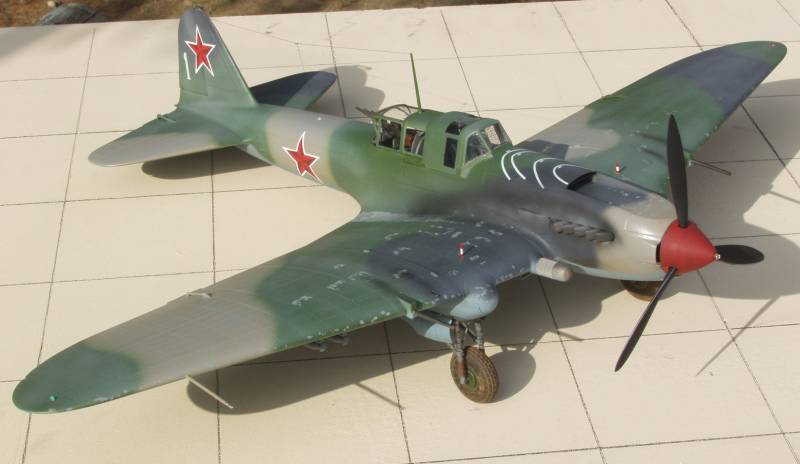
The balance of the photos are completion shots taken outdoors, backgrounds aren't the greatest but I had to go where the light was best.
The Eduard set included sighting lines for the windscreen glazing which adds a nice touch.
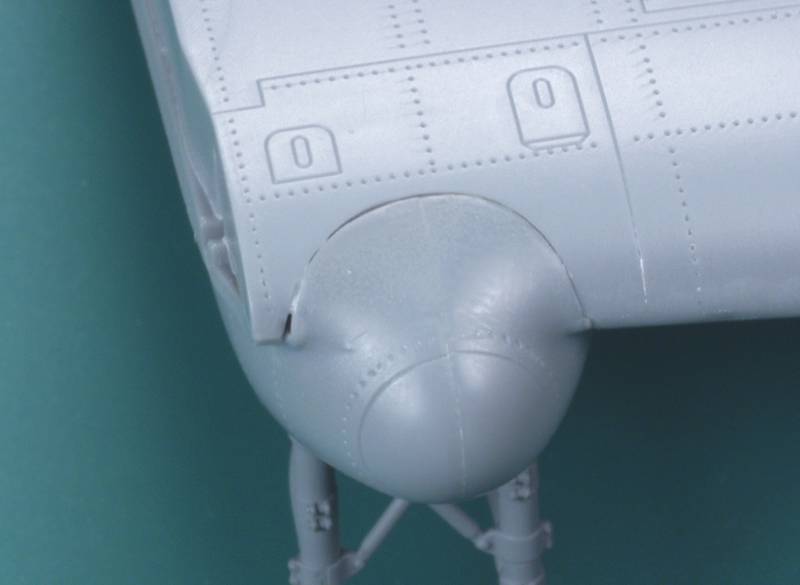
I also added the distinctive gear down indicators.
Back to the 1/32 Scale Russian Aircraft Page
Updated 12/1/12