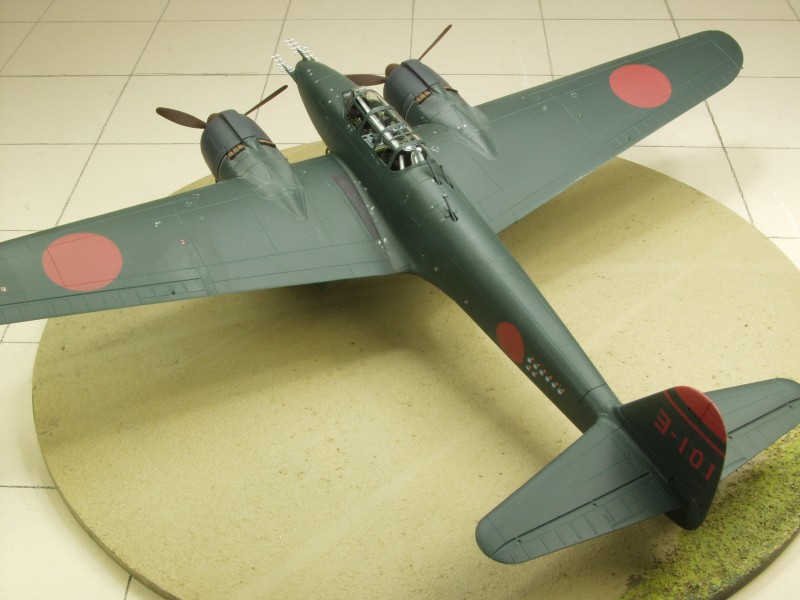
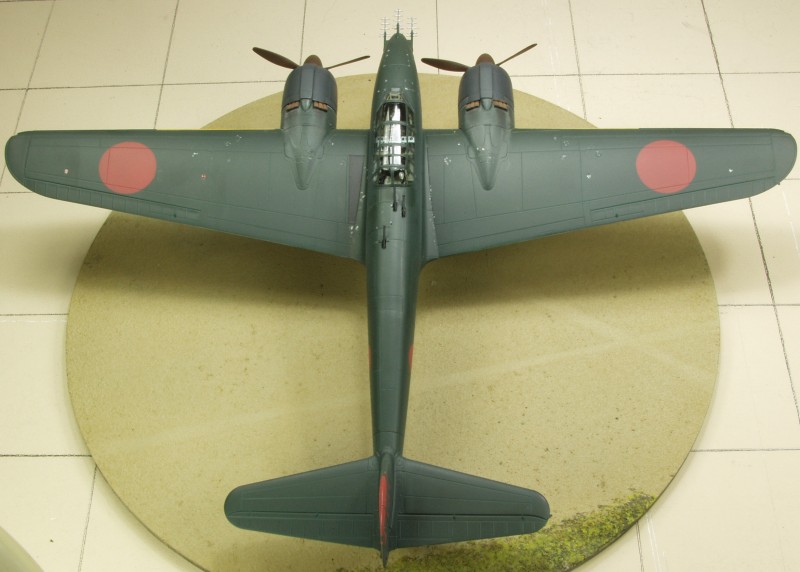
J1N1-Sa

The
development
of the Gekko night fighter began in 1938 with Nakajima
developing the Type 13-Shi Twin-Engine Land-Based Fighter
(J1N1), featuring 1,000 hp Sakae engines. Initially it was
designed as a twin engine escort fighter for long-range
bombers, but due to poor performance and maneuverability, it
was rejected as an escort fighter and redesigned as a
land-based reconnaissance aircraft (J1N1-R). The Japanese
navy was desperately seeking something to counteract U.S.
bombers, which were causing significant damage during night
raids in the Pacific. In May 1943, two J1N1-R's with oblique
guns fitted in the upper and under fuselage successfully
downed two American B-17 bombers. With word of this success
the navy quickly instituted a program to fit other J1N1-R's
with twin-mounted 20mm cannon mounted at a 30 degree oblique
angle in the upper and lower fuselage, thus creating the
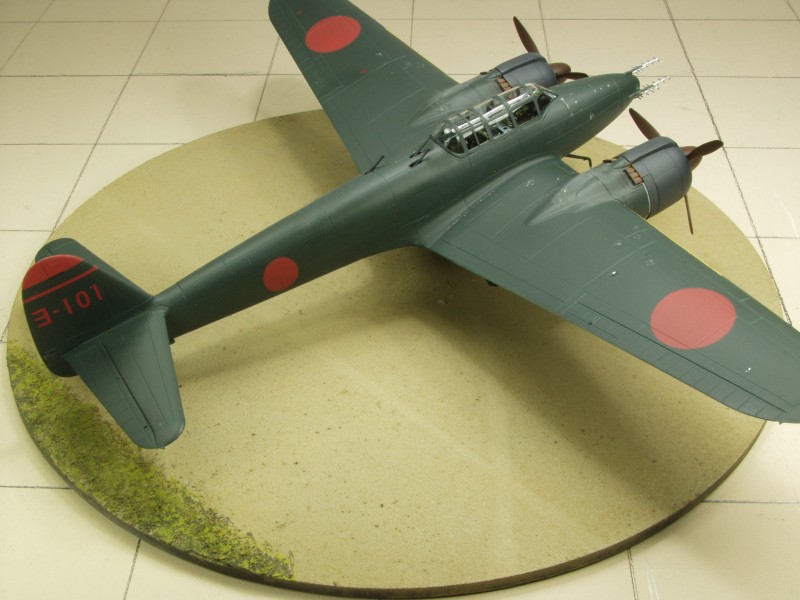
night fighter J1N1-S Gekko (moonlight). After much success,
the Gekko was redesigned with a more streamline fuselage and
the downward angled guns were removed. A further upgrade in
the summer of 1944 saw an extra 20mm upward cannon placed
behind the twin-mounted cannon, leading to the J1 N1-Sa.
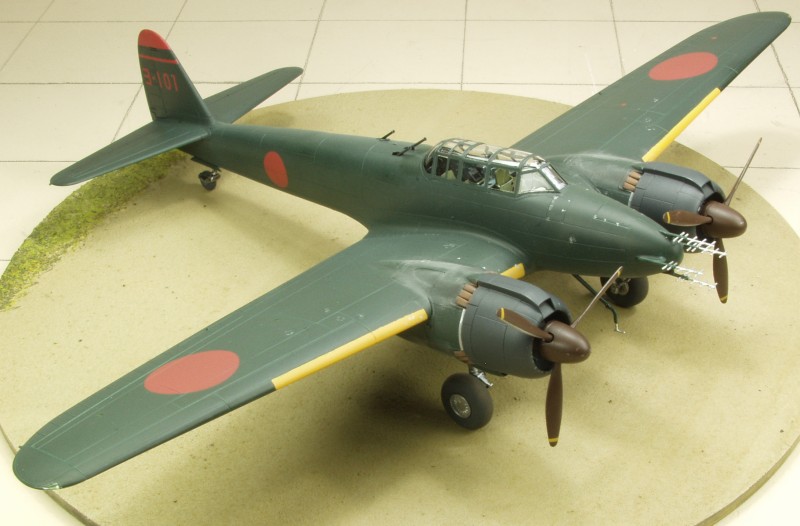
Later J1N1-Sa models also featured singular exhaust stacks
in place of the collective exhausts, providing extra thrust
and reduced exhaust flames. Some later Gekko models also
featured a FD-2 radar system and antenna fitted to the nose.
After successes in the Pacific, the Gekko was used to defend
the mainland against B-29s until the end of WWII.
The Kit
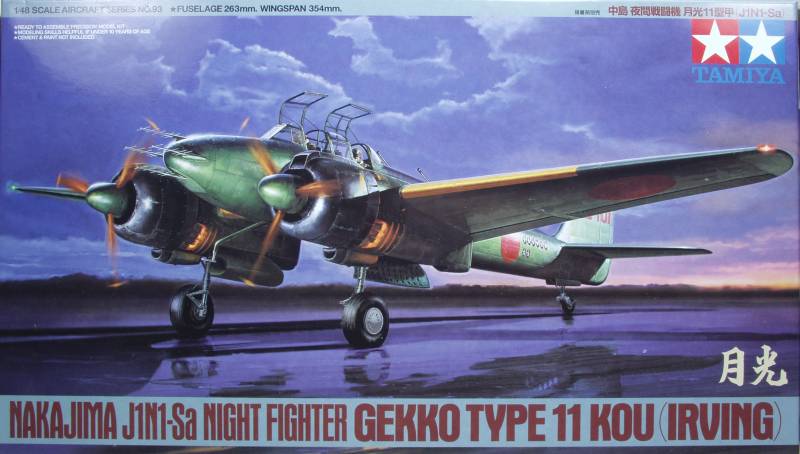
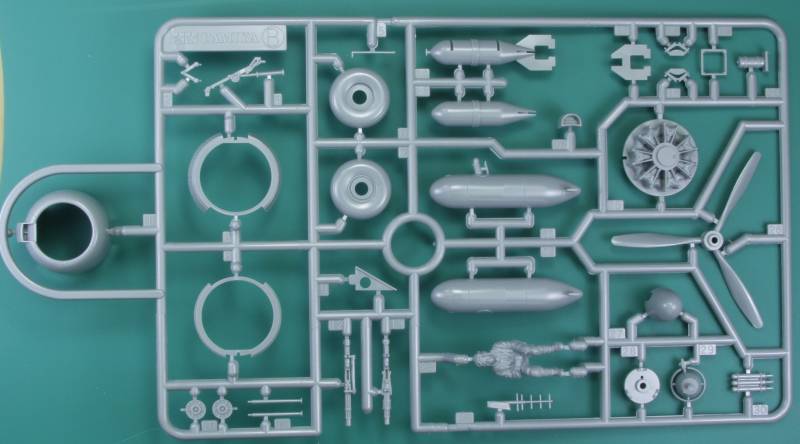
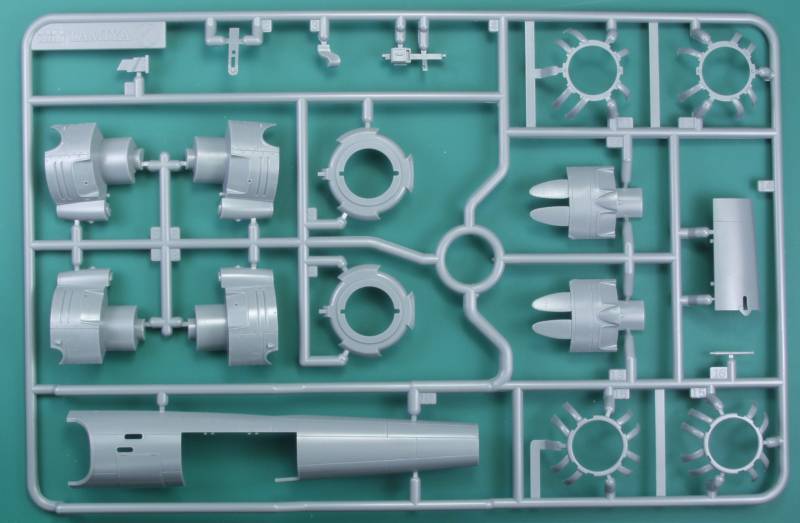
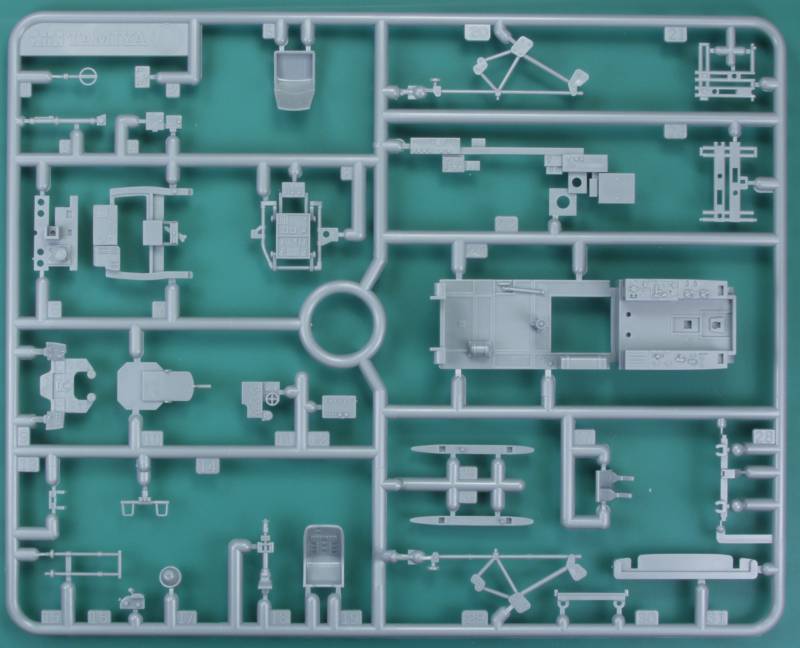
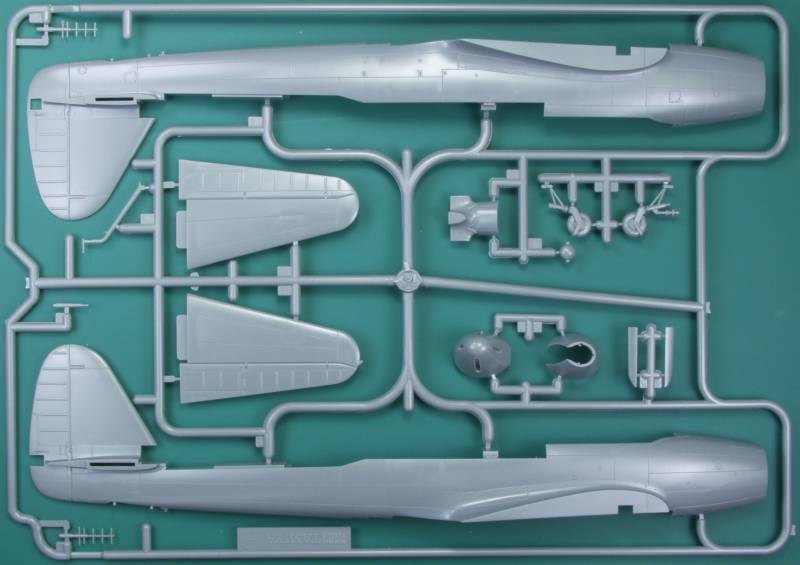
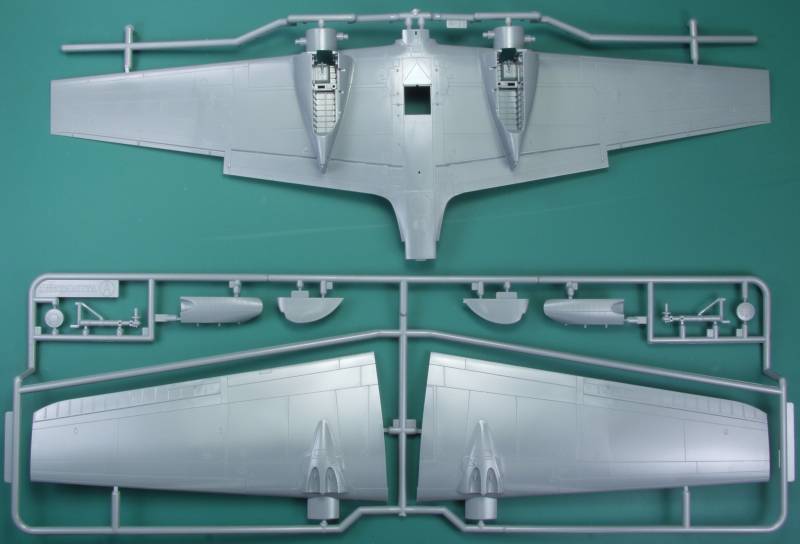
The Tamiya kit comes in one of their standard top opening two part boxes with nice artwork on the top. Inside the box one finds six sealed bags. One bag contains two interlocking sprues which contain the upper and lower wings and various in sundry parts. By having the sprues interlock it reduces the potential for shipping damage. A second bag contains two sprues, these are duplicate and contain the engine parts as well as bombs, drop tanks, crew members, armament and other parts. The remaining four sprues are individually bagged, with the clear parts bag contained in the bag with the fuselage sprues. The decals are also bagged,
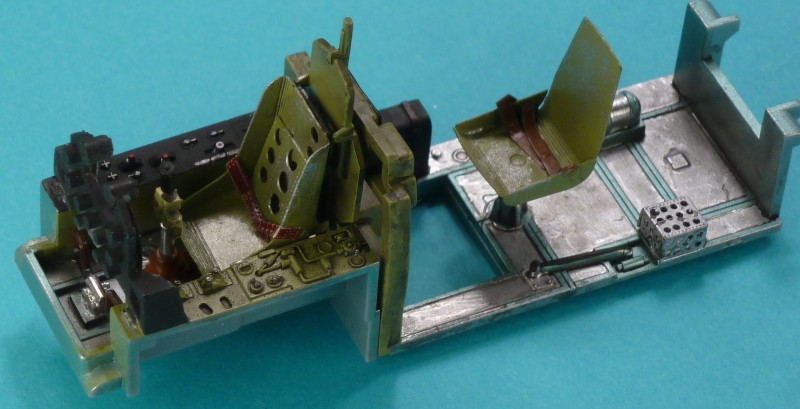
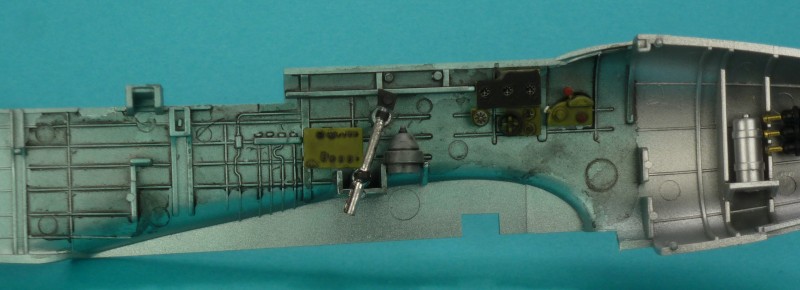
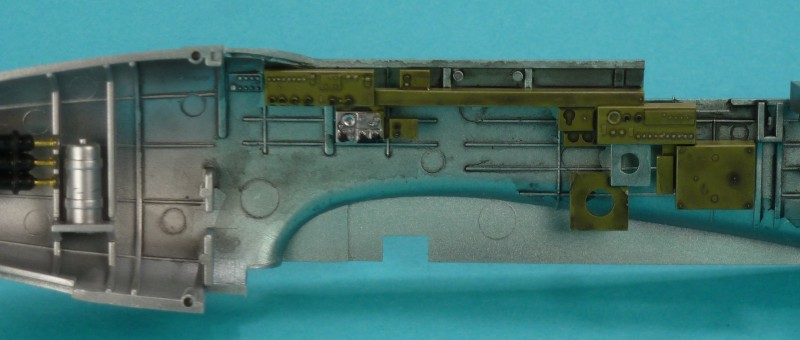
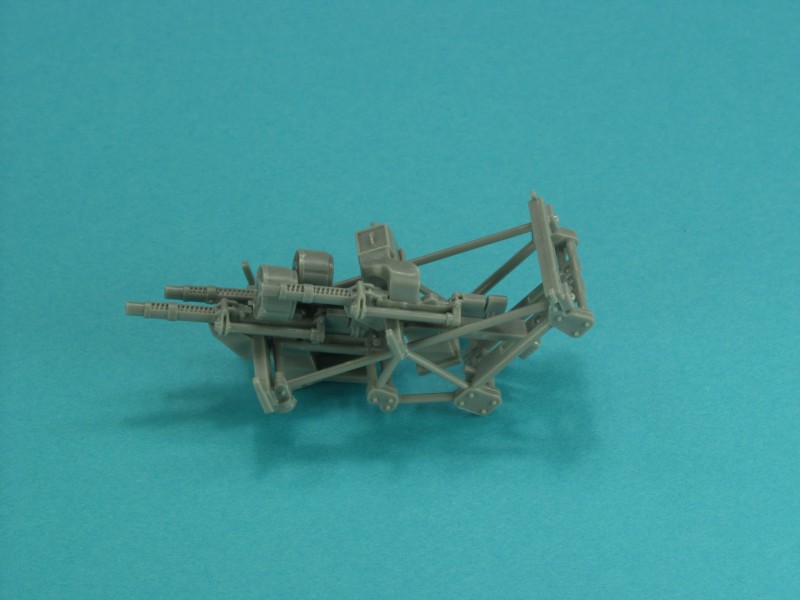
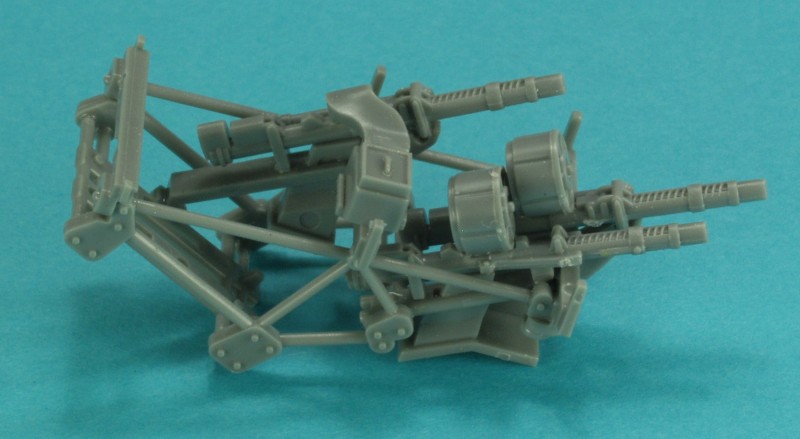
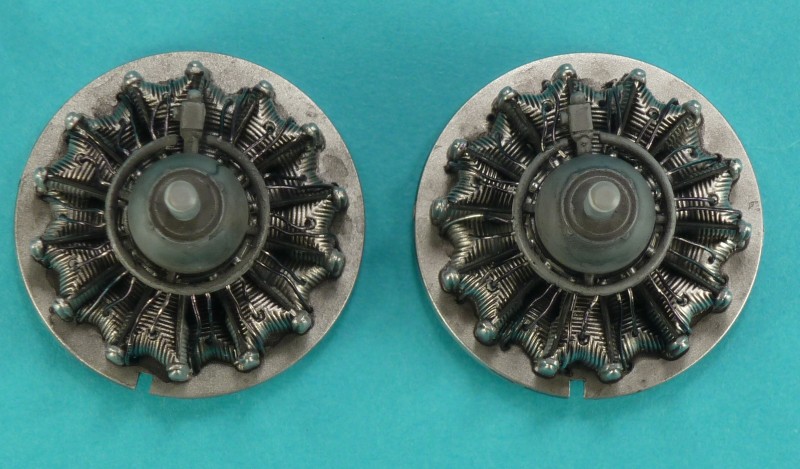
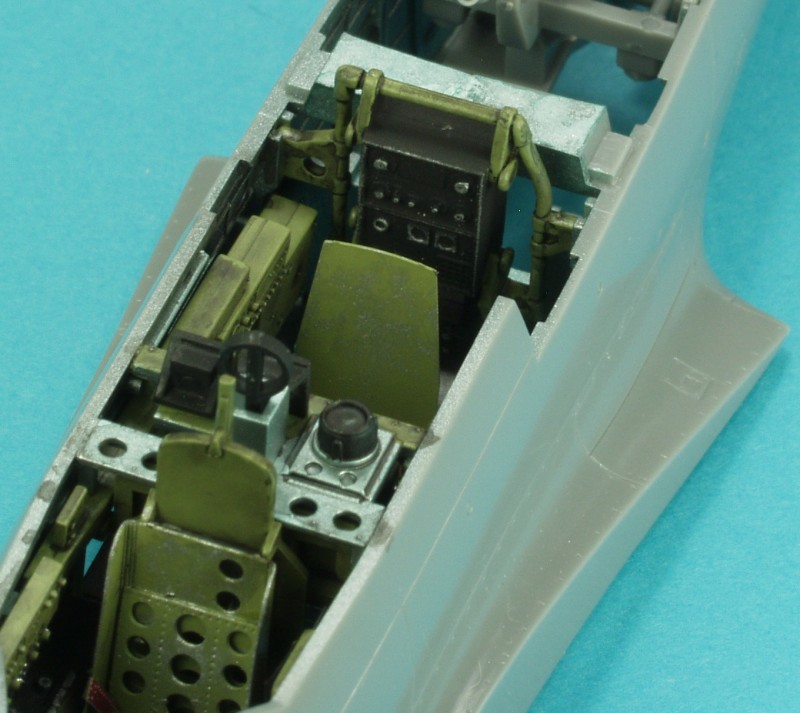
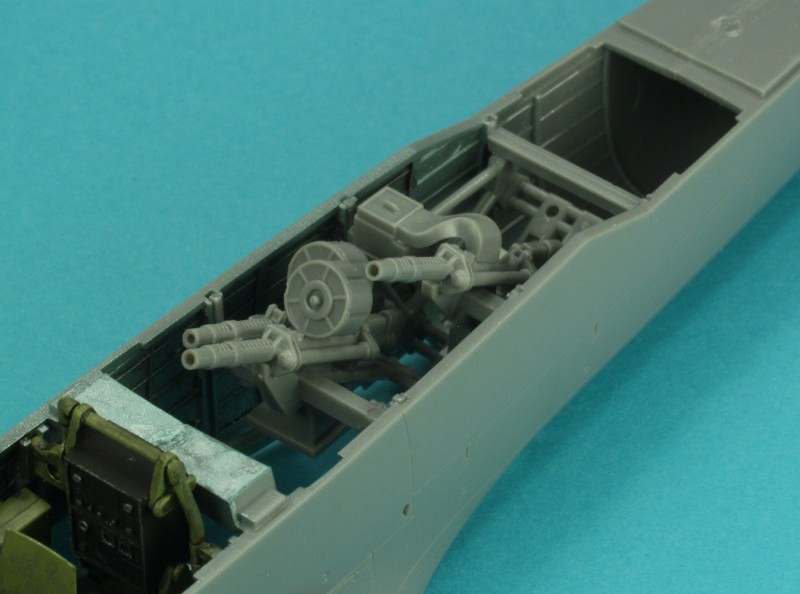
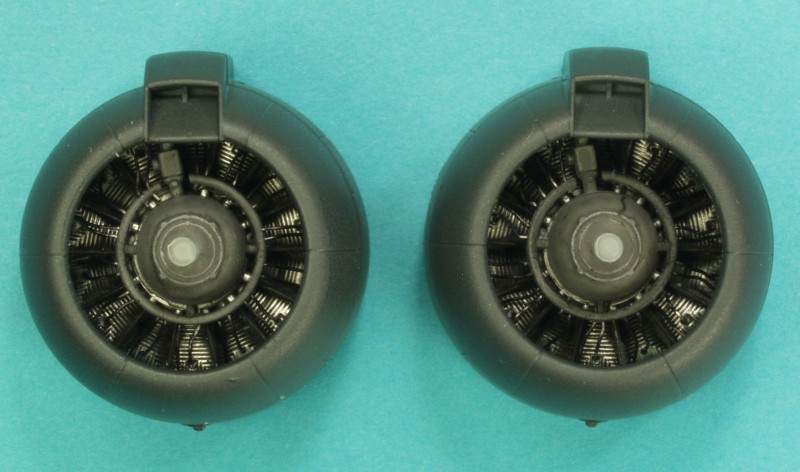
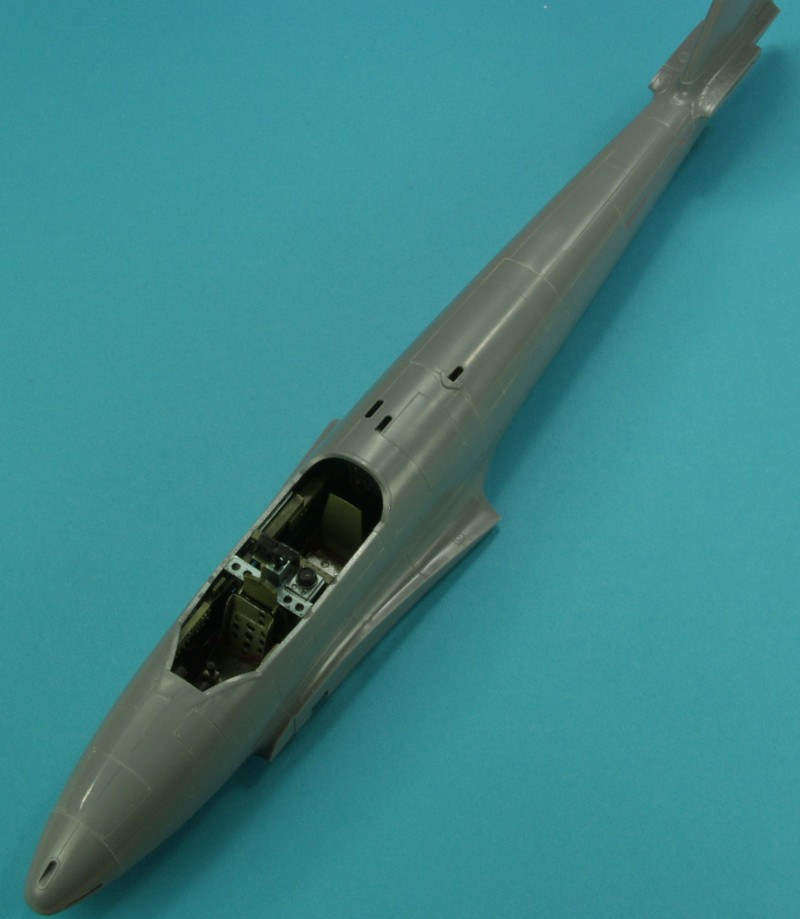
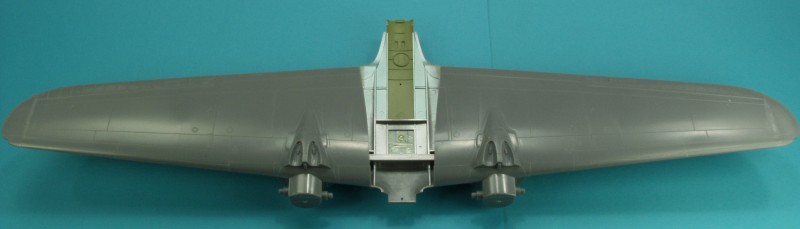
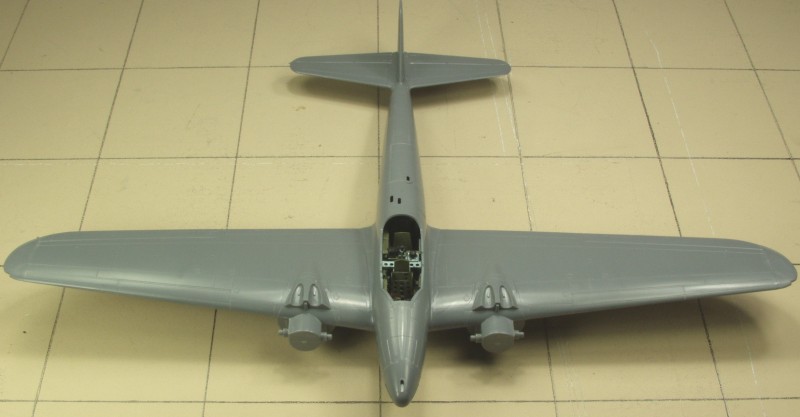
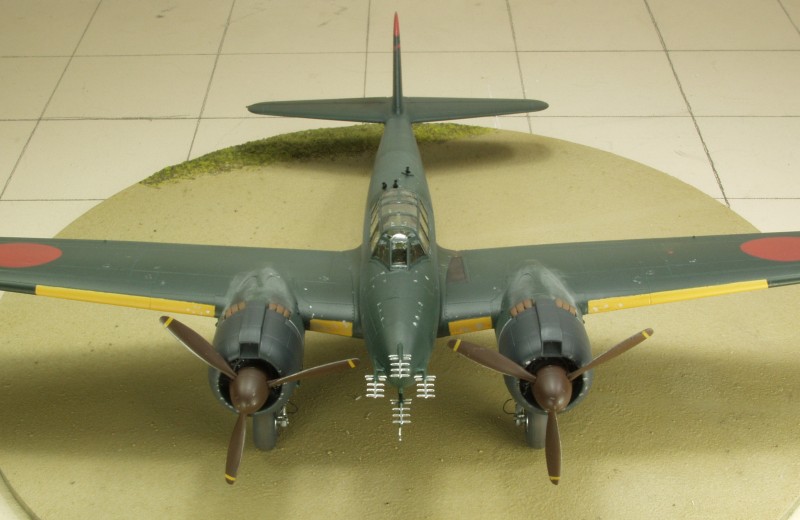
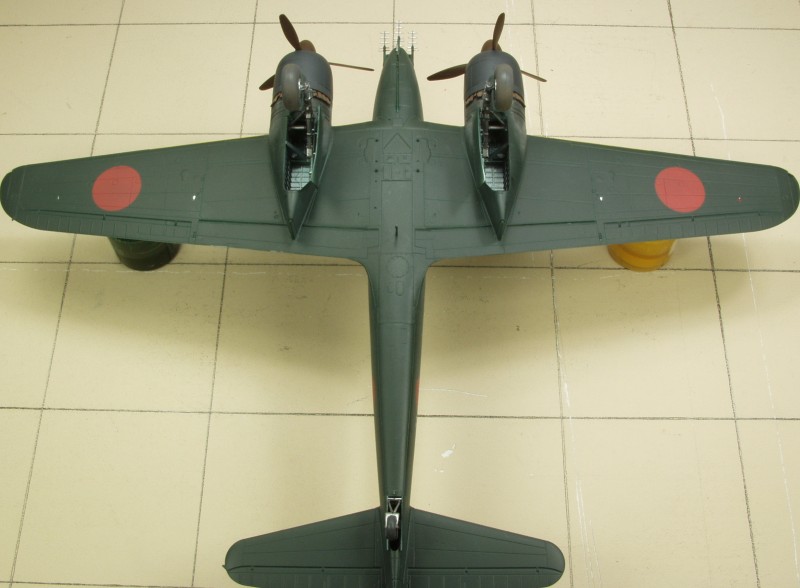
The parts are molded in a medium gray color and feature recessed panel lines and fastener detail as well as some raised detail as appropriate. After inspecting the major pieces the only surface defects found were a couple of minor sink marks on the fuselage opposite some of the internal molded detail. These are very slight and could be passed off as oil canning if you don't feel inclined to fill them. The control surfaces are all fixed and the fabric surfaces done very subtly. The landing gear bays are molded integral with the wings which is most impressive considering their depth and the level of detail included. There is both side wall and top structural detail as well as an oil tank for the engines. The ailerons are molded integral to the upper wings providing a sharp trailing edge. Disappointingly there are ejector pin marks on the interior of the fuselage where they will be most visible. Other locations include the gear struts although the inside of the gear doors are free of them and include some very nice structure detail. The engines are only minimally detailed but won't be all that noticeable behind the tight fitting cowls. The wheels feature separate hubs for the outside but the tires are not weighted. The two crew members are just so-so detail wise and are duplicates. The interior has a high level of detail, including side wall detail marred by the ejector pin marks. Both crew areas feature a great deal of add on detail and the 20mm cannons are also very well done. All together by my count there are 139 parts in gray, see photos below.
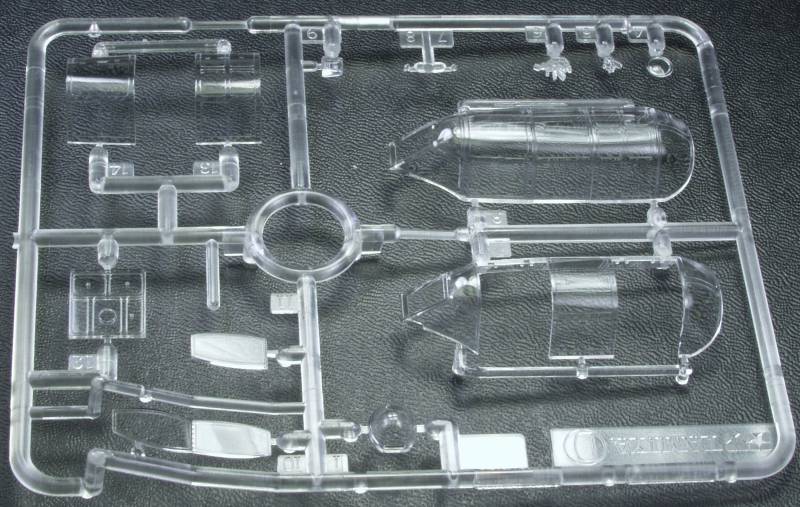
The clear parts are thin and clear and provide the option of being displayed open or closed. The closed piece on mine had a strange line on it that almost appear as if a hair had been on the die when it was molded. I'm not sure how it will show up after being dipped in Future. All together there are 14 clear parts, see photo below.
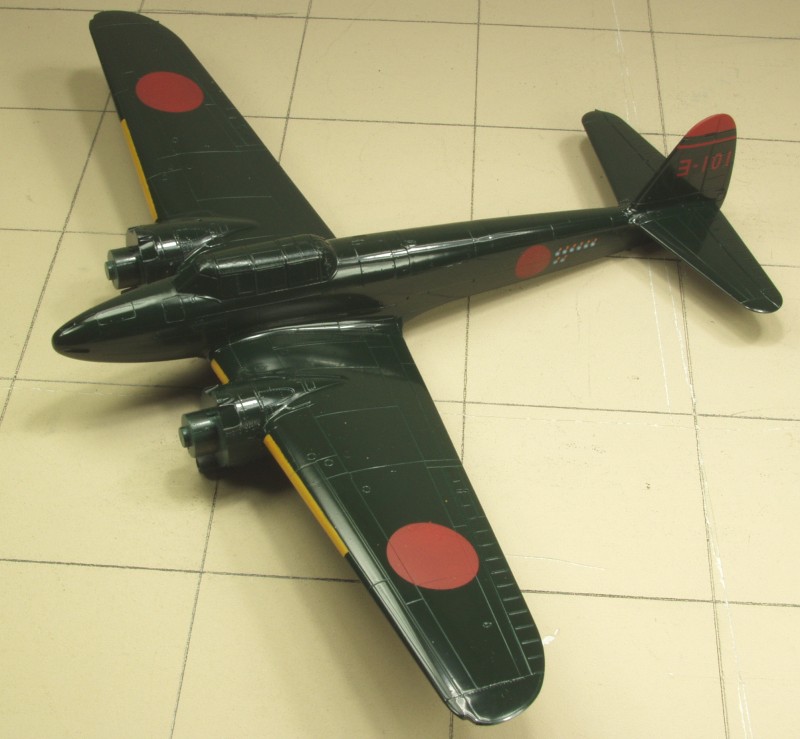
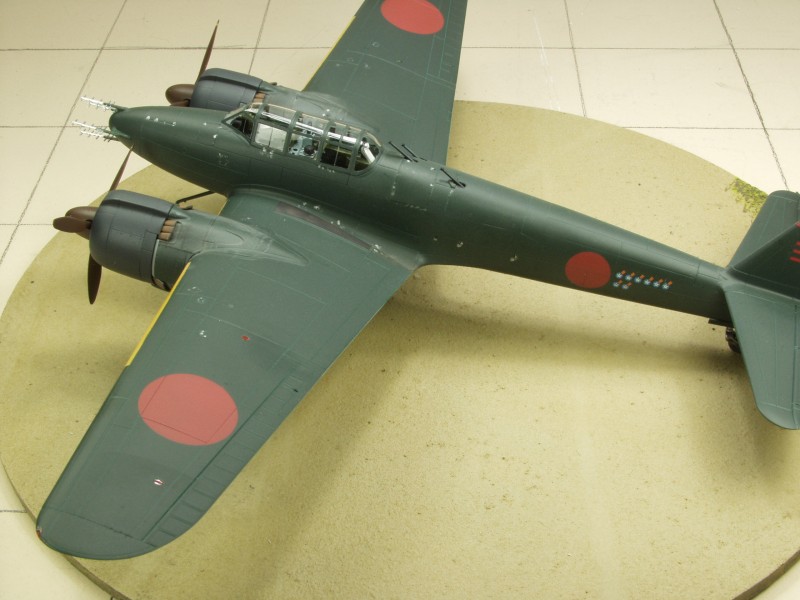
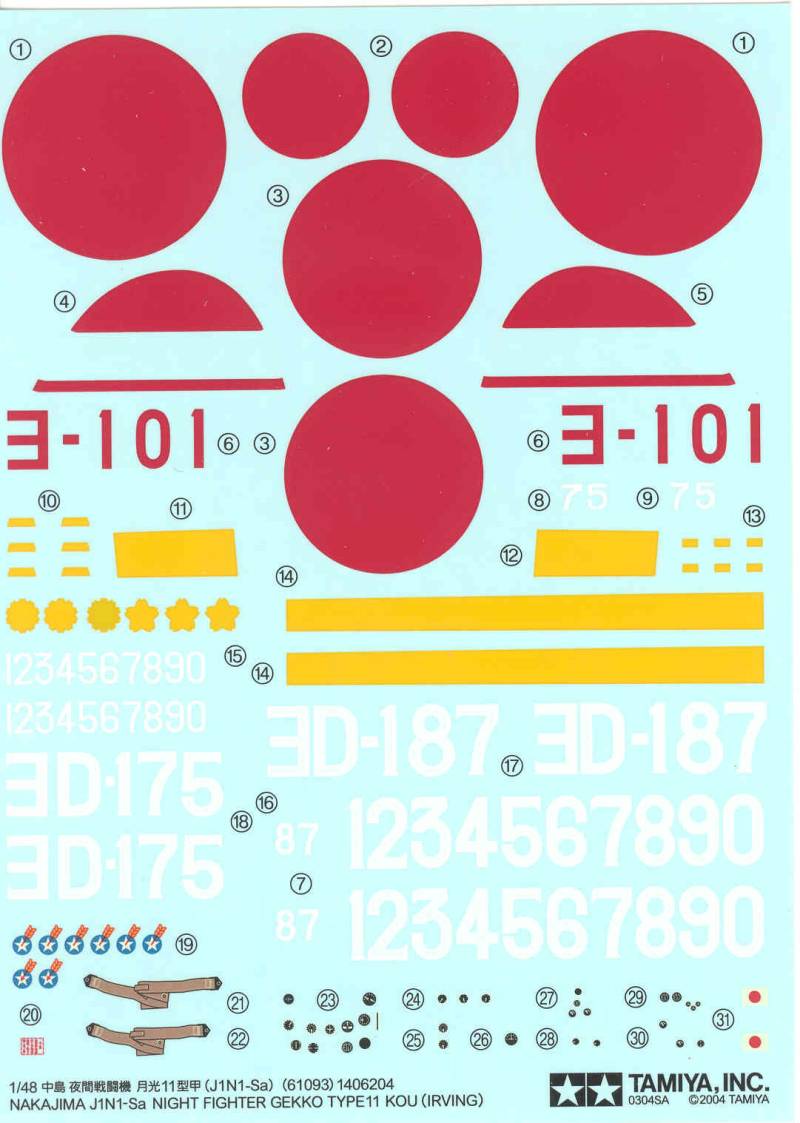
The decals include markings for three aircraft, two without the radar nose and one with. They look rather typical for Tamiya in that they are a bit thick looking. The sheet includes instruments for the various panels as well as seat belts. Only one stencil which I believe is the builders plate. Since none of the hinomuru have white surrounds, painting them might be a better option based on my experience with Tamiya decals. See photo below.
The instructions are printed on a largish sheet, fan folded to produce 10 panels. The front panel contains history in multiple languages as well as listing suggested tools. The second panel has the usual safety warnings, a color chart for Tamiya paints only and the first section of assembly instructions. Panels three through seven and half of eight are assembly steps and the other half of eight, nine and ten are painting and decal information. A second page was included which included more detailed history of the aircraft and its service usage as well as some diagrams showing the differences between versions, this being provided in both English and Japanese.
After Market Goodies
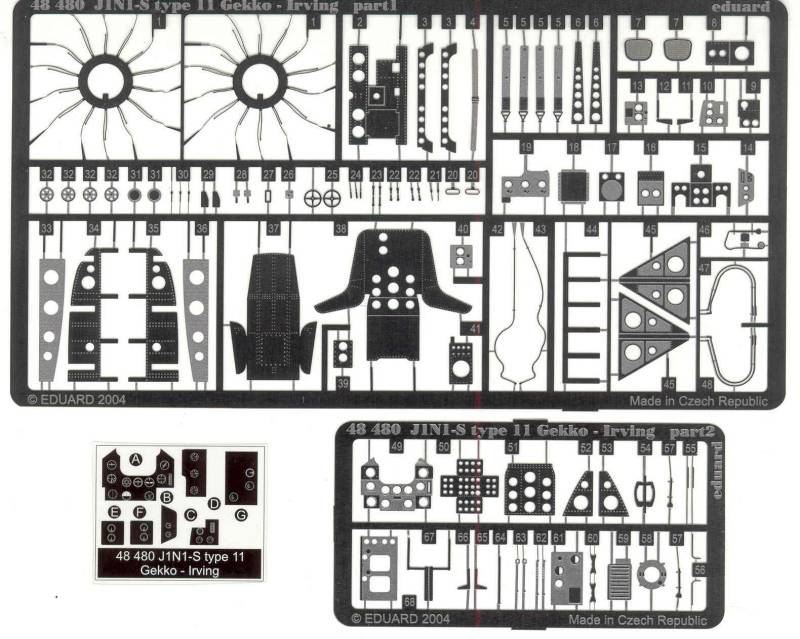
Eduard makes a Photoetch set [48480] It does not include any color but has the usual replacements for interior panels with film printed instruments and host of structural and engine details to jazz things up and test ones patience. See photo below.
Conclusions
While it is easy to say this is another typical kit from Tamiya, it really is. Well engineered, nicely appointed and the kind of build someone fairly new to the hobby can build and improve his or her confidence level as well as being a kit the veteran modeler can build as a break from dealing with the rigors of many of the limited run kits that they get suckered into building. Highly recommended.
Links to kit build or reviews
Build / reviews can be found here and a three part here, here and here and another in box review here.
References
Japanese Aircraft of the Pacific War by R.J. Francillon
Back to the Night Fighter page
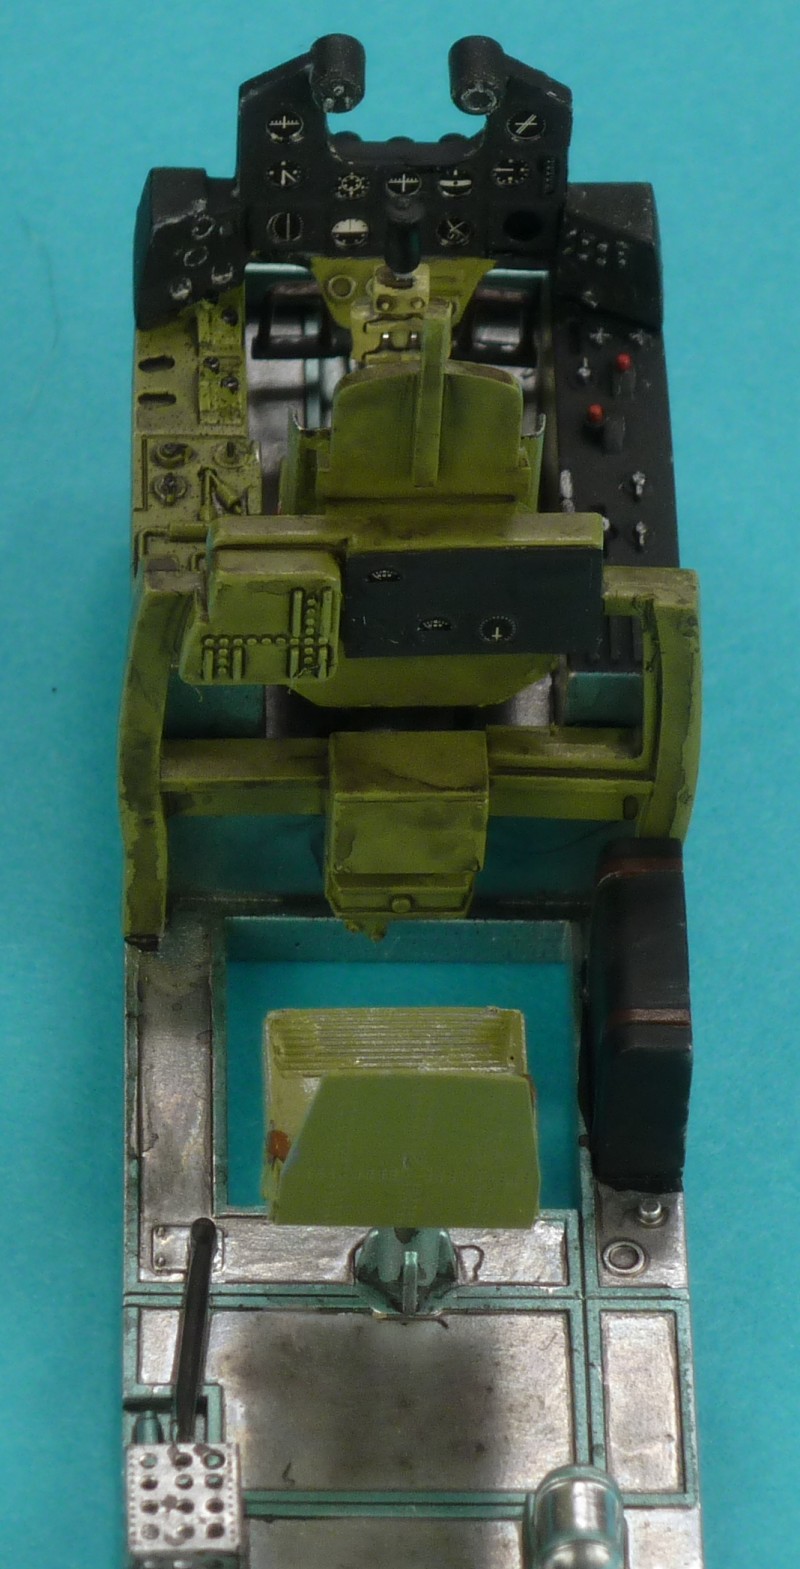
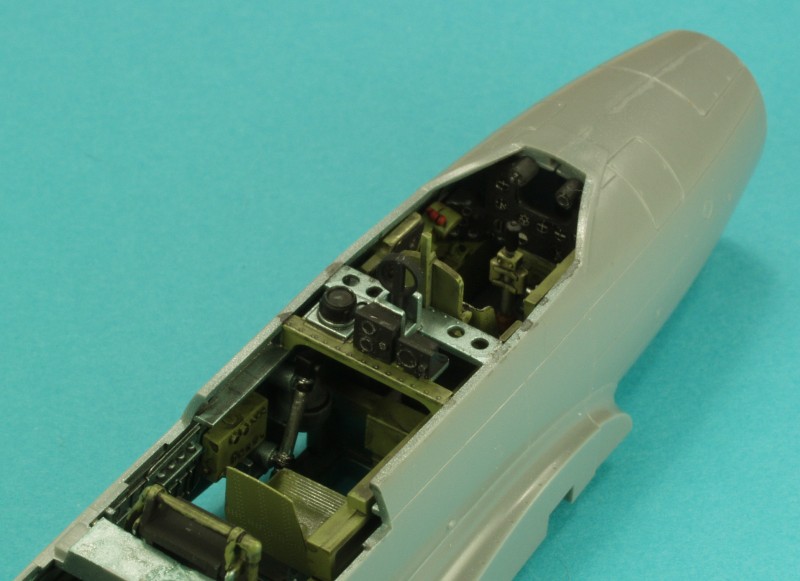
The Build
As with most kits the assembly
starts with the interior parts. I used the PE instrument
panel and seats and a couple of the smaller panels, seat
belts and one small enclosure but that was all, the cockpit
is rather cramped and adding a lot of other bling just won't
be seen.