
P-26A
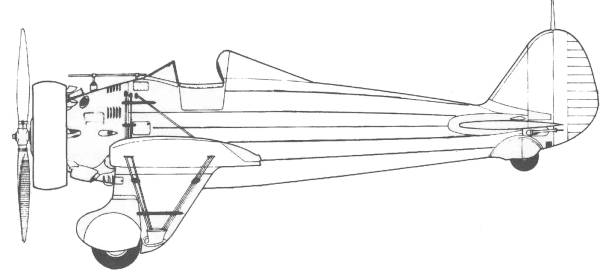
The P-26 was the first all metal production fighter designed for the U.S. Army Air corps. It was also the first monoplane design. The Boeing model 248 was designed as a private venture. Based on this design, in December 1931 a contract was signed with the Army specifying that they would accept three XP-936 pursuits for testing. Construction on these began in January of 1932. The prototype first flew on March 20, 1932. The second prototype was sent to Wright Field in Dayton, Ohio, for static testing. The third was sent to Selfridge Field, Michigan, for flight testing. Shortly after flight testing began the Army then purchased the two XP-936 aircraft and they were designated XP-26, later changed to Y1P-26 during their service testing and again changed later to just plain P-26.The P-26A was the first production model received by the Army Air Corp which took place in January 1934. When introduced into service one issue encountered was its high landing speed combined with its narrow track landing gear required great care to avoid ground looping. Boeing solved this problem with a short wing flap fitted to the underside of the wing. This proved to be so satisfactory that all P-26A's were retrofitted at the factory. This in turn lead to additional orders for P-26B and P-26C aircraft. These were nearly identical to the A with the major differences being in the fuel system and carburation system.
In 1938 the P-26 was deployed overseas. A number were sent to the Hawaiian Islands, the Philippines and the Panama Canal Zone. Hawaii received 25 P-26's which served with the 18th Pursuit Group, Panama received 26 P-26's which served with the 16th Pursuit Group. A total of 35 P-26A's went to the Philippines. Fourteen P-26's were still in Hawaiian service on December 7, 1941 serving as backup aircraft for the 15th and 18th Pursuit Groups based at Hickim and Wheeler Fields and were destroyed during the initial Japanese attack. The 26 in Panama served in defense of the Panama Canal. As later pursuit aircraft were sent to defend Panama, the P-26's were phased out of service.
The Kit
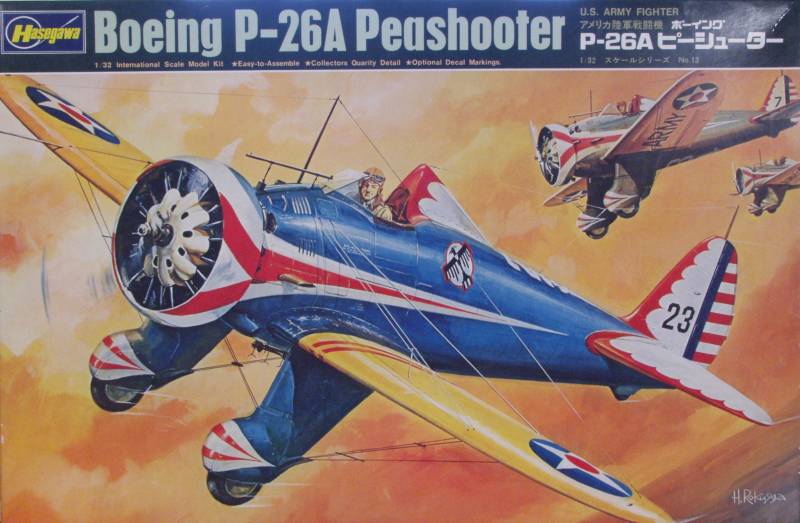
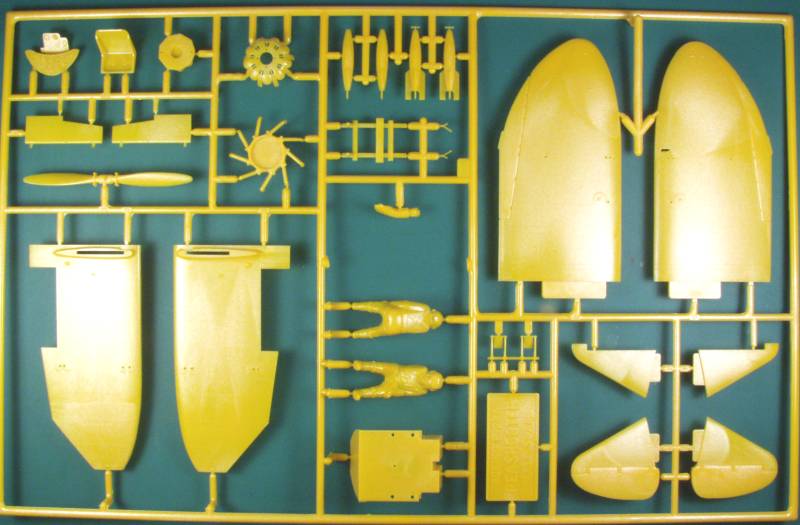
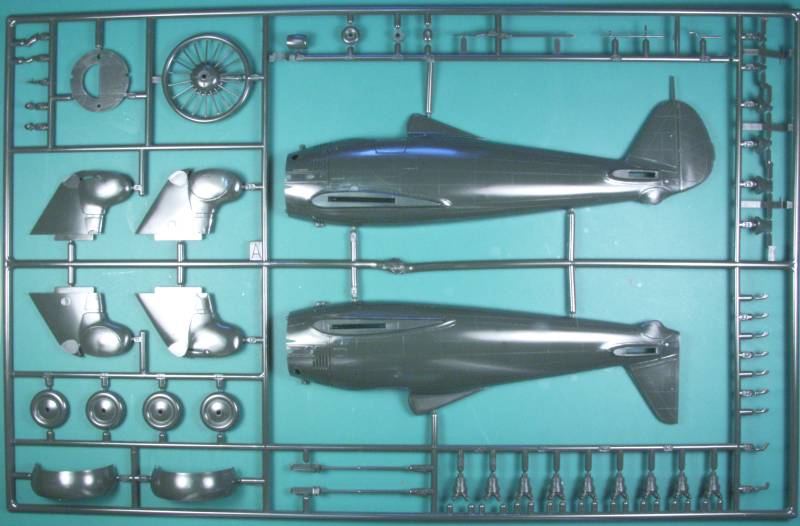
The Hasegawa P-26 comes in a rather large box considering the size of the aircraft with some what dated artwork showing several P-26s in flight. This kit was originally released almost 40 years ago and it's still the only kit of this aircraft in this scale. Inside the box there are two large sprues of parts, one molded in yellow the other in a dark olive color. Nothing inside the box was bagged and this was a fairly common practice at the time the kit was released. The kit is molded of the more brittle plastic that Hasegawa used years ago and features very fine raised rivet and panel line detail. While not the current favorite of modelers these days it is actually more accurate than the recessed detail in use today. The parts are very cleanly molded with very little flash. The parting lines on some parts are a little heavier than norm these days but there are not many to clean up. The surface of the yellow parts is smooth but not glossy and as can be seen in the photos they have flow marks in the plastic. I don't think this will be an issue once painted. The dark olive parts have a glossy finish. Other than the flow marks in the yellow plastic I did not find any surface defects in the airframe parts. The flight surfaces are all molded in the neutral position but the flaps are separate parts and could be positioned down. Both sides of the flaps are detailed but there is no wing interior detail in that area. The engine is nicely detailed with separate cylinder heads and the crankcase has push rods molded to it. There is an intake manifold for the rear of the engine and separate exhaust stubs. The cockpit is pretty basic with stick and rudder bar, a seat and instrument panel. There is both structure and other detail molded on the inside of the fuselage halves. The kit comes with a somewhat mediocre pilot figure that would probably look OK if given a decent paint job. I could not find any ejector pin marks any where that they would show. Holes for the flying wires are molded into the wings and fuselage. The kit includes two bombs and a rack for them. The kit contains 81 part in color by my count. See photos below.
There is only one clear part. the windscreen. It is a bit thick but reasonably clear and should look fine after a dip in Future. See below.
![]()
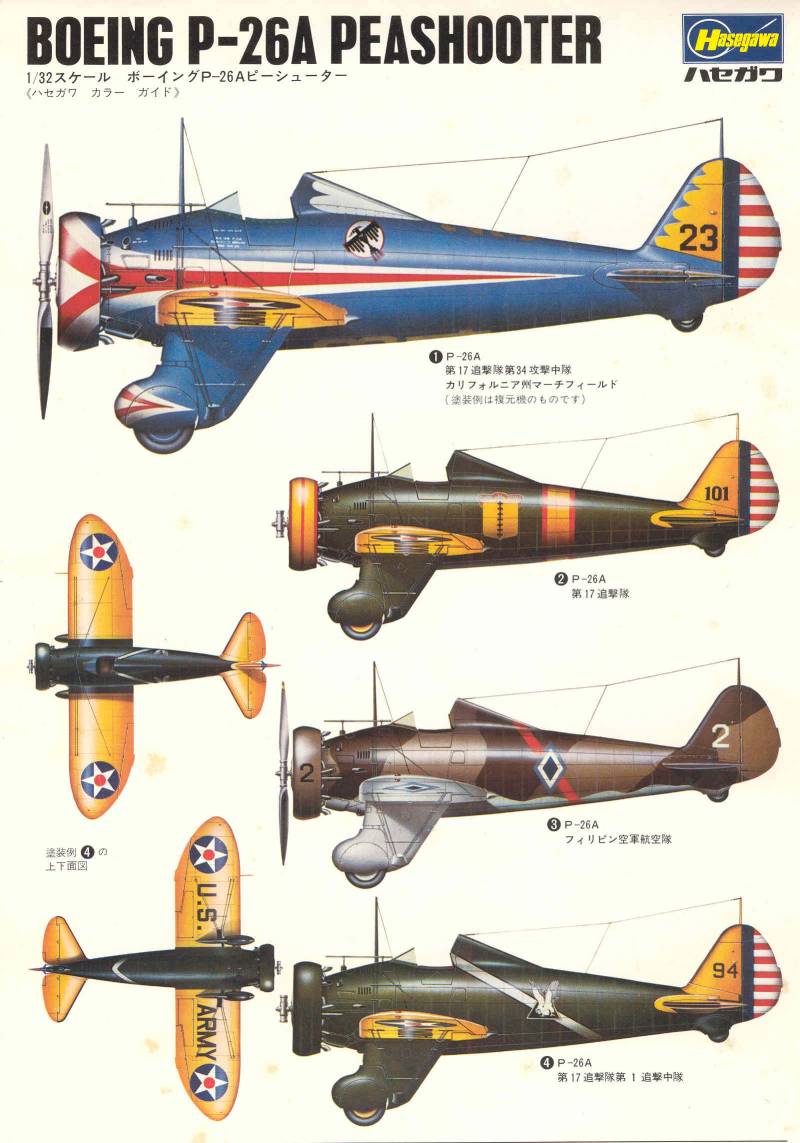
This kit has been in my stash well over 30 years and the decals have suffered from the effects of age. They included marking for four aircraft as shown below the decals on a color page supplied with the kit. Painting instructions are on the reverse side but due to the age of the kit, it's all in Japanese. The decals have a flat finish and a lot of extra clear film around them and as can be seen have yellowed quite a bit. I don't plan on using these when I build the kit. See below.

The instructions are printed on a long sheet folded in thirds creating what amounts to 6 panels. As mentioned above the instructions are all in Japanese except for part numbers. The first panel has what I assume to be a history of the plane with a couple of photos, the next three panels have the main assembly steps. Although the notes are all in Japanese the diagrams should be easy enough to enough to follow. These 3 panels also have photos of the painted pilot, assembled cockpit, assembled bomb rack with bombs and the completed engine assembly. Panel 5 has rigging diagrams and panel 6 has a parts map and a photo of the completed model.
After Market Goodies
Just recently Lone Star Models released a resin interior for this kit which addresses the lack of detail in the kit itself. The set is molded in tan resin and includes new side walls, a new cockpit tub with integral machine gun breech blocks a replacement seat with molded seat belts and a new instrument panel. There is some light flash that should clean up easily. My set included some duplicate parts and close examination shows some casting defects and the reason for the duplicates. The parts are nicely molded and I did fine a bubble hole here and there that will need to be filled. There are pour blocks to remove and some of the molded on interior detail in the kit will need to be removed. The kit's joystick and pilots head rest are used. The Instructions are printed on an 8 1/2" x 11" page and are pretty basic but should be adequate. See below.

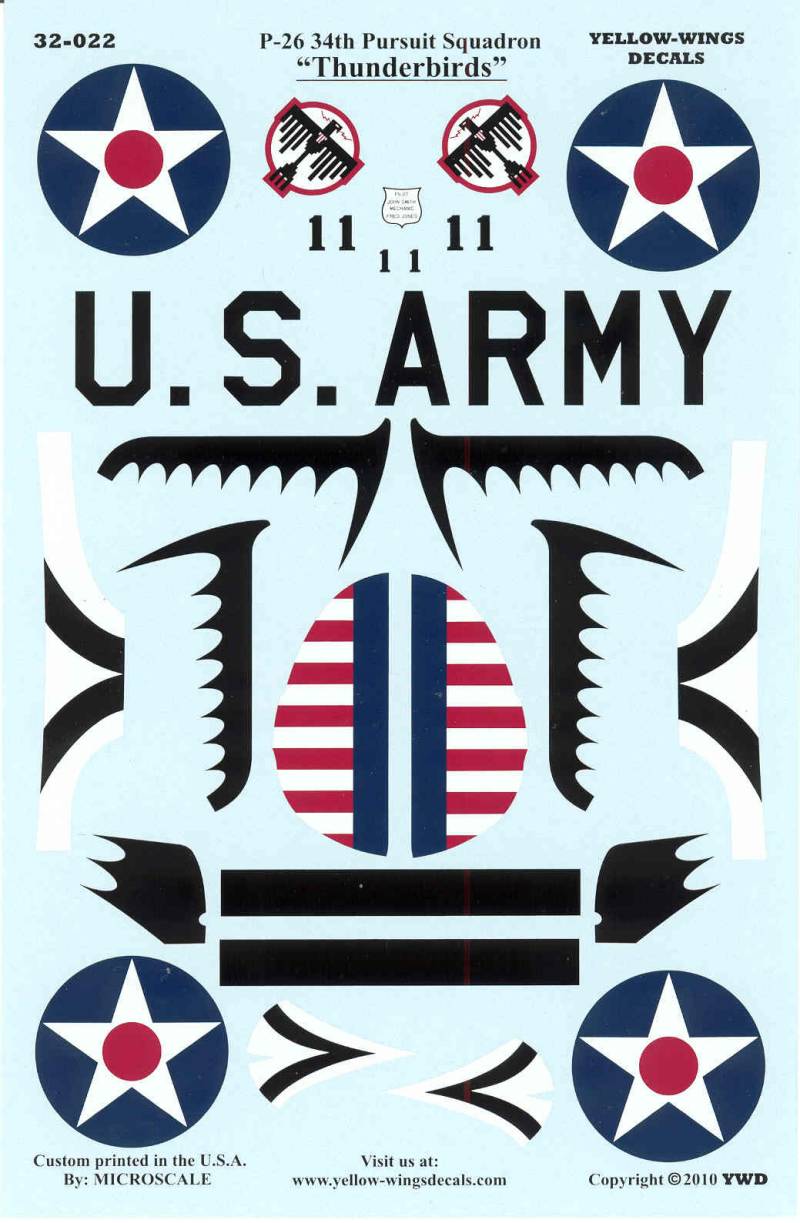
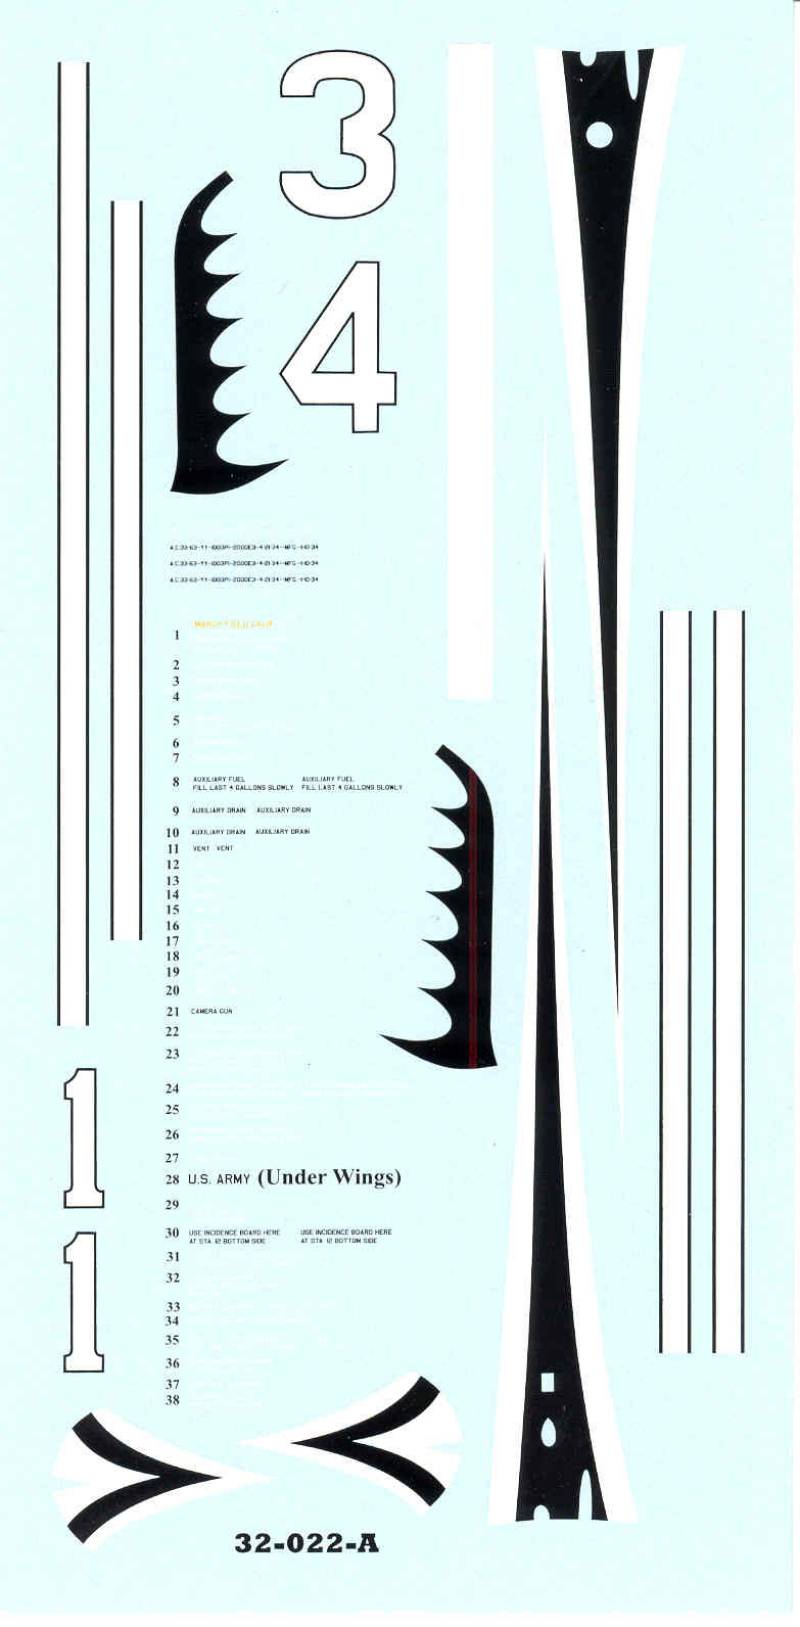
Since the kit decals were pretty much beyond use I opted for some after market decals from Yellow Wings. As their name implies they specialize in between war aircraft that were quite often painted up with yellow wings. The set I got is their number 32-022 and includes markings for 17th Pursuit Group, 34th Pursuit squadron. The sheet is printed by Microscale and as usual for them is extremely well done .The decals are in perfect register with a glossy finish and good color saturation. There is minimal excess film and the decals are very thin. The decals are split into two sheets, one with the main markings and the other has some of the stripes, numbers and a lot of stencils. The instructions with this set is extensive with one 8 1/2" x 11" page printed on one side and three printed on both sides. The instructions include painting information as well as diagrams for all of the decals and stencils. See below.
Conclusions
While certainly not a new kit this one has passed the test of time and by all accounts is easy to assemble and in this scale is the only option so it's nice that it is a good option. If you want more interior detail by all means search out the Lone Star set and if you want alternative markings check out Yellow wings. Recommended for modelers of with at least a little experience.
Links to kit build or reviews
A build can be found here.
References
Boeing P-26 "Peashooter" Aero Series # 22 by Edward T. Maloney
Back to the 1/32 U.S. Aircraft Page