
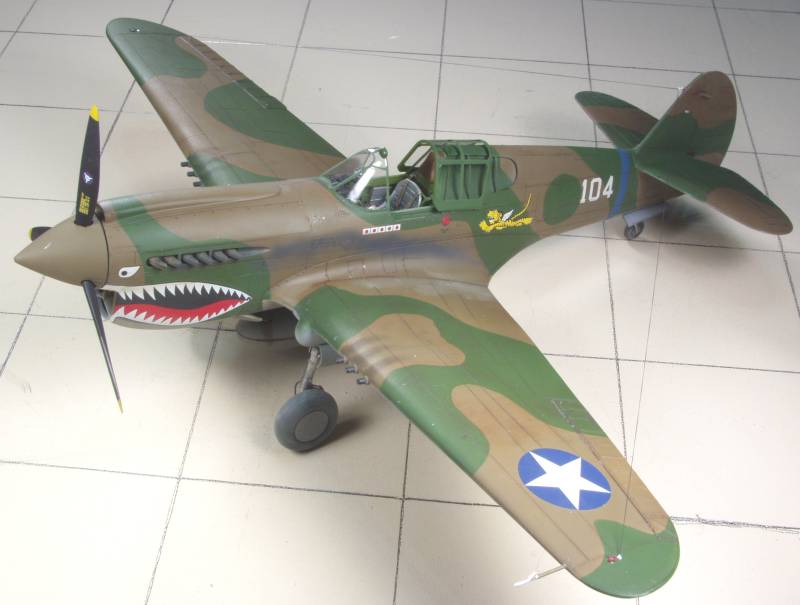
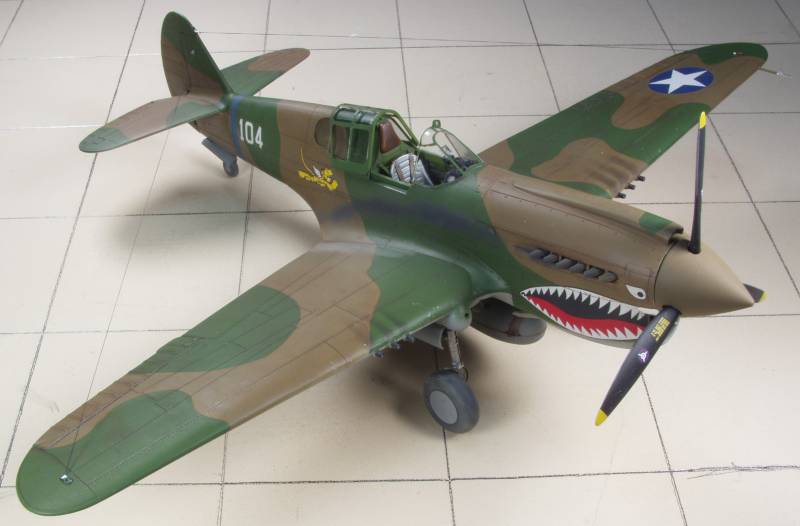
P-40E
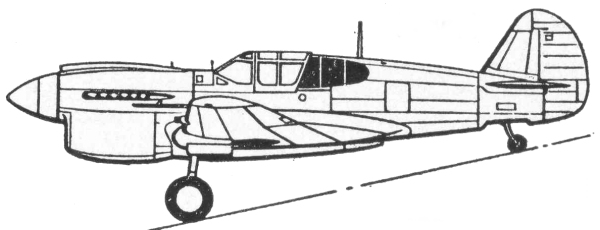
The Curtiss P-40 was the first American single seat fighter to be manufactured on a mass production basis. While it's performance was below that of most of its antagonists, this shortcoming was partly compensated for by its sturdiness which enabled it to withstand considerable punishment. It was also very adaptable and was available when it was needed. The P-40 was an adaptation of the P-36 reworked to accept the Allison V-1710 liquid cooled engine. The XP-40 was actually the 10th production P-36 with a supercharged 1,160 h.p. Allison engine. It flew for the first time in autumn of 1938. It proved successful in a U.S. army Pursuit Contest staged at Wright Field in May 1939 and was awarded what was at the time the largest ever production order for a U.S. fighter, totaling nearly 13 million dollars.
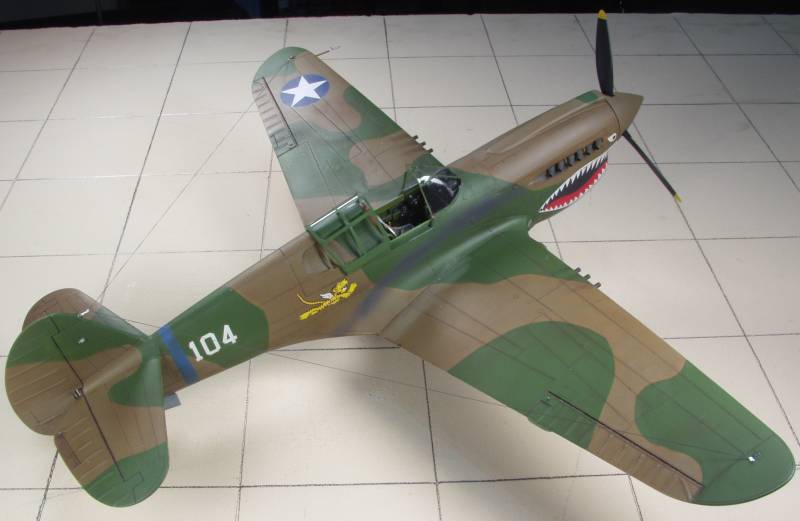
The first really combat worthy model was the P-40B (the A designation was never assigned), it benefited from reports of air combat in Europe and embodied armor protection for the pilot, an armor glass wind screen and self sealing fuel tanks. The U.S.A.A.F. only got 131 of the "B" models the rest of the over 1,200 built went to Britain, China and the Soviet Union. Minor production changes in 1941 including improved self sealing fuel tanks and revised internal equipment resulted in the P-40C, 193 of these being built. The first major design change came with the development of the p-40D. this had the Allison 1,150 h.p. engine which had the external reduction gear box shortened and raised the thrust line, enabling the overall length to be shortened by six inches, the nose cross section reduced and the landing gear shortened. the radiator was increased is size and moved forward. The fuselage guns were removed and the wing armament increased to four 50 caliber machine guns. with hydraulic chargers. Only 22 of these were supplied to the U.S.A.A.F. but 560 were ordered by the RAF. This variant paved the way for the first major production model the P-40E. Generally similar to the P-40D, the P-40E had two additional 50 caliber guns in the wings. 2,320 were built including a number of P-40E-1's with minor modifications. Both the RAF in the Middle East and the Flying Tigers in China had their P-40B's replaced with E's. The ground attack potential of the P-40E was much superior to early models and they continued to operate in the Far East with the U.S.A.A.F. while the RAF Kittyhawks spearheaded the attack against Rommel's Afrika Korps in the Western Desert, participating in the combat until the last German forces had been cleared from the tip of Cape Bon, then proceeding to Sicily and eventually Italy. In these battles they operated alongside similarly equipped squadrons of the U.S.A.A.F., four of which took part in the massacre of German transport aircraft off Cape Bon. Other p-40 squadrons in the Middle eastern theater were numbers 2, 4, and 5 Squadrons of the S.A.A.F.. Elsewhere these aircraft were being operated by the R.C.A.F., the R.N.Z.A.F. and the Soviet air Force.
Development of the P-40 continued beyond the "E" model but since this is the model covered by this kit I'm not going into those here. Good, bad or indifferent, the U.S.A.A.F. had only the P-40 available when it went to war. More than 14,000 P-40's were delivered during its six year production life. It will be remembered as a "best Second choice", but the majority of its pilots viewed it with affection. It rarely out performed the fighters it opposed, but it was one of the sturdiest fighters produced during the Second World War, and innumerable pilots owe their lives to its rugged construction.
The Kit
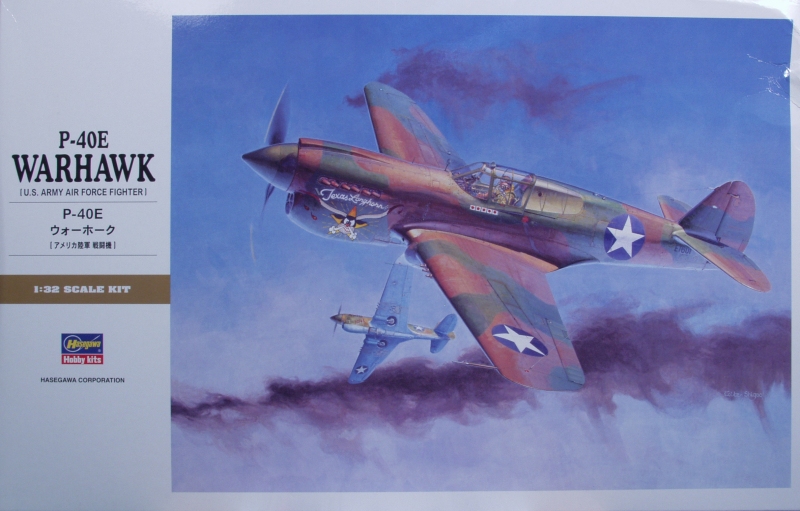
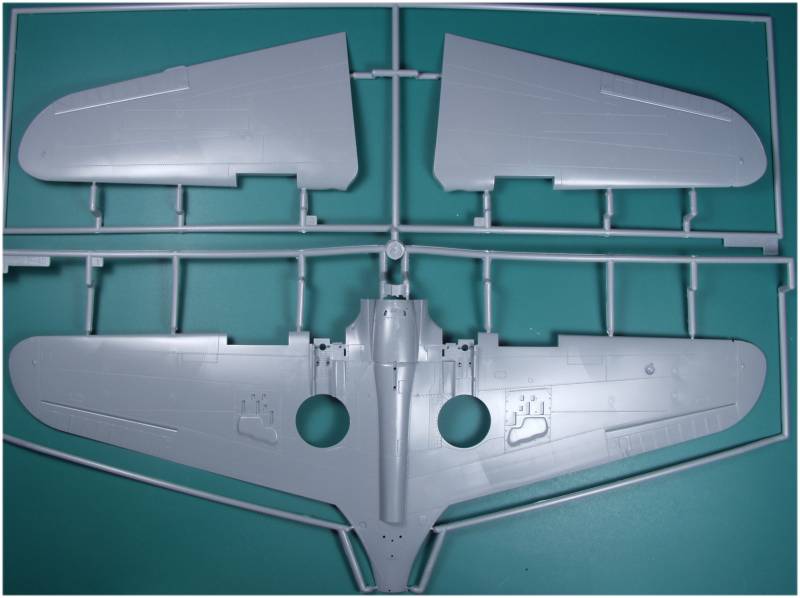
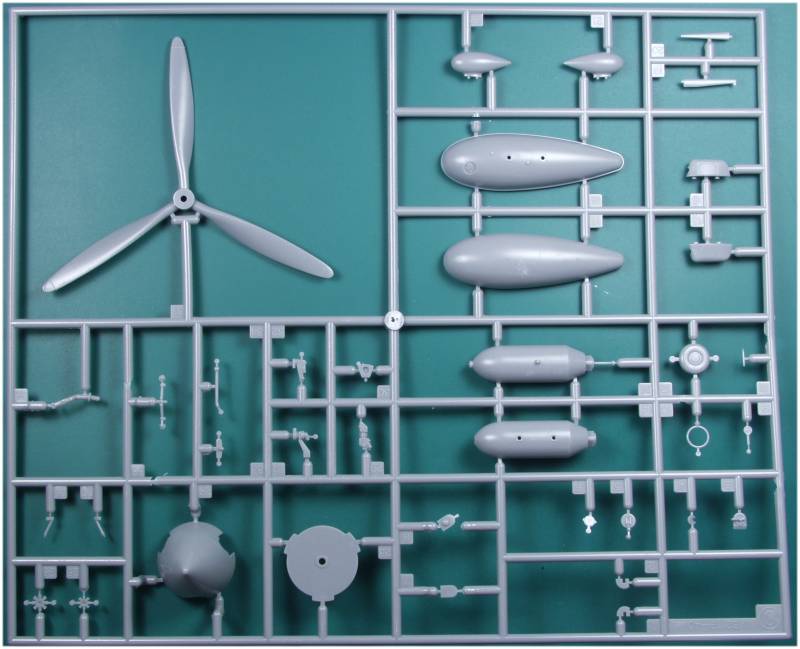
The Hasegawa kit in an appropriately sized top open tray type box with Hasegawa's typically nice artwork on top. Inside the box we find we bags of gray sprues and one with clear parts. All of the larger sprues are in one of the bags which includes the fuselage halves, upper and lower wing halves and the tail parts along with a lot of the smaller parts. The second bag has six smaller sprues and includes parts specific to this version plus two duplicate sprues with the wheels and tires, exhaust stacks and numerous other parts. As not uncommon with Hasegawa kits the molds have been made so as to provided the possibility of doing all the major versions of a type and this kit is no exception. This can lead to problems as will be discussed later on. The kit features recessed panel lines and rivet and fastener detail. The riveting is restrained and looks to be appropriately sized for the scale. The panel lines also look good for the scale and there is some raised detail where applicable including some raised head rivets in the gear wells. Some of the fasteners have screw slots in them. The surface finish is smooth and glossy and free of surface defects. There are some faint marks on the top and bottom wing halves from knock out pin spots on the back side of the wings and similar marks from ribs in the flap area but I don't think these will show once painted. My kit did have scuff marks where the sprues rubbed together during shipping but nothing serious. One reason i like to see sprues bagged separately.
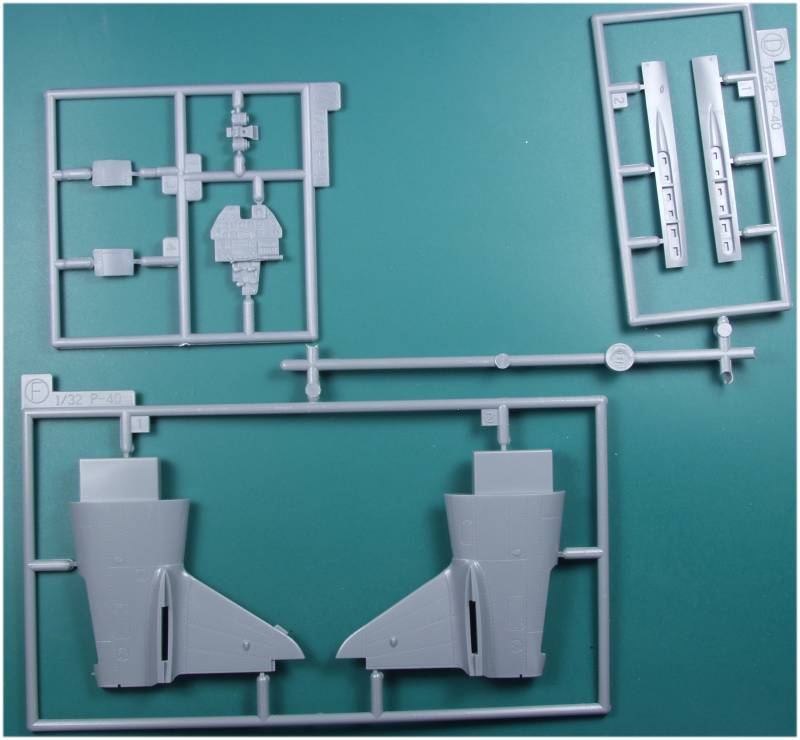
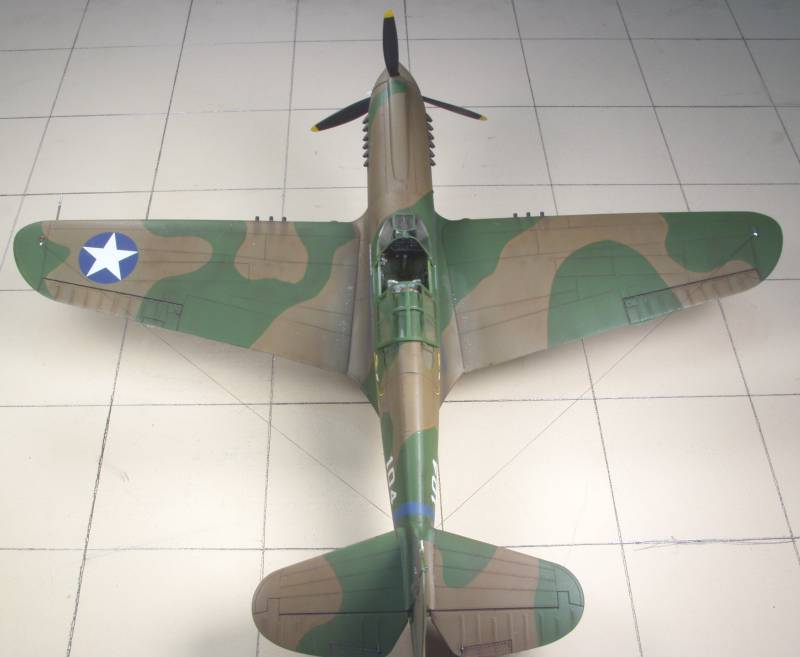
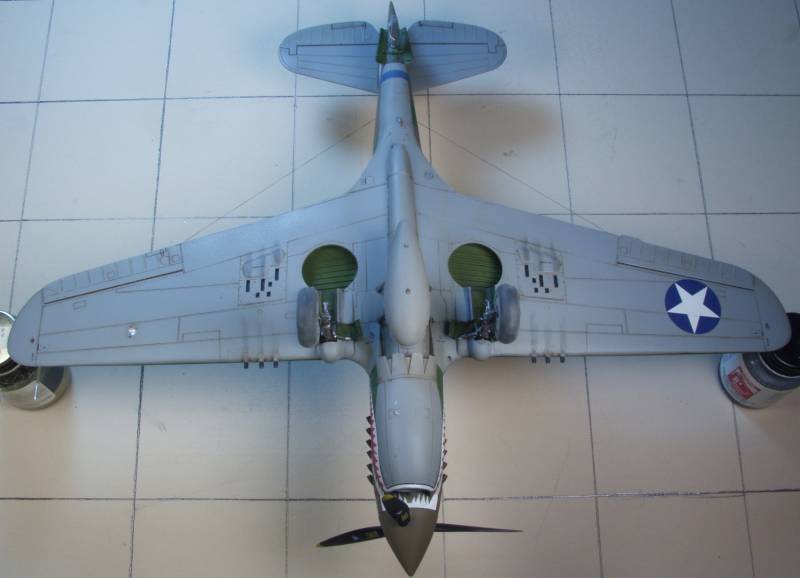
The control surfaces are molded in the neutral position, the rudder is a separate part but not intended to be positionable. The wing flaps are not separate so I'm not sure why structure was molded inside unless to just give the wing more strength. The fabric surfaces are depicted with rib tapes and no saggy fabric, the way they should be ! As mentioned earlier the kit is modularized to make different versions. For one thing the rear fuselage is split from midway between the cockpit and vertical tail to allow producing the versions with a longer fuselage. Also the area behind the cockpit is separate for versions where this space was left empty to improve the pilots rearward vision. All of the pieces are split left and right and assembling them separately and the instructions would have you to do can cause unnecessary seam work later on. Especially on the fuselage as the dividing point is not on a natural panel line and any seam there will not look natural. It is much better to assemble all of the left pieces and all the right pieces first so you can glue them from the inside and work on getting the seams minimized before assembling the fuselage halves. Another issue is that there is some surface detail that does not appear on all versions and in this case there are some inspection panels on the nose that are not there on the 'E' version and should be filled.
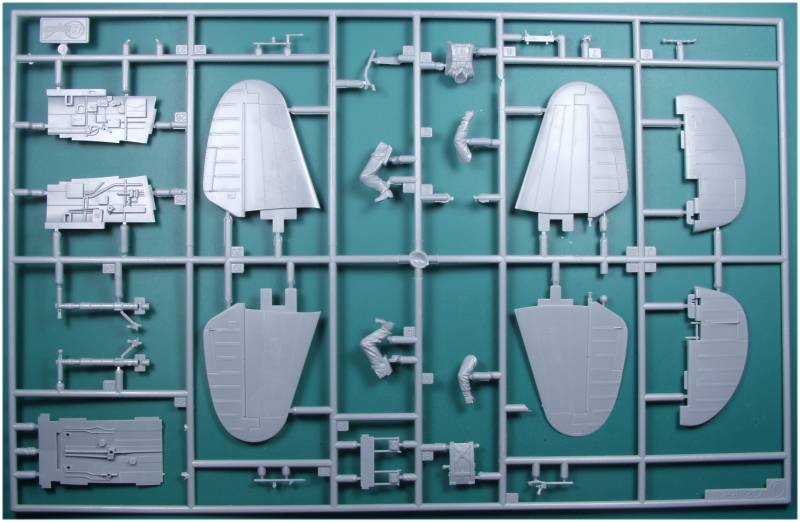
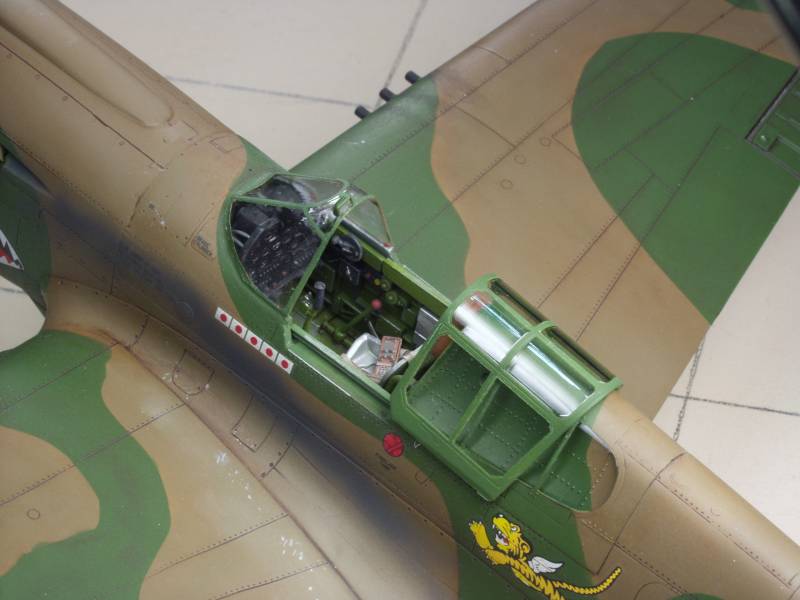
The cockpit is nicely detailed for all but the detail hounds and should please most right out of the box. There are separate side walls to which have nice molded on detail that just needs to be painted up plus there are additional items to add to them. With a separate floor, rear bulkhead and instrument panel all go together with the side walls to form the cockpit tub. The instrument panel is nicely done with both raised detail and recessed instruments with raised detail on the faces. Two different decals are supplied, one that covers the entire panel and another one that is clear with just the instrument faces. Sometimes these work well, some times they don't. There is a lot of raised detail to settle over on this panel so I'm skeptical !
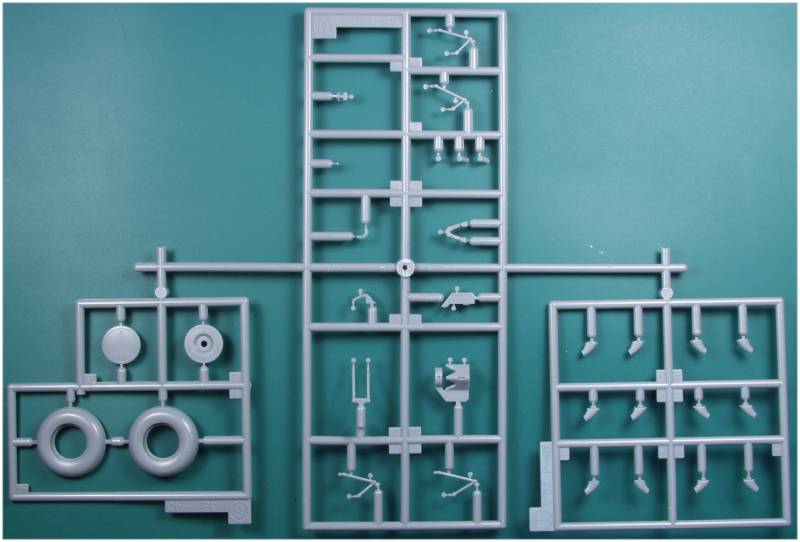
The wheel wells are built up from multiple pieces and attached to a wing spar which should insure a correct dihedral. There is no separate engine, just blanking panels where the exhaust stacks attach. The exhaust stacks are individual and made up of two halves each which seems like a lot of extra work.. Another place for fit issues is the area on the wing where the guns are located. These are supplied as separate inserts so some care will be required to make certain these fit well before trying to glue them. The navigation lights on the wings and tail are molded as part of the wing but clear parts are supplied for them so if you want to use them you will need to shave the molded ones off. The landing gear are nicely detailed and the wheels are molded in halves and not weighted. They have separate hubs. The propeller is a one piece molding and the propeller and spinner assembly includes a poly cap making it easily removal able is needed. The kit comes with an optional drop tank or bomb and a pilot figure. OK, lets look at that plastic.

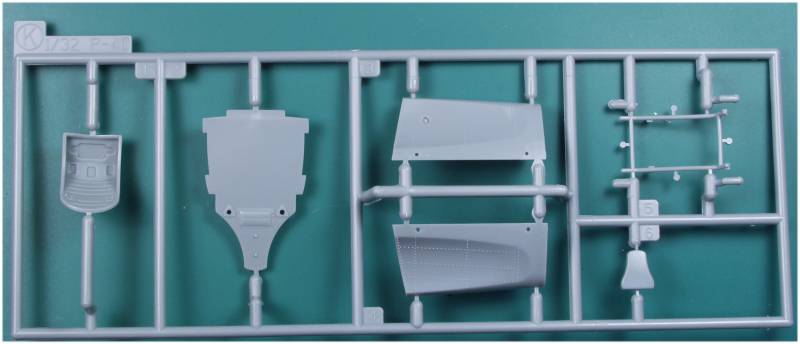
The clear parts are thin and reasonably optically clear. Two of the sliding parts are supplied, one slightly larger to fit over the turtle deck if you want to display it open. Both the front windscreen and the rear glasses have additional surface area on them that isn't clear which is nice it there are fit issues as you can take care of them with worrying about damaging the glass areas . There is one rub however, Hasegawa included in the windscreen an additional divider on each side that was not there on 'E' version. The artwork on the box top is correct but the kit part is not. Getting rid of it is some what of an issue since it is recessed but it can be sanded away and repolished, just takes a bit of work. Squadron does make a vacuform canopy but it's intended for the Old Revell kit and doesn't include the extra structure ahead of the windscreen that the kit part does so fitting it may be more work and more problematic than polishing out the errant frame lines. The red arrow in the photo below shows the errant frame line.
![]()
![]()
![]()
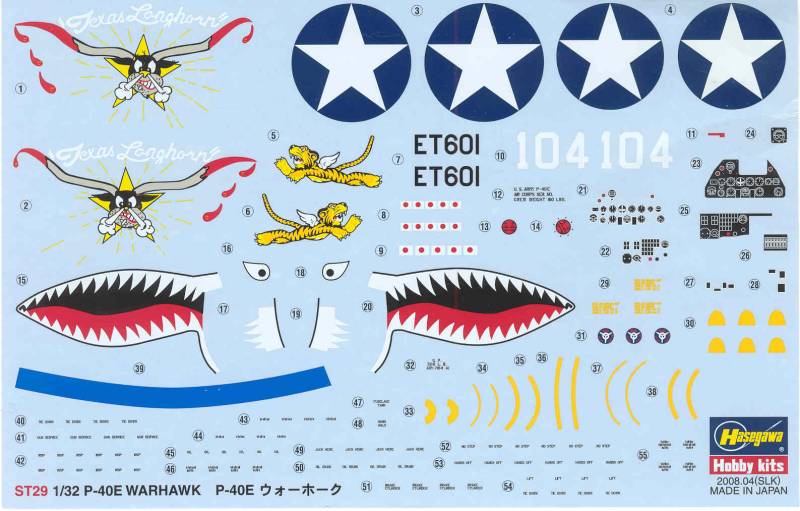
The decals sheet looks pretty good for Hasegawa, I'm not always impressed with them. They are in register have good color saturation and include marking for two aircraft, one for Lt. John D. Landers in New Guinea in 1942 and the other Major Eduard Rector in China in July of 1942, both are camouflaged in dark earth and dark green over neutral gray. You might want to check other references before going with the paint recommendations as the reference listed below has the "Texas Longhorn" as being medium green and sand over Azure blue. A good supply of stencillings is supplied and a lot of the decals have more excess clear film than I would prefer.
The instructions are in the form of an A4 sized booklet in portrait format consisting of twelve pages and is stapled together. Page one has a very brief history and a couple photos of the finished kit, page two has a parts map and color chart with GSI Creos Aqueous Hobby Colors and Mr. Color paints as well as generic color names. Page three has an icon chart at the top and starts the assembly diagrams which continue through page nine in sixteen steps. Pages ten and eleven are painting and marking instructions and page twelve has multilingual safety warnings and generic decal installation instructions.
After Market Goodies
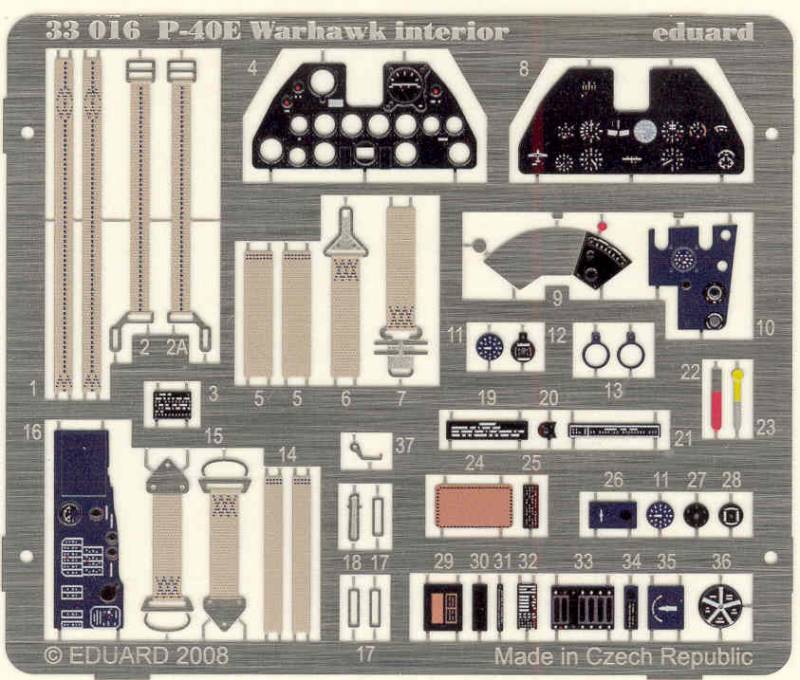
I opted for the Eduard Zoom set primarily for the instrument panel as I wasn't sure how well the decals would work and has seat belts and shoulder harness and some other gizmos and a placard or to busy up the interior.
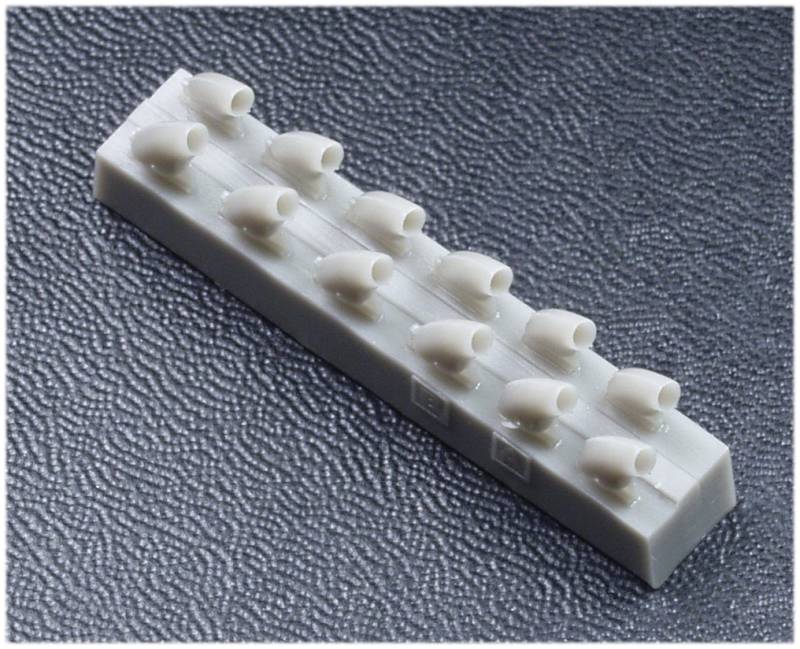
I also decided to use a set of Quickboost exhaust stacks (their number 32159) to save myself the grief of gluing together a dozen of them.
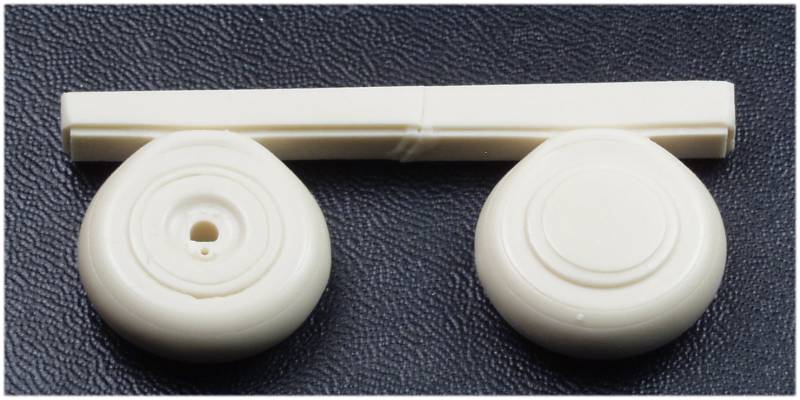
I also opted for a set of Squadron weighted wheels ( 32015) but I'm not sure whether I'll use them. They will actually be more difficult to paint and don't offer anything detail wise other than being weighted, a bit too much as usual.
Conclusions
Build reviews seem to be a bit critical of the over all fit of the kit but I suspect a lot of it deals with the breaking up of the fuselage for multiple versions and most of this can be avoided by assembling them with the fuselage halves and then assembling the halves rather than trying to fit them later. Check out both of the build reviews listed below, the first offers a lot of good pointers on assembling the kit and fixing the canopy issue and the second one, although it's a different kit version, offers a tip on dealing with the upper fuselage to wing join. Other than that it is nicely detailed right out of the box and with a little care modelers of most skill levels will be able to produce a nice model.
Links to kit build or reviews
A build / review can be found here and here.
References
Curtiss P-40 in Action by Ernest R. McDowell
Back to the 1/32 U.S. Aircraft Page
I did not take any in progress photos on this one so I will just make a few comments on my experience building the kit. In spite of what was said concerning polishing out the extra divider in the cockpit glazing, I still managed to ruin mine and ended up using a vacu formed one from True Details that was made for the old Revell kit. It took a lot of work to get it to fit and if I had to do it over again probably wouldn't bother with it and live with the error. The most laborious part of the build was blending in the joint where the rear fuselage meets the forward fuselage. Since this doesn't occur on a panel line it seemed to take a lot of work especially replacing panel lines and rivet detail. Ditto on the wing inserts for the machine guns. Some builders complain about a gap at the wing roots but when I glued these I pulled them up tight by bending the wing tips up using tape across the top of the fuselage to hold them, this exaggerates the dihedral but when dry the plastic relaxes and pulls the plastic at the wing roots out a bit and fixes the dihedral where it should be. The resin exhausts were worth their cost and saved a lot of time over the using the kit parts. The rest of the kit went together well but on my kit the round caps forward of the wing at the wheel wells did not fit all that well and it was a difficult area to fill and sand. I did not use the True Detail wheels as they appear too flat for my tastes. The PE set did not include the ring sight and in this scale the solid molded one supplied with the kit just didn't look right so I left it off until I can find a photo etched one. The decals worked well although the shark teeth were a struggle and took multiple coats of Micro-Sol be for they finally settled down. As with most kits there is always some things that don't go as well as one would like and this one was no different but over all I'm pleased with how it came out.

Updated 3/26/15