
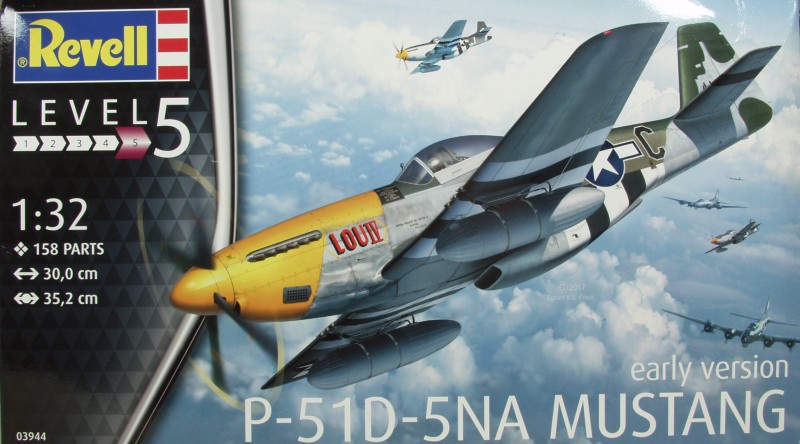
P-51D-5NA

The
North
American P-51 is one of the most iconic aircraft of WWII and as
such needs no introduction here. Information is available in
legion
from both printed matter and the internet so I'm not going to
waste
bandwidth here. The kit represents the -5NA version which was an
early
variant and lacked the dorsal fin which was added to later
versions to
compensate for the loss of keel when the rear fuselage was cut
down for
the bubble canopy. Some early models had this fin retrofitted.
The Kit
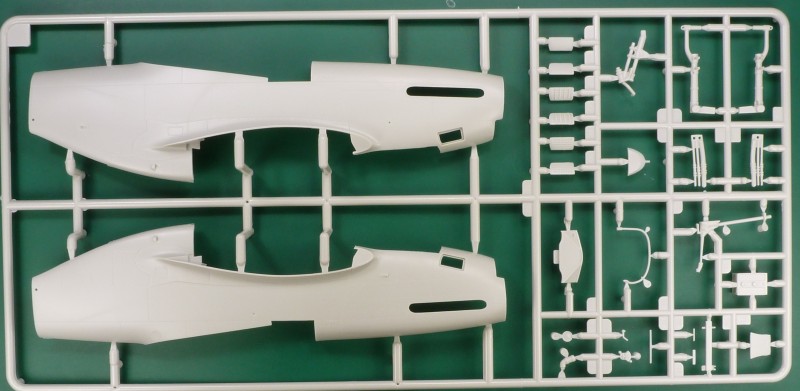
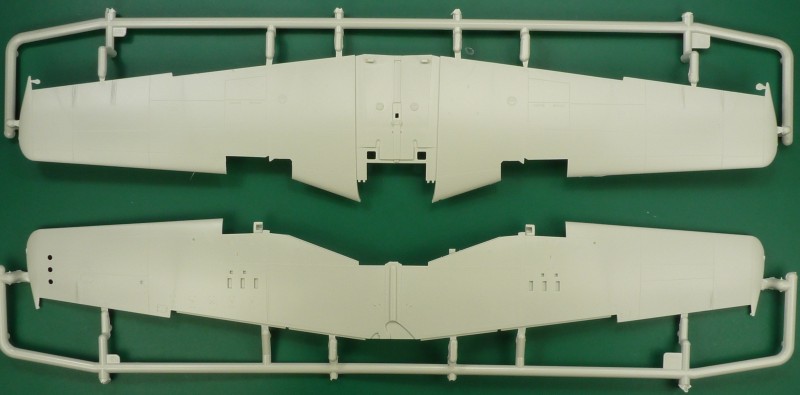
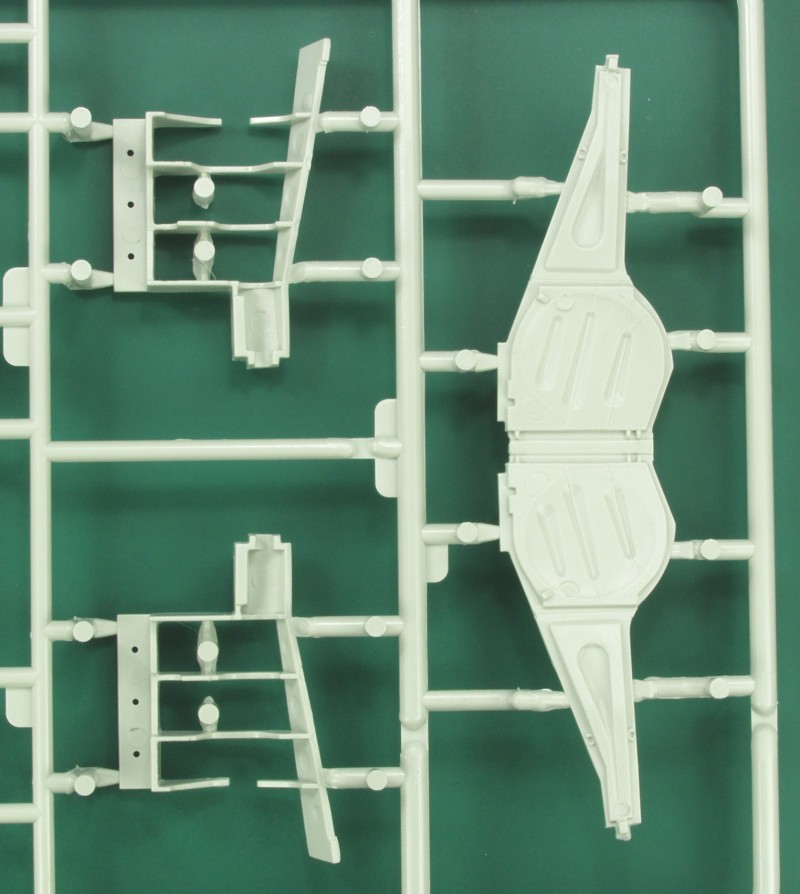
The Revell P-51D comes in a large end flap style box that everyone loves to hate. Inside the box the sprues are divided into four groups, each in their own separate bag. The kit is molded in a light bluish green color. Overall the parts are crisply molded with only a hint of flash. That said in a few areas the detail is a bit softer than might be seen on a Tamiya kit but still quite acceptable for most. Mold alignment is good and there is only a minimal amount of mold work to clean up on parts. Surface detail is provided with recessed panel lines with a minimal amount of recessed rivet and fastener detail. The panel lines are consistent and a good size for the scale. The surface of the parts is smooth and has a matte finish. There are a few surface anomalies such as a light sink mark that runs down the center of the flaps. This seems to vary some from kit to kit as mine weren't as bad as some others I have seen. The fuselage is broken into two halves which indicates that a some point a later model with the dorsal fin will be released. The control surfaces are molded separately and can be posed in positions other than neutral is desired. Unless I have over looked something it appears that all ejection pin marks have been located where they will not be seen. No separate service panels have been molded but the air intake on the front cowling has been molded separately and you have a choice of the three different styles that were used. I understand that the louvered panel was only used on British Mustangs. The fabric surfaces are nicely represented and not over done as seems to be common. Enough verbiage lets look at the parts.
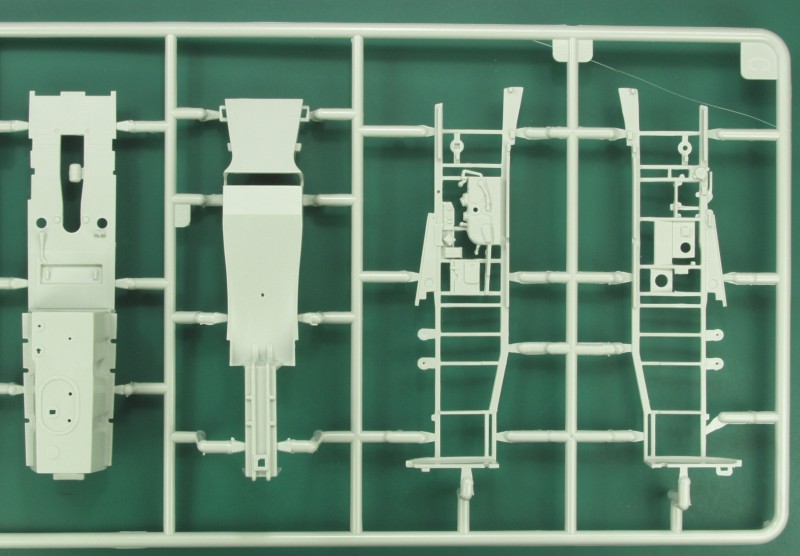
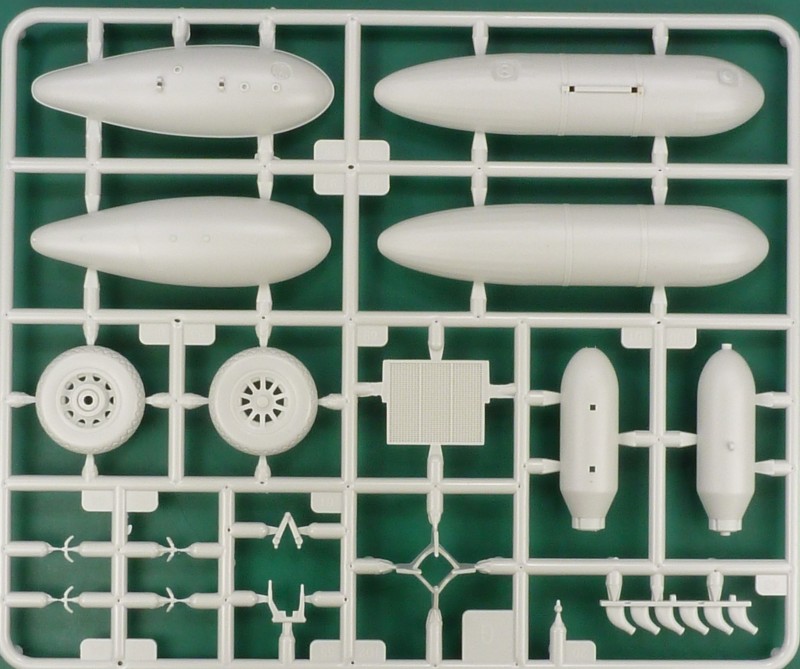
The
first sprue contains the forward fuselage halves, main gear struts and
tail wheel strut some cockpit details and the various nose cowl
panels.
The inside of the fuselage only has a small amount of structural
detail
as most of this will be added during assembly. There are two rather
large ejector pin marks in this area but they should be mostly covered
by the add on side wall detail.

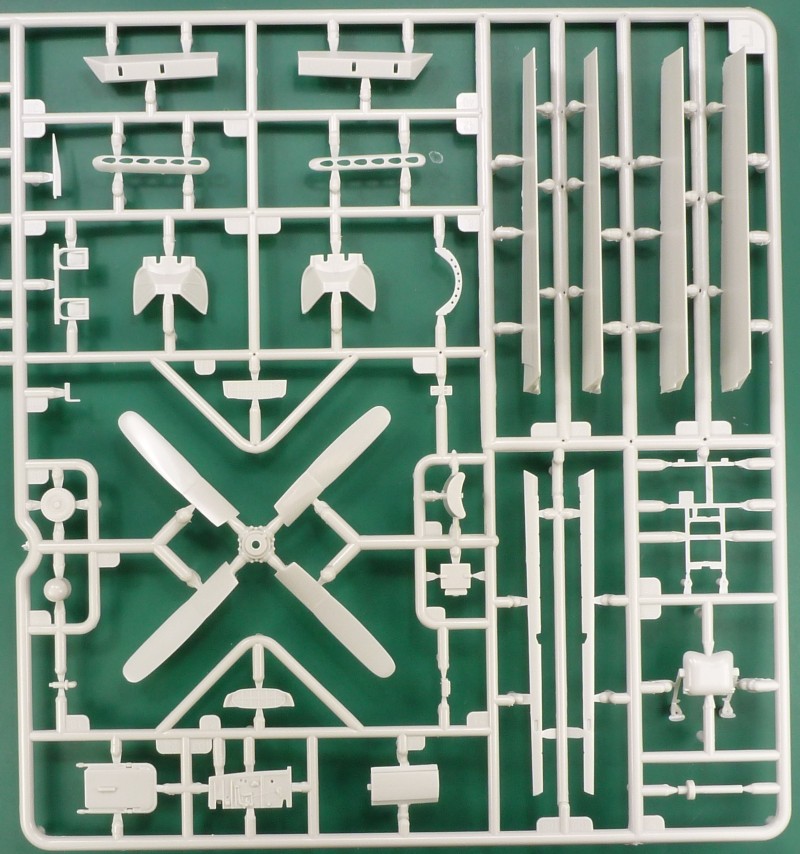

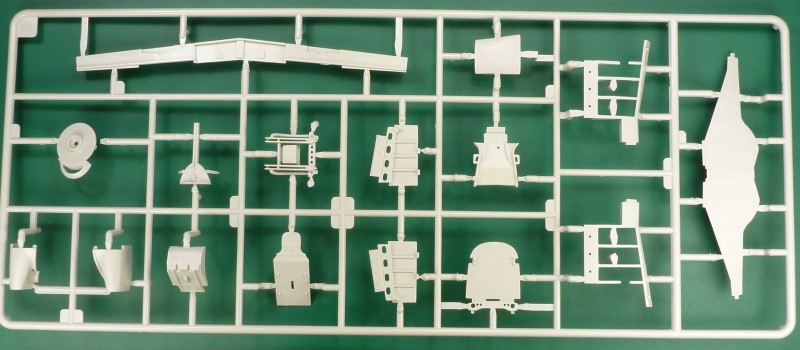


The
last sprue of which there are two, contain a bomb with fins and
mounting gear, exhaust stacks, main gear wheels, radiator cores and
two
different styles of drop tanks.
The
clear
parts are the most disappointing part of the kit, both the
bubble
canopy and the forward wind screen are very distorted which can
be seen
below, the one in my kit almost looks as if it has a blister
molded on
one side, the wind screen, although nice from the standpoint it
is
molded with a portion of the fuselage to make seam filling
easier is
just as bad. So if you want to have a good look at the interior
detail
one must find a substitute or leave the canopy open. Some folks
have requested replacements from Revell and the new parts were
better if not great than the ones in my kit. I was able to
source a Tamiya canopy which will fit this kit from eBay. The
other clear
parts are a gun sight, formation light covers, wingtip light
covers and
landing light.
![]()
![]()
![]()
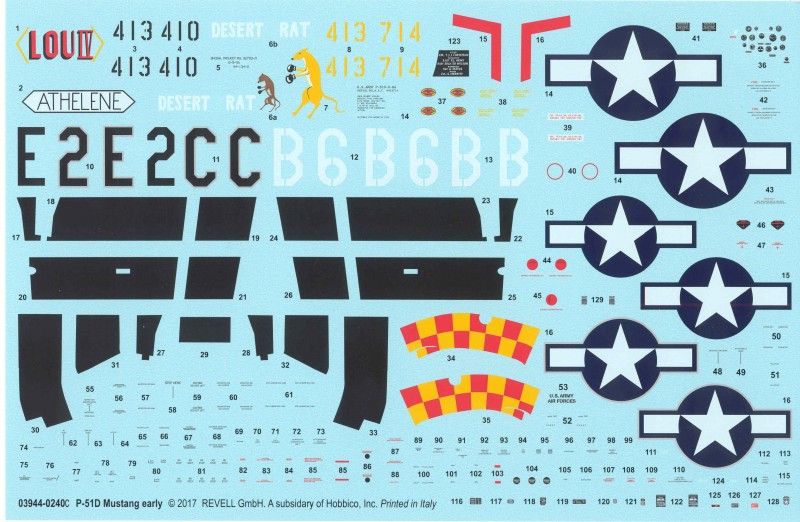
The
decals
are very nicely done and though it doesn't say who printed them
it does say they were printed in Italy so Cartograph is a likely
suspect. The sheet provides markings for two aircraft, the
rather well
known Lou IV and the Desert Rat. The printing and registration
are
excellent and a great number of stencils are provided although
not all
are called out to be used. A variety of placards are provided
for the
cockpit as are Hamilton Standard logos for the props. The decals
are
opaque, have a flat finish and have minimal excess clear film
except
for the code letters which are almost always better trimmed down
anyway.
The
instructions
follow the trend to an extreme almost. It's a 24
page
booklet, stapled at the spine and printed in
color. The instructions
provide no aircraft information although a brief
description is listed
on the side of the box. The front page features a
photo of the completed
model and has a note at the bottom of the page
referencing a separate
safety warning sheet listed in 21 different
languages. Page 2 has what
is referred to as "additional tips and tricks"
shown graphically and
pages 3 and 4 feature an Icon chart with each icon
being described again
in 21 languages. Pages 5 and 6 are a color chart
referencing Revell
paint numbers which also feature generic names in
21 different
languages. Some of the colors require mixing and
percentages are given
for those. Pages 7 and 8 feature a parts map and a
note as to where
spare parts may be obtained in Germany and Great
Britain. Assembly
starts on page 9. Paint color call out are
abundant and many of the
parts are shown in the color they are to be
painted. Assembly continues
through page 20 in 74 steps. Pages 21 through 24
are the main painting
and decal instructions. All in all a very nicely
done booklet that
should be easy to follow.
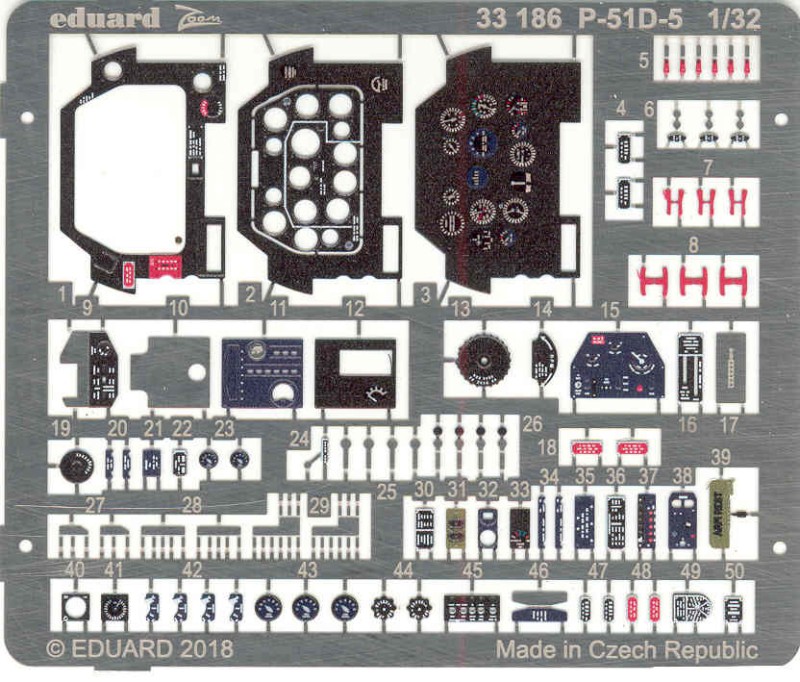
After Market Goodies
There
are a number of after market items available for this kit but
so far I
have only acquired the Eduard Zoom set shown below. This is
one of
their newer style instrument panels which is more finely
printed and
features a dome of clear material over the instruments
themselves which
save one the need to do it yourself. A competitor Yahu has
been selling
instrument panels with much better detail which no doubt gave
Eduard
some reason to improve on theirs. Typical of the Zoom sets it
also
includes some additional cockpit details but no seat
restraints which
means buying and additional item if you want them.
Conclusions
This
kit provides a nice alternative to buying the more expensive
kits from
Tamiya or Zoukei-Mura. For the price of one Tamiya kit you
could buy
four of these. That said one can forgive some of the faults
found in
this kit. It is certainly a much simpler kit having no
engine or
detailed gun bays or opening or removable panels and for
those who
aren't interested in such things all the better. The biggest
downside
to the kit is the poorly executed clear parts. At this date
no after
market supplier has released any replacement canopies
although I
suspect at some point someone will. An alternative is to
find someone
who has built the Tamiya kit and used the late style canopy
as the
Tamiya kit includes both the early and late versions. Beyond
that the
kit has no major faults and those that exist are easy enough
to fix
using normal modeling skills. The kit provides a nicely
detailed
cockpit right out
of the box and overall is a much easier build since it
contains a lot
fewer
parts.
Links to kit builds or reviews
In box reviews here
and here
.
References
As I mentioned early references for the
P-51 are numerous and much is available on the internet.
Back to
the 1/32 U.S. Aircraft page