
Pe-8
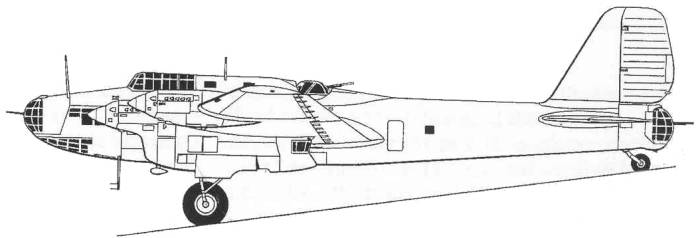
The Petlyakov Pe-8 began life in 1934, when the Soviet government issued a requirement for a new four-engine heavy bomber as a follow-on to the TB-3. The new bomber would feature the latest innovations in aircraft design and would operate at high altitude to avoid interception. It would also have a heavy bomb load and strong defensive armament. The engines were to be Mikulin AM-34 water-cooled vee-12 engines, then in development, which were expected to provide 840 HP each initially. The Tupolev OKB (experimental design bureau) came up with a design with some general resemblance to the contemporary Boeing XB-15 and B-17 bombers, constructed mostly of metal but with fabric-covered flight control surfaces. It was given the official designation of "TB-7" and had the internal OKB designation of "ANT-42", where "ANT" stood for "Andrei N. Tupolev". Approval was given for construction of an initial prototype.
The AM-34 engines were a problematic issue, partly because they weren't available at the time, and also because they weren't going to be introduced with any optimizations for high-altitude operation. The first problem had to be tolerated, while the second was addressed by installing a Klimov M-100 water-cooled inline vee-12 engine in the center fuselage to drive a blower system that supplied air to the four AM-34s in the wing. It would have been preferable to use an AM-34 in the fuselage as well to simplify maintenance, but it wouldn't fit, and so the smaller M-100 was used instead. The first (unarmed) prototype TB-7 performed its initial flight on 27 December 1936. The aircraft was fitted with AM-34FRN engines with 1,120 HP each. The prototype evaluation was not entirely smooth. The AM-34FRN engines were unreliable, not surprising as they were preproduction units, and in fact the AM-34 would never go into production and the aircraft was overweight.
The second prototype was built to a near-operational standard, with armament and armor, and performed its first flight on 26 July 1938. Pre-series production of six aircraft had already been authorized in April 1937. However, producing the aircraft proved troublesome, partly because of difficulties in delivering the AM-34 engines and in developing critical components for the air-blower system. In 1939 the Kremlin considered canceling the program, but advocates managed to save the program, partly by obtaining AM-35 inlines and redesigning the pre-series aircraft to accommodate them. The first TB-7 was delivered in May 1940. By July of that year, Petlyakov had been was assigned his own OKB, which retained ownership of the TB-7. The bomber would be presently re designated "Pe-8" to reflect the change in management. It is not clear when this change was actually made, different sources claiming 1941 or 1942.
The initial production machines were fitted with AM-35A inlines with 1,350 HP each. The scheme involving the M-100 engine in the fuselage to drive a blower system was not used in production machines. Following the initial production aircraft, Pe-8s were then built with Charomskii M-30 and M-40 two-stroke diesels, which proved unreliable to the point of unacceptable, leading to retrofit of AM-35As. Ultimately, problems with delivery of the AM-35A forced conversion to Shvestsov M-82 air-cooled radials, with 1,850 HP each. The refit of the air-cooled engines required considerable redesign of the engine nacelles. Air crews liked the greater power provided by the M-82s but found the old AM-35As more reliable.
The Pe-8 performed the Soviet Union's first bombing raid on Berlin, on the night of 10 August 1941, barely three weeks after the Nazi invasion. It was mostly a propaganda exercise, with only five of the eight bombers on the raid actually reaching Berlin, and then dumping their loads haphazardly. The difficulties with the raid and other Pe-8 operations in the same time frame were mostly chalked up to the unreliable diesel engines, leading to their wholesale replacement with AM-35As.
It is unclear how many Pe-8s were built. Western sources list only 79 built into October 1941, when the state factory building the type had to be abandoned in front of the German invasion, and that the M-82-powered aircraft were mostly or all refits. More reliable Russian sources claim that the Pe-8 was actually built into 1944 and that total production was 93 or 96, with later production of new M-82 powered machines from a state factory in Kazan. In any case, by 1944 the Pe-8 was no longer up to first-line combat against much improved Luftwaffe night fighter defenses, and was retired to second-line duties. It operated in various roles in the postwar period, including operation as a test bed and transport service with Aeroflot, and flew into the early 1950s before being phased out entirely. The report card on the Pe-8 seems a bit mixed. It was an advanced aircraft for its time, comparing well at least on paper with contemporary British and American heavy bombers, but given the small number built it made no major contribution to the Soviet war effort, and was clearly not regarded as a weapon deserving of priority production. The Red Air Force was focused on battlefield support and there was little emphasis on strategic bombing at the time.
The Kit
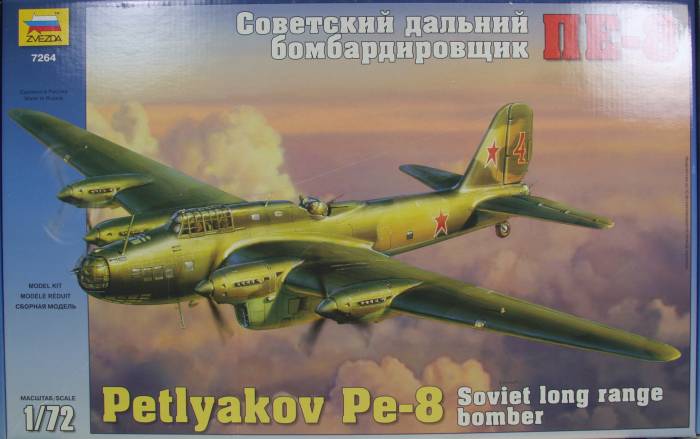
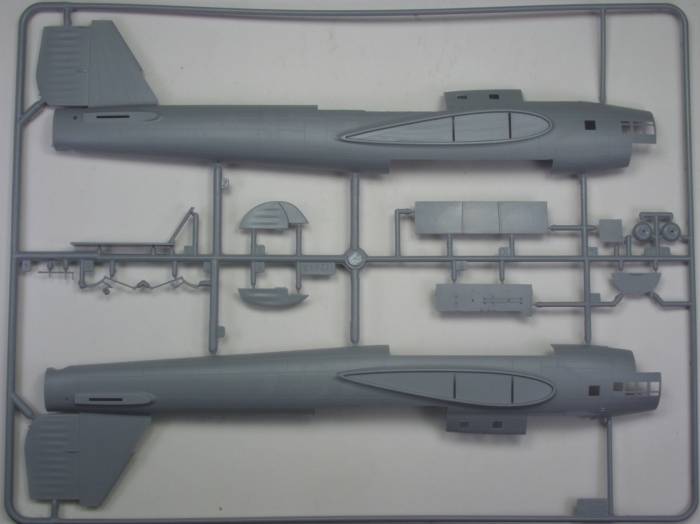
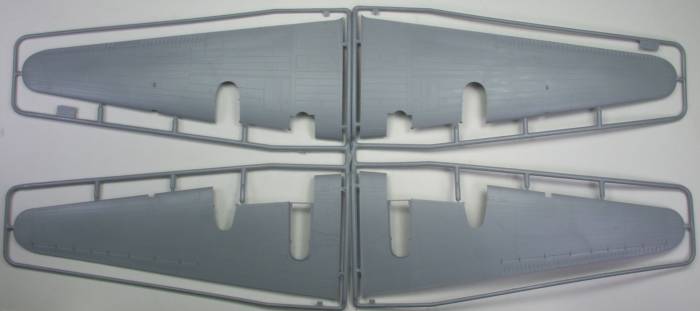
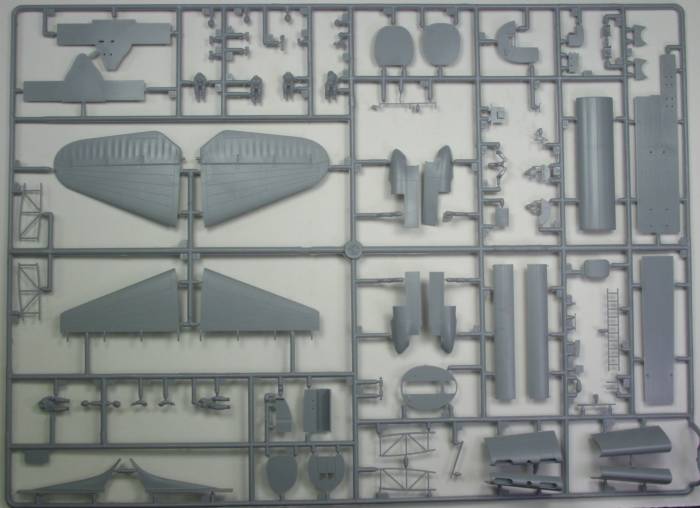
The Zvezda kit of the Pe-8 comes in a quite large and sturdy corrugated cardboard box with a flap open top. Not as handy as a separate top but better in most respects than end flap boxes. The box is as large as many 1/48 scale planes such as the Trumpeter Condor and MPM He 177. The box top has a colorful and nicely done artwork of the Pe-8 in flight. Inside the box are six bags, two with one sprue each, one with two sprues which are just the upper and lower wing halves. one with three sprues of smaller parts and one with just one sprue containing the engine cowlings and parts and lastly one with the clear parts. While all the separate bagging is nice, only the bag with the clear parts is sealed, being a zip lock type, the others are open on one end. While they do protect the parts they don't keep parts from going astray although I found only one loose part in one bag.
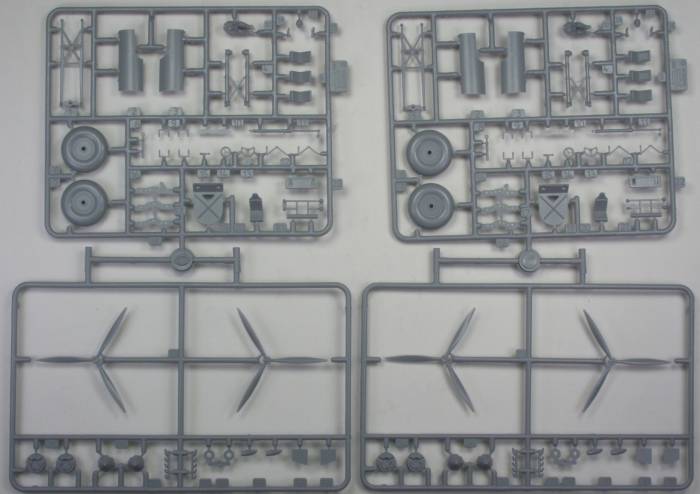
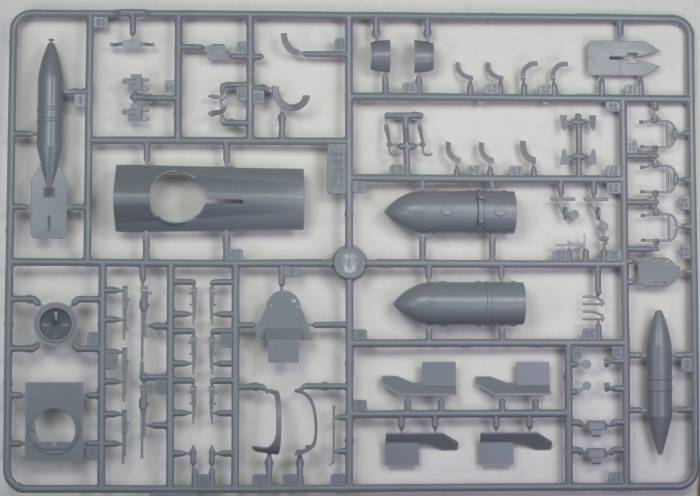
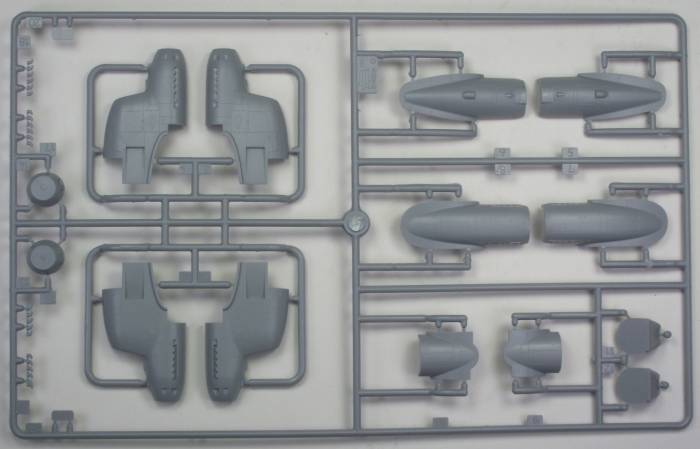
The parts are molded in a medium gray plastic with recessed panel lines and some raised detail where applicable. The surface as a very fine texture to it but it's not like orange peel and it should disappear under a coat of paint. The panel lines are fine and uniform. Most of the sprue gates are relatively small. Some of the ones on the smaller parts may need to care when removing them. The only surface irregularities I found were some slight sink marks where the optional window openings are located and they may need a touch of filler if they don't get cut out. The parts are virtually flash free with only a hint of flash on a few of the parts. The control surfaces are all fixed and the fabric detail is nicely done to my eye. I did not find any ejector pin marks that would show when assembled. The kit is loaded with detail for a 1/72 scale kit. There is multi part structure for the gear bays, the gunners positions are well detailed with oxygen bottles and ammo chutes, the flight deck is loaded with detail and with all the glazed areas it should show up well. There are eight crew members supplied, all with separate heads and several with one or both arms separate so they can be posed and they are nicely detailed with harness and belt detail where applicable. The Bomb bay features structural detail and the both open and closed doors are supplied as well as door actuators. The crew door can be posed open and a ladder is supplied if it is left open. All of the weapons are nicely molded and the kit includes a 5000Kg bomb. There are two good sized spars that pass through the fuselage and insert into the wings which should provide a strong attachment for the wings. Like wise there is one for the horizontal tail parts as well. The kit does have alignment pins. By my count there are 274 parts molded in gray.
See photos below.
The clear parts are reasonably thin and clear. The upper turret glazing on mine had some internal mold marks like scratches that might be tough to deal with and I thought it all would look better with a coat of Future, however I found that Future would not stick to them even after cleaning with alcohol. They are glue able with solvent based glues so I was hesitant to try anything stronger than alcohol. In the end they didn't look all that bad if you check out the photos in the build section. Just a heads up. By my count there are 31 clear parts giving a grand total for the kit of 305 parts. See photo below.

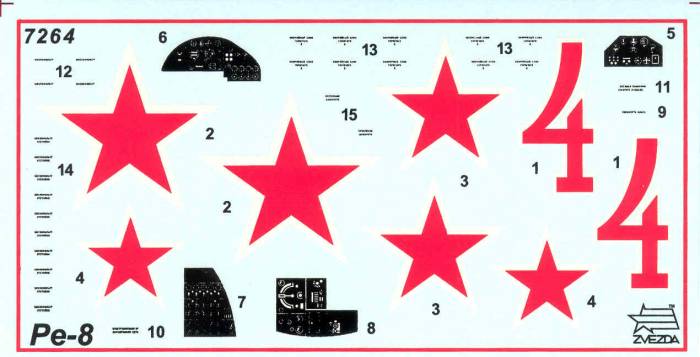
Probably the weakest part of the entire kit is the rather anemic decal sheet with markings for only one aircraft. The decals look thin but I have read reports not favorable to Zvezda decals, whether these fit that category I don't know. The stars and the large 4 are all out of register. There are a fair number of stencils provided and they look to be readable but since I can't read Russian I can't say for sure. Various instrument panels are supplied as decals but they are not very convincing. Hopefully the kit will be popular enough to attract some after market decals and A PE set and mask set from Eduard. See photo below.
After Market Goodies
Eduard was Johnny on the spot creating a mask set for this bird, their part number CX-215. I hope they will also do a PE set for it as well as the instrument panels could use some help !
Conclusions
I am most impressed with this kit as I was with their recently released La-5FN kit. It looks more like one of the later Eduard kits, equal to if not better than. The plastic is soft like Eduard kits. It's obvious from the parts supplied that other variants will be released. While I don't normally do this for reviews my curiosity got the better of me so I removed a number of parts from the sprues and test fitted things using tape to hold things together. First the fuselage. I taped it together with the two wing spars which are also bulkheads in the fuselage and the tail spar. Engineering is good, the tail spar is made to fit one way and it also prevents the tail planes from being put on wrong. The fuselage seemed a bit flimsy at first with all the openings but stiffened up with the wing spars in and when the other fuselage bulkheads are installed it should be quite solid. I only trimmed sprue gates for this, no other trimming of fitting was done. The two photos below shows the fuselage joints top and bottom. I didn't fit the last piece on the top as it was in two pieces and they didn't lend themselves to just being taped together.
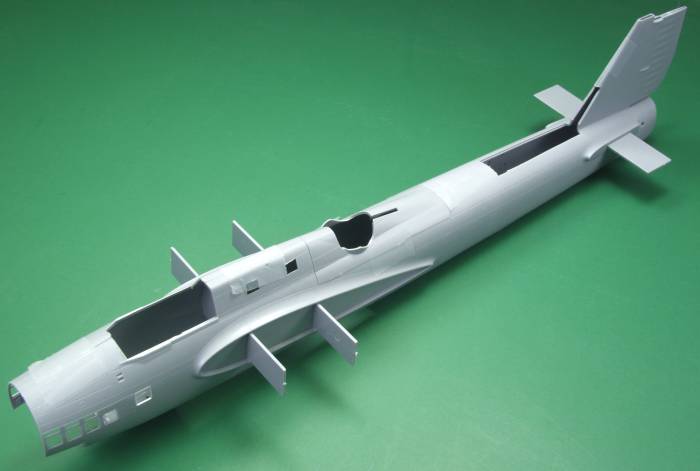

The bomb bay doors could have used a little more trimming but actually fit better than it looks in the photo. Next I taped the wings and tail planes together. Except for trimming a small ridge that was around the alignment pin mating holes and a couple of the pins which were a tad too long the fit was excellent. Once together I slid them onto the spars to check the wing to fuselage and tail to fuselage joins. The wings were a bit much for the tape to hold securely but the fit was good. It will require a little care and a progressive glue job but I saw nothing to make me believe that when finished little or no filler would be required. The two photos below show the top and bottom joins.
The tail planes are pretty much the same story as shown below, I didn't bother to tape them but they fit tight when pushed into place.
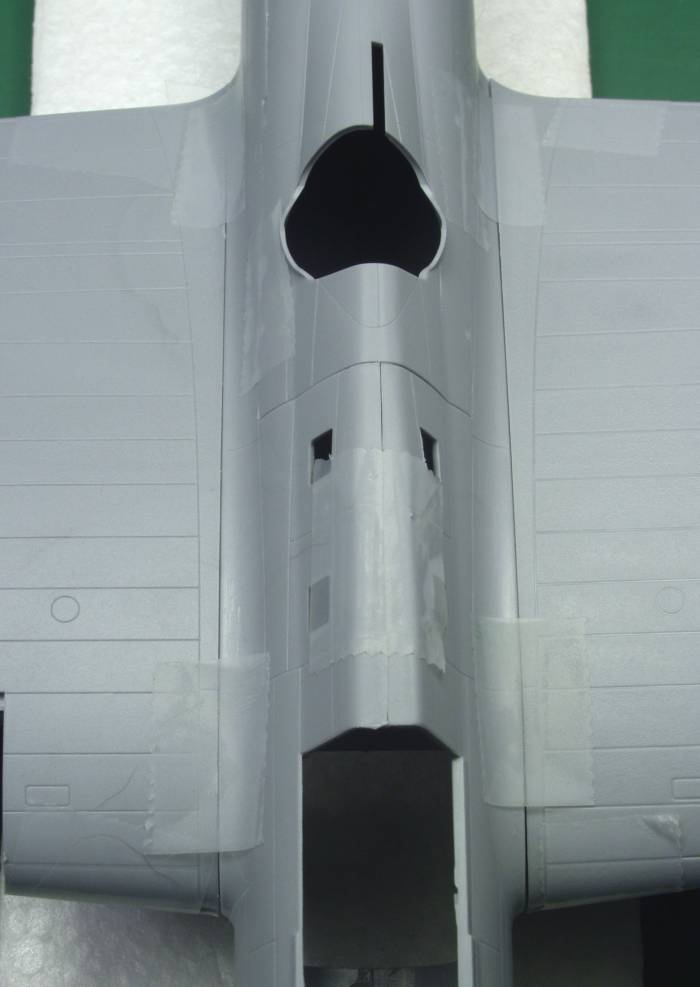
One issue that plagues almost all kits having separate engine nacelles is the fit to the wing. In this case it looks to be very good. The inboard nacelle has a lot more pieces to it than what I show but as you can see the fit of both on the top is excellent and again all I did was remove the sprue gates. See photo below.

There is another piece of leading edge that is not attached in the photo.
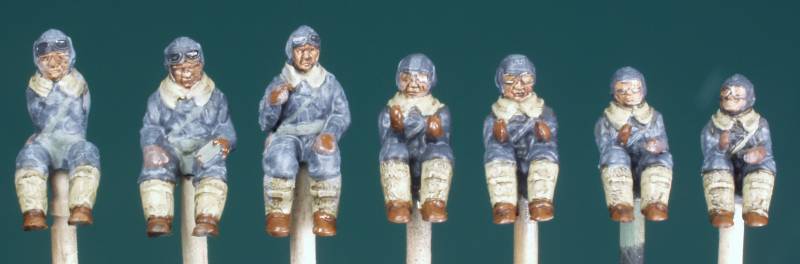
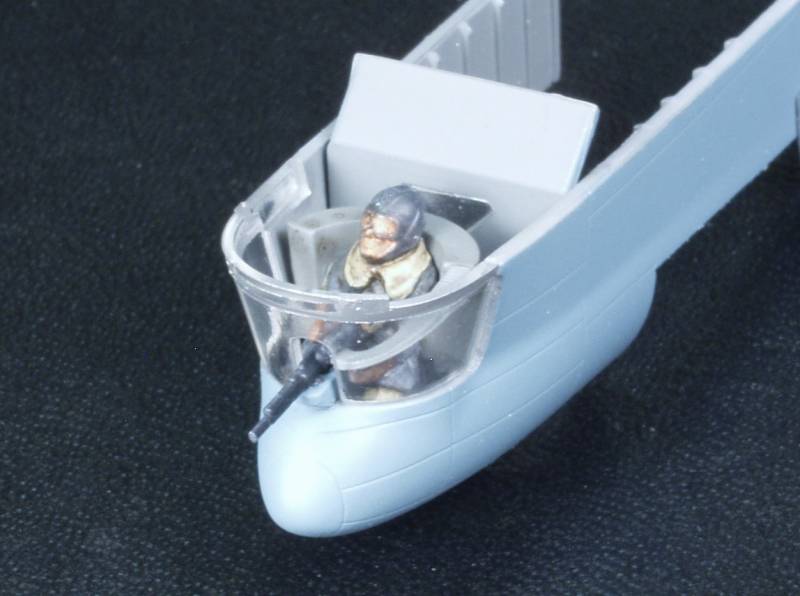
Finally, I'm not normally very impressed with the figures supplied with most 1/72 scale aircraft but the ones supplied with this kit I really like and may actually use instead of tossing them like I do with most. All have separate heads and some have one or both arms pose able. The heads are very well done and though it may not show in the photo they actually have well done faces, the one below has a frown on his face, obviously doesn't like his job. He's the copilot and is holding a clip board. His arms were fixed. To help show off the detail I gave him a thin wash of black. See photo below.
Links to kit builds or reviews
A build / review can be found here and an in box review here. Note: at this link you will need to scroll down the list on the left.
References
My primary source of information for the aircraft history came from an online resource located here which claims to have gleaned most of its information from "Soviet Combat Aircraft of the Second World War" by Yefim Gordon & Dmitri Khazanov
"The Osprey Encyclopedia of Russian Aircraft" by Bill Gunston
The Build
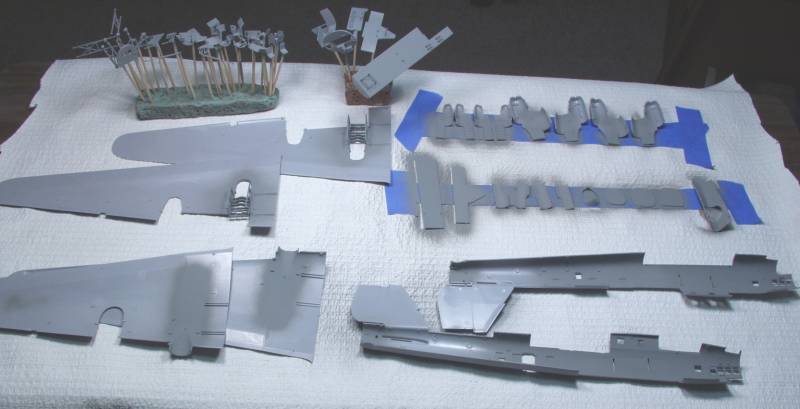
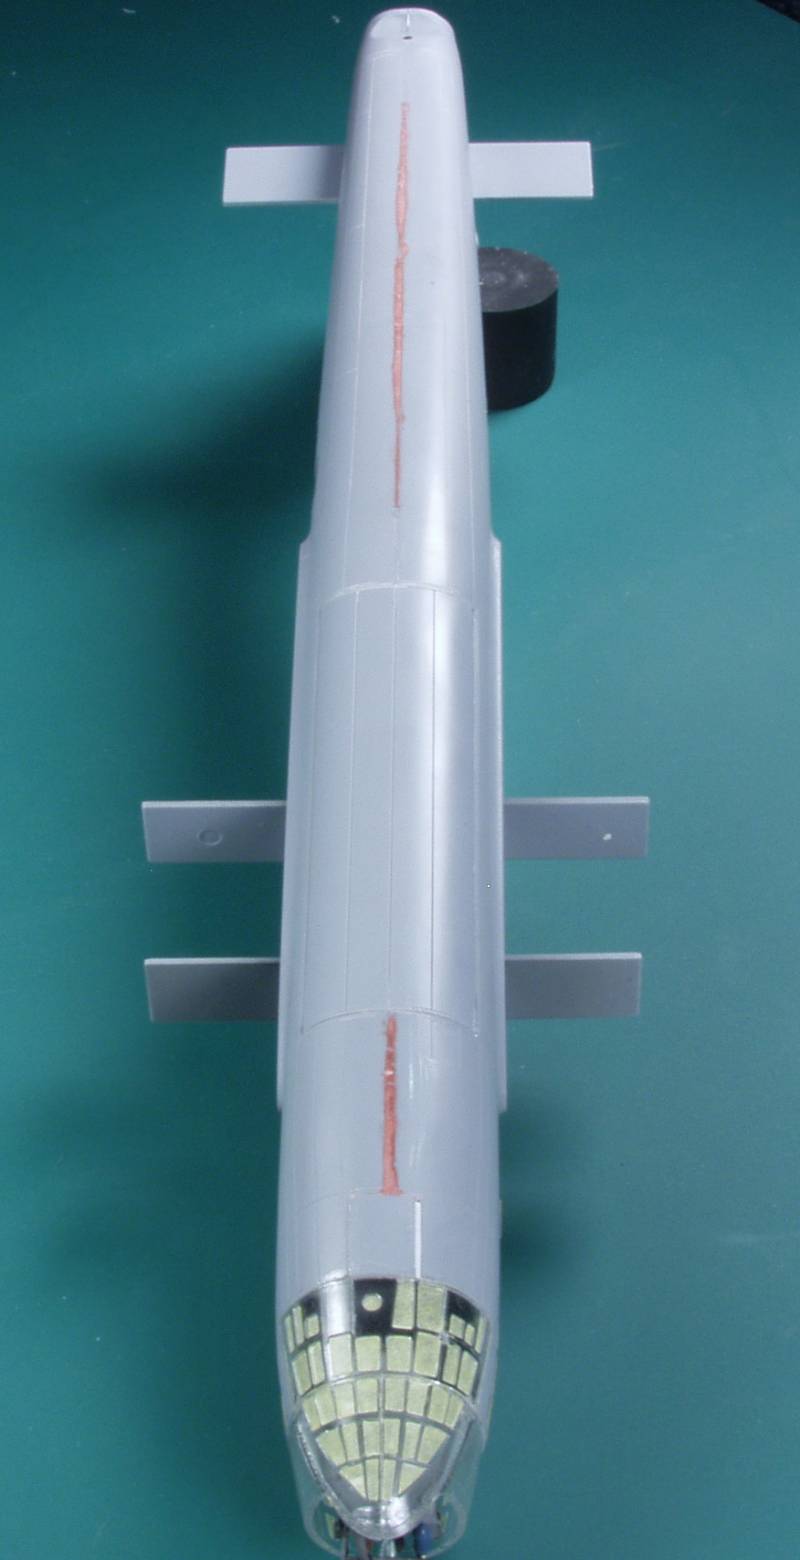
I'll begin this by saying this is the first 1/72 scale kit I have completed in over 30 years and I was pleasantly surprised by how much better the fit was and level of detail as well. So without further a do, on with the build. When I paint I like to do as much of any one color at a time to reduce the amount of clean up required. This kit was no exception but when I started cleaning up the parts that needed the interior color I began to think there was no end to them. As the photo below shows there were a lot of them and amazingly enough I found about a dozen more after I finished these.
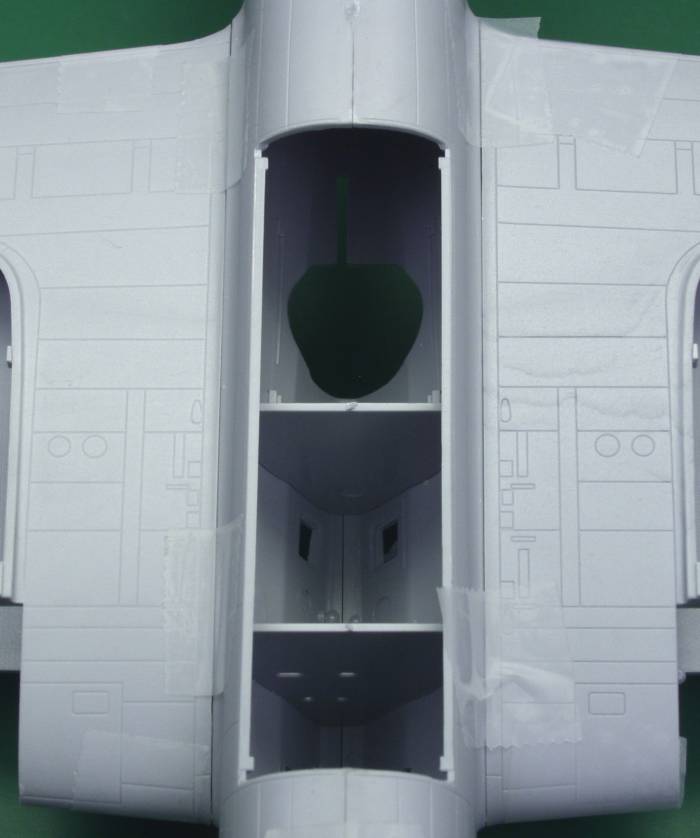
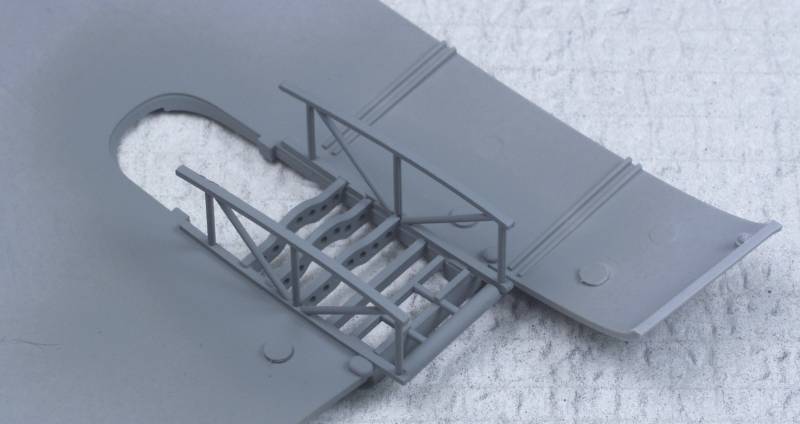
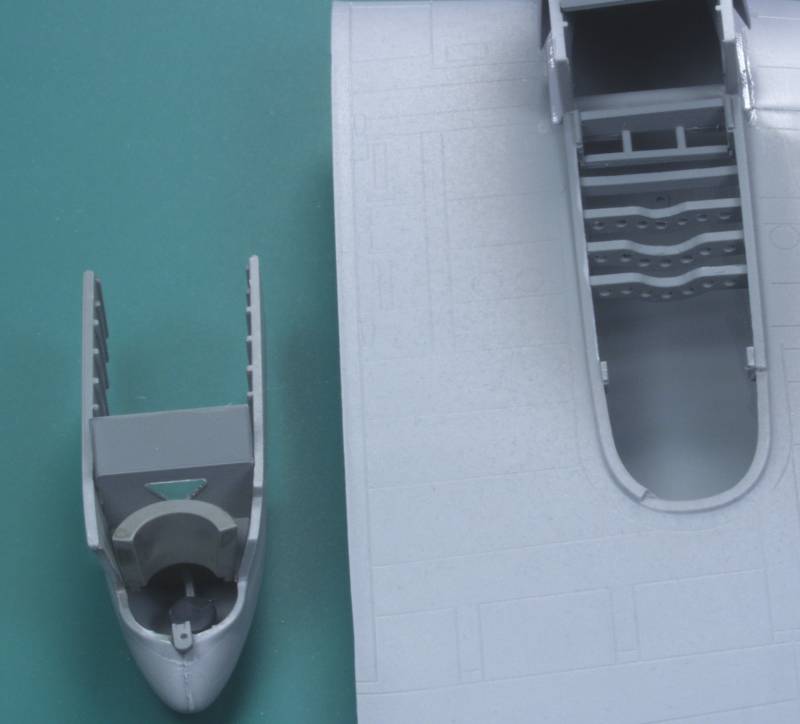
To illustrate the level of detail in the kit the photo below shows the structure included for the wheel well. The wing ribs actually provide additional strength when the wing halves are glued together.
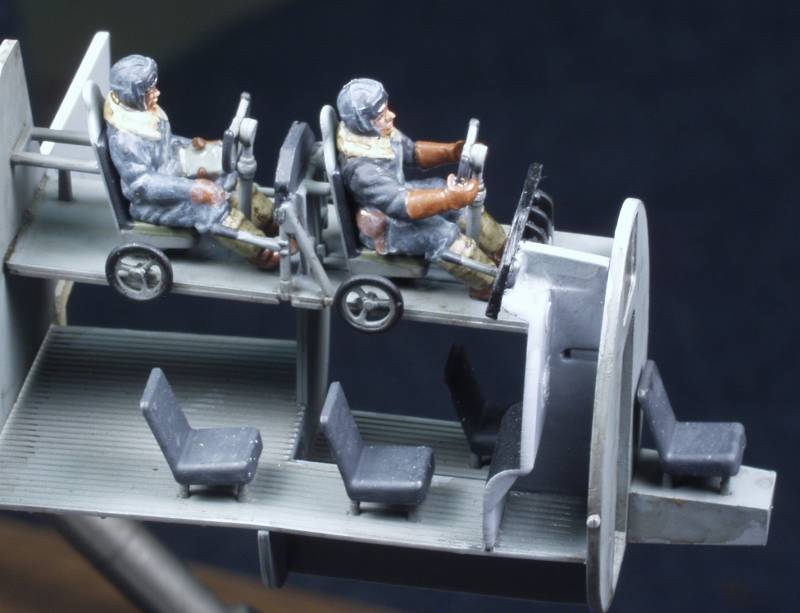
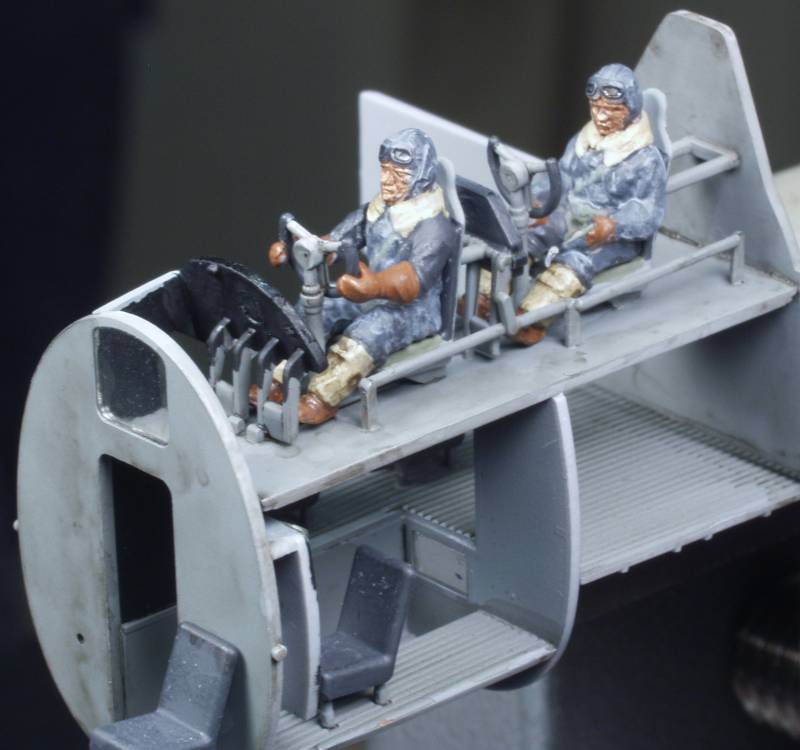
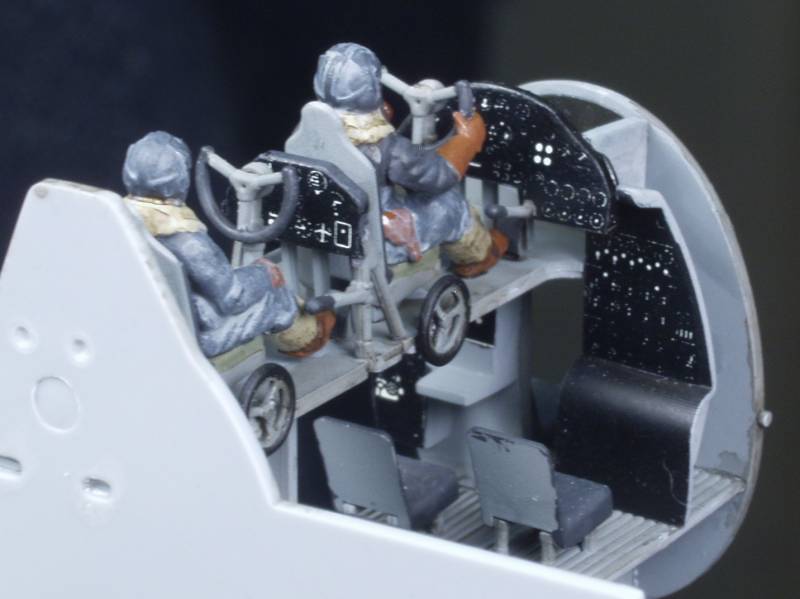
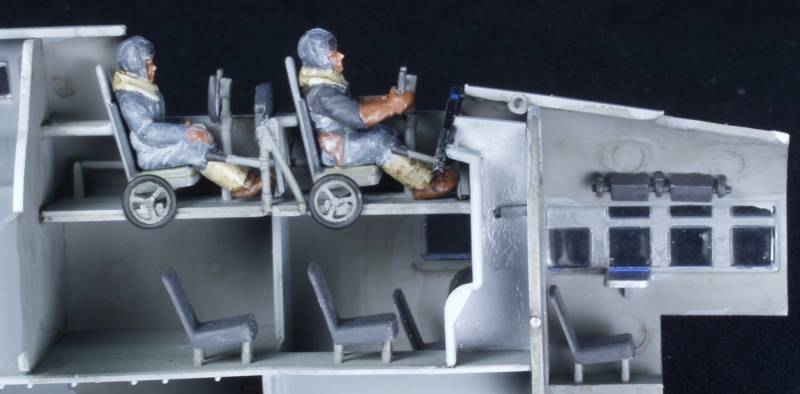
I wanted to used the rather well done figures supplied with the kit so I ended up spending more time than I should have proving that I have no talent for painting figures. Apparently the VSS chose crew members by size, the under wing gunners being the smallest, the turret gunners in the mid range with the pilots being the largest. The pilot will get his arms when installed in his seat so his hands can grip the control wheel.
After assembling the engine cowls I decided it would add to their appearance if all the various air vents and scoops were opened up so using a variety of drill bits and an x-acto knife I opened them all up. I think it added a lot to the overall look.
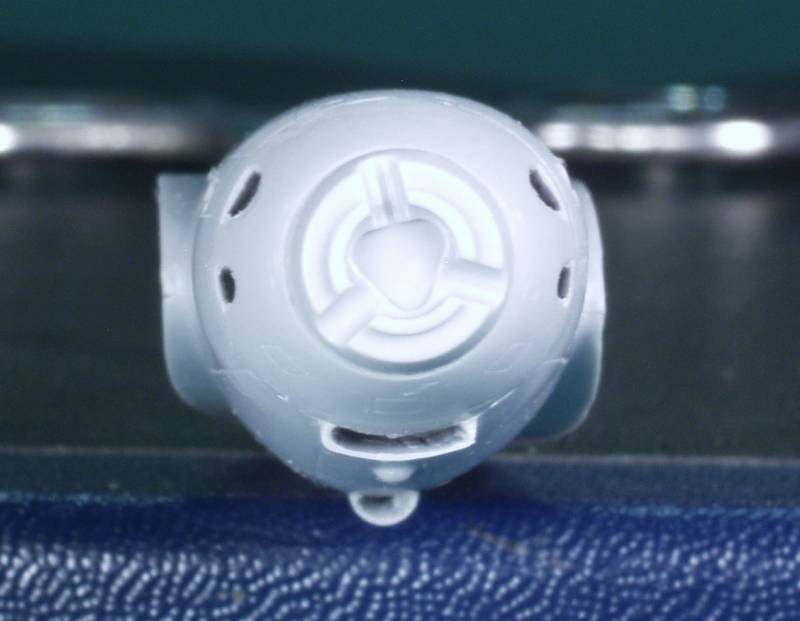
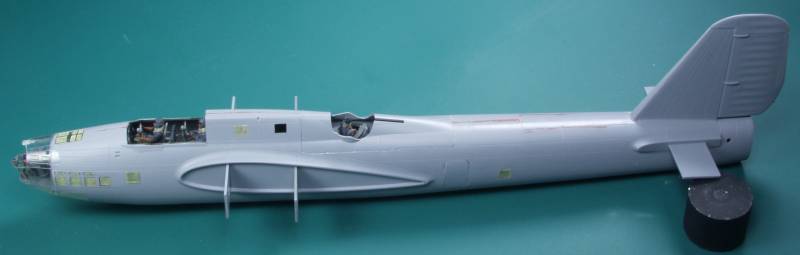
Before the fuselage could be joined all the internal sub assemblies needed to be assembled. I was quite impressed by how well all of the rather tiny (to me anyway) parts fit together. Big difference from 30 years ago. Anyway, here is the top turret.

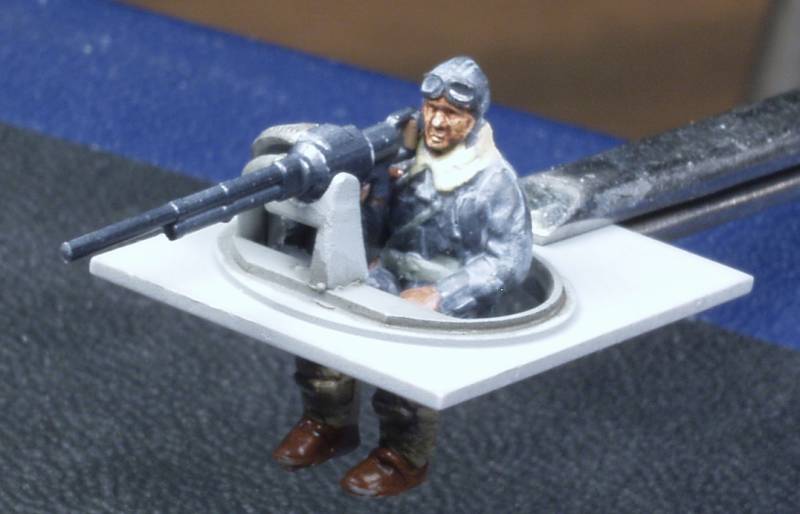
The front and rear turrets were essentially the same with minor differences, the guns and ammo belt feeds were left off till later to prevent breakage.

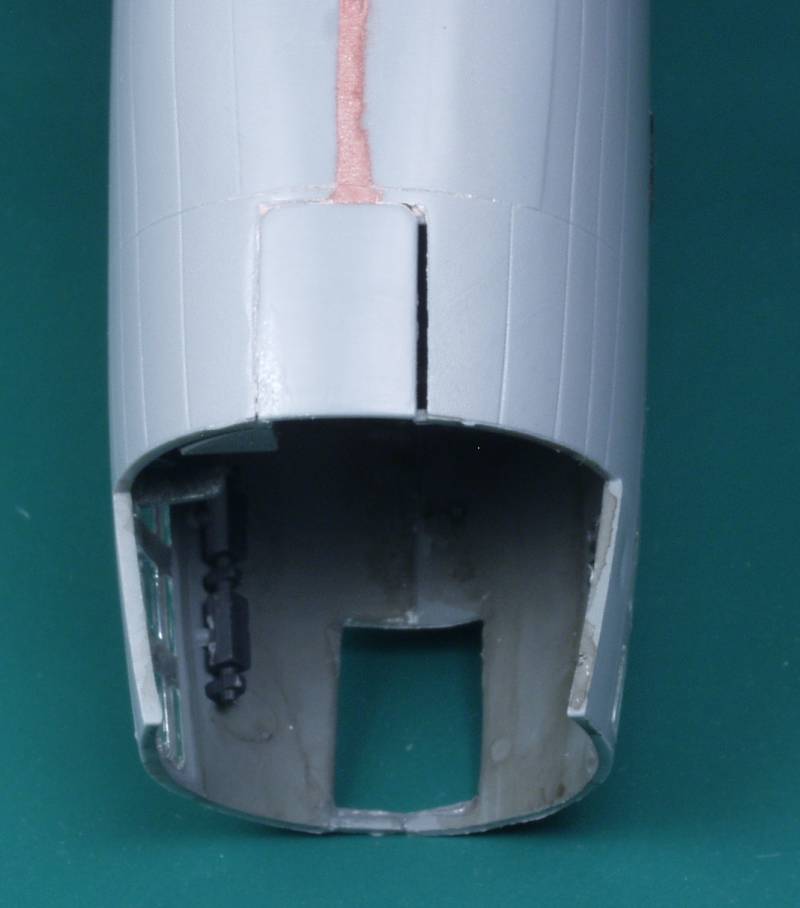
The forward section of the fuselage.
While I might have liked to have some color PE for the instrument panels for no more than can be seen when complete the kit provide decals are adequate.

The wings and cowling fit really well and the cowling to wing joins are quite often the downfall of many kits but these fit really well with only a little in the way of trimming required.
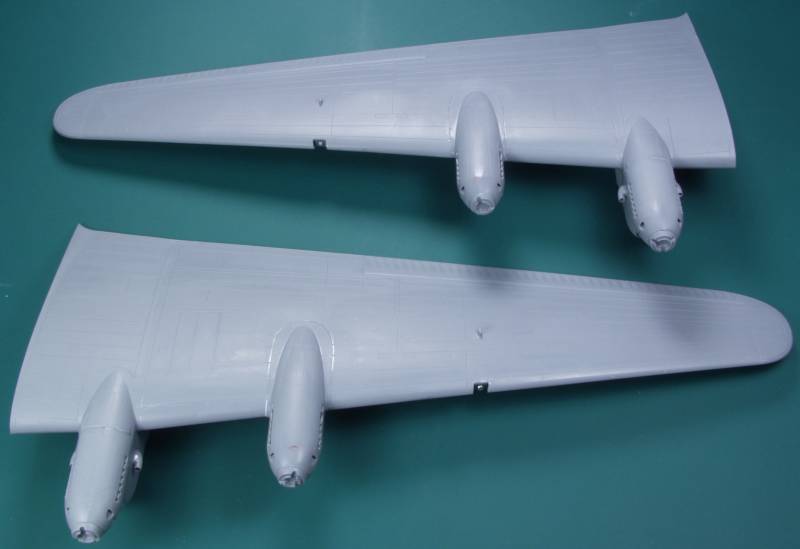
The only fit issue I had with the wings was next to one nacelle I ended up with a gap that was just slightly narrower than the thinnest styrene I had on hand so I enlarged the slot slightly with a razor saw and glued a piece of styrene in. Once dry it was trimmed to fit.
Due to the difficult of both masking and later installing the guns and ammo feeds on the nacelle gunners position I decided to leave them off till nearly the end. A test showed they fit well enough to do that.
The fuselage went together well with no fit issues caused by all the interior parts. The rear spar does need to be installed the correct way or you'll have problems and it is not real easy to tell without test fitting first.
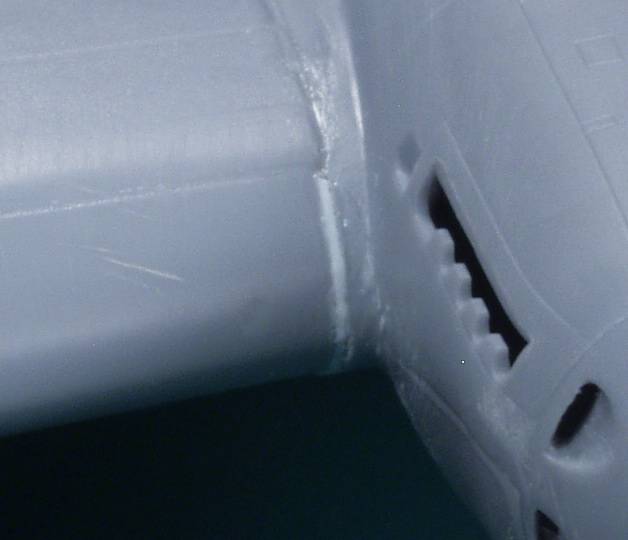
The fuselage and the various inserts fit well and only a little filler was required. Most of it was due to inattention on my part as I ended up with a step both on the top and mostly on the bottom of the fuselage. A few more alignment pins would have been helpful.
Probably the worst fit on the fuselage was the crew entry door which had a good sized opening. As seen in the last photo this was filled with a piece of styrene.
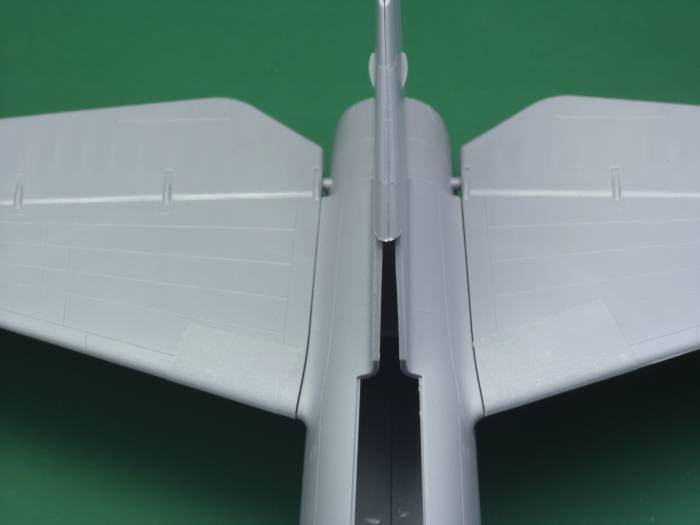
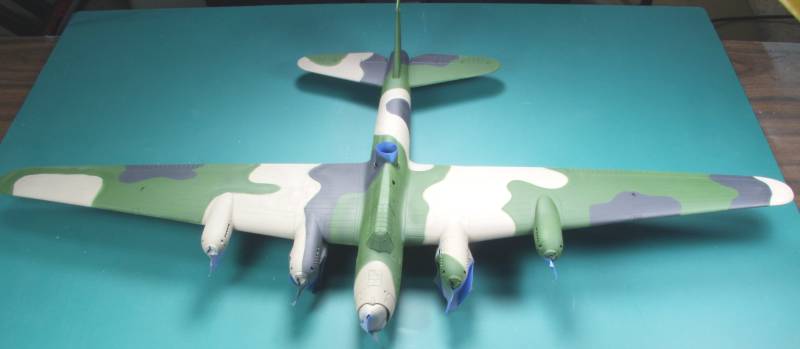
With the wings and tail installed the primary color was applied. The wings and tail with extremely well and only a touch of filler was used on the tail.
Here's what the under wing gunners station looked like before mounting on the lower wing.
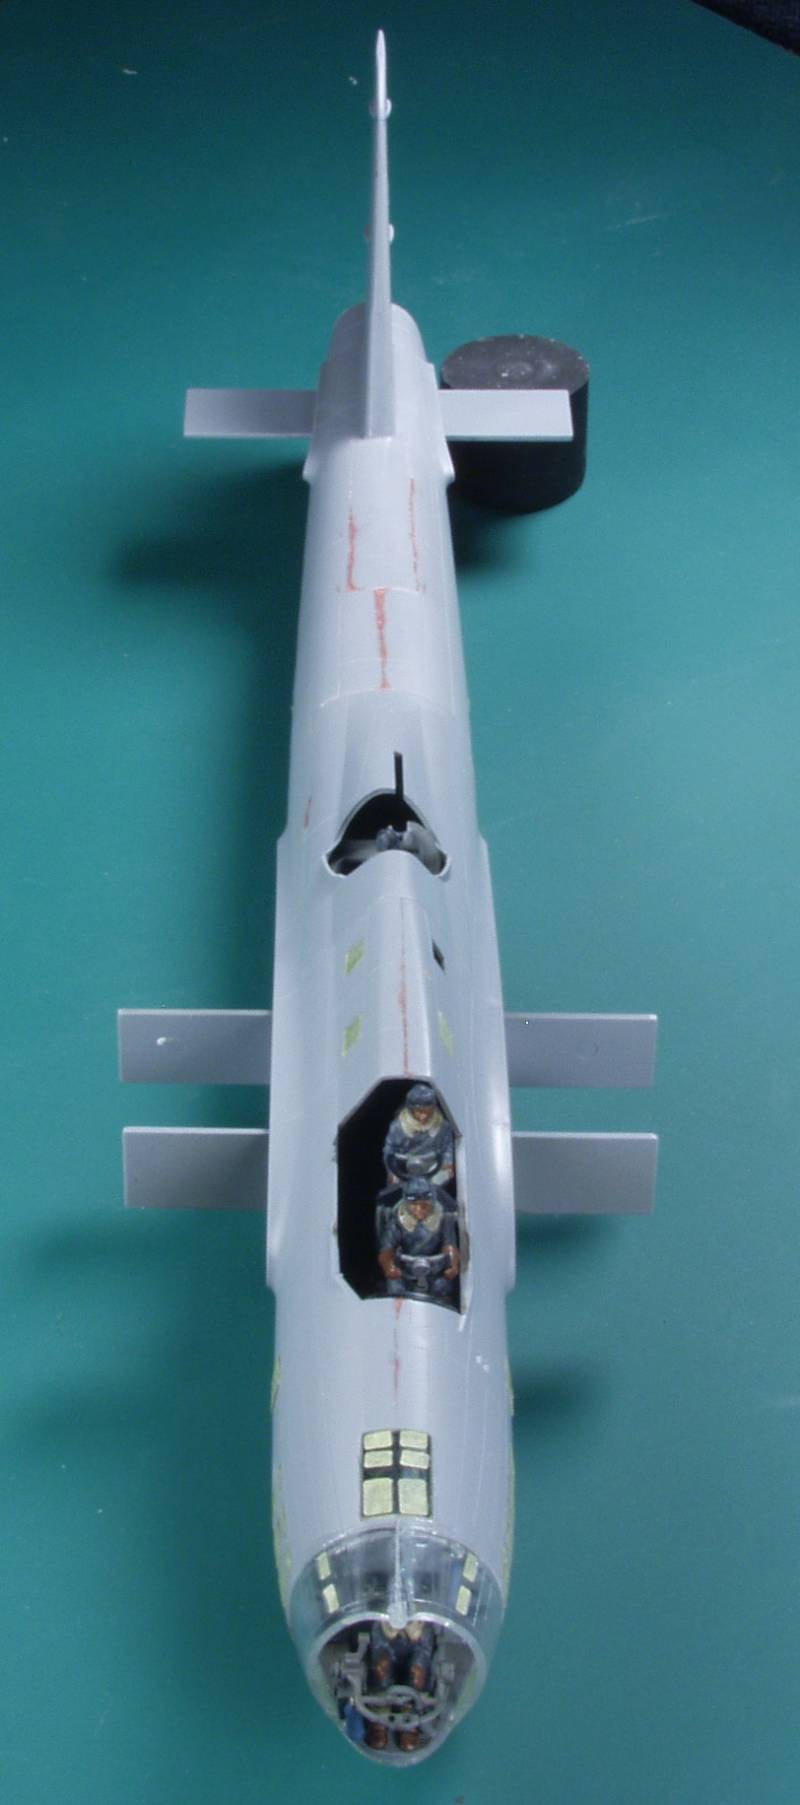
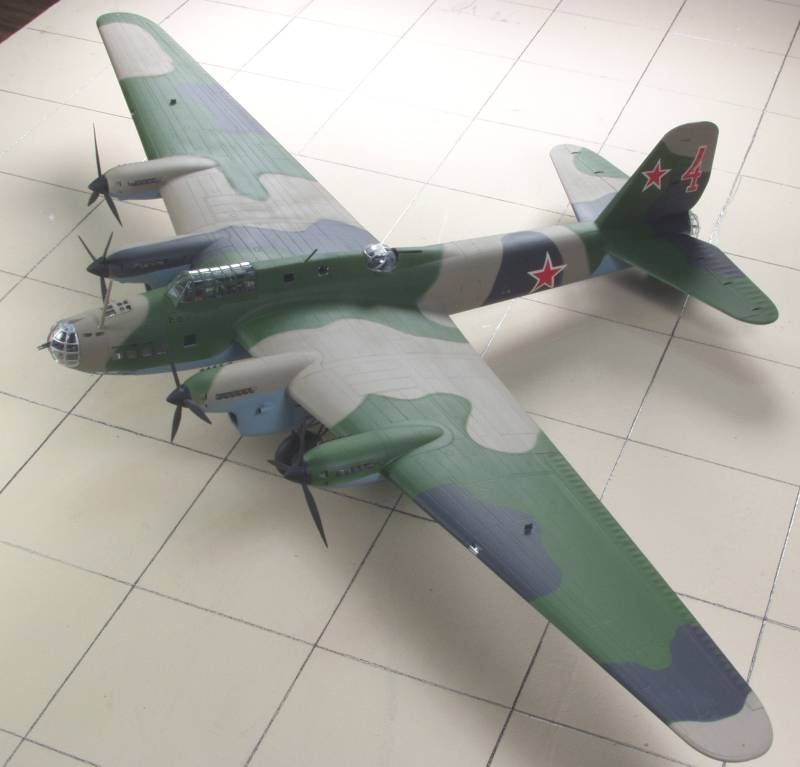
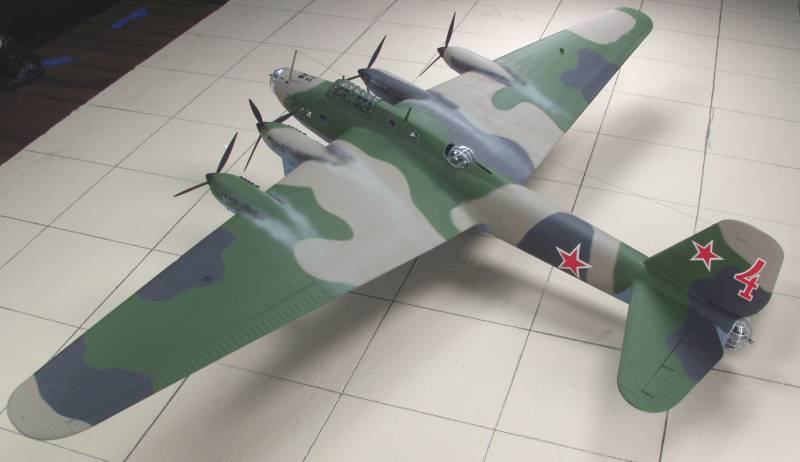
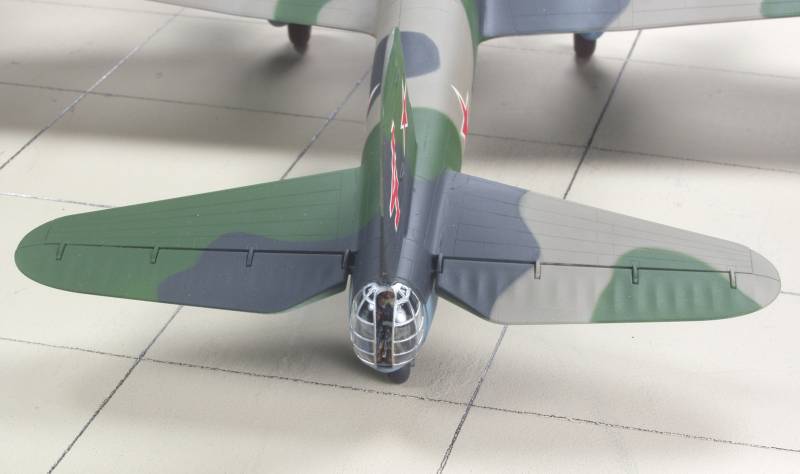
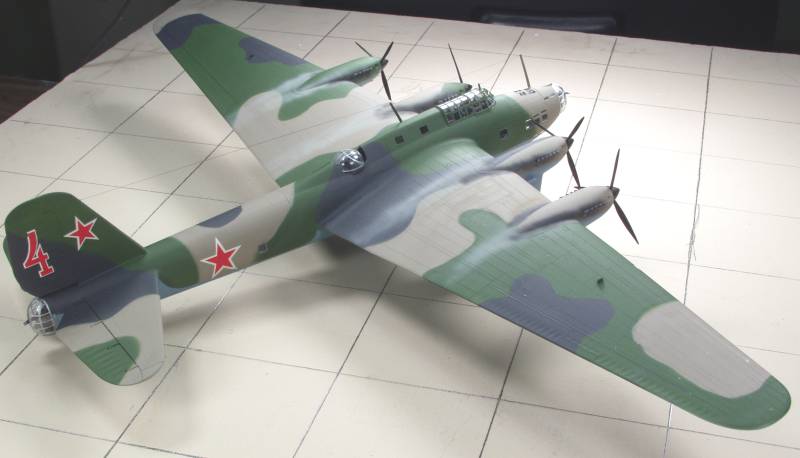
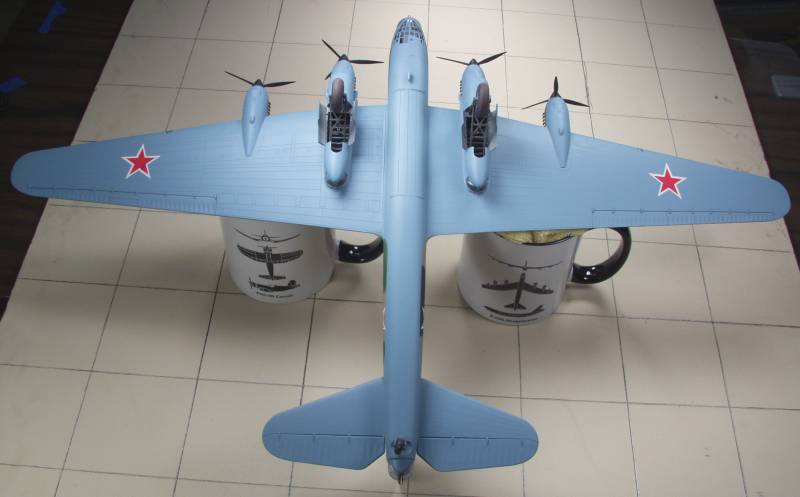
Here are the final photos, I kept the weathering rather light and wished I had done more but by the time I decided that I had already unmasked everything and didn't want to risk messing up other stuff. The decals settled OK with a bit of Microset however they are out of register and two of the stars broke up during application so if you can find substitutions you should.

While a bit intense due to the large number of parts in the kit, most modelers with a few kits in this scale under their belts shouldn't have a real problems with it. One strange thing I found was that the clear pieces were not brittle like most and Future would not stick to them in spite of cleaning them with a variety of substances. In some cases even the very small masking pieces didn't stick all that well but in the end the clear parts seemed clear enough for the scale.
Back to the MISCELLANEOUS 1/72 page
Updated 2/16/13