
PV-1 Ventura
The PV-1 Ventura came about as a result of the British Purchasing Commission's request to Lockheed for an aircraft with improved performance over that of the Lockheed Hudson. Lockheed's answer was a medium bomber based on the Lockheed Model 18 Lodestar. Although the aircraft resembled the Hudson it was larger and heavier and featured more powerful engines. The British ordered 25 of the aircraft designated Ventura I and Lockheed subcontracted them to their Vega subsidiary. The prototype flew at the end of July 1941 and as was typical of British aircraft at the time, it was armed with eight 303 caliber machine guns, two of which were in a Boulton-Paul dorsal turret.
The British Purchasing Commission was impressed with the Ventura's performance and ordered an additional 650 of them, however only 394 of these were delivered as the Navy requisitioned the remainder following Pearl Harbor. The aircraft evolved as requirements for it changed with the Ventura II / IIA and GR V which were the equivalent of the PV-1 and PV-2. The Ventura II was similar to the first production model except that it was powered by military rated Pratt and Whitney R2800-31 engines and had a bomb-bay capable of carrying 3000 lbs of ordinance. Great Britain ordered 487 of these although most were taken over by the Air Force and used for training. In 1943, 43 of these aircraft were delivered to the Royal Australian Air Force and the Royal New Zealand Air Force. The MK II also operated under the designations B-34-VE, B-34-3-VE, O-56, RB-34, O-56-LO and B-37 during its service with the Army Air Force.
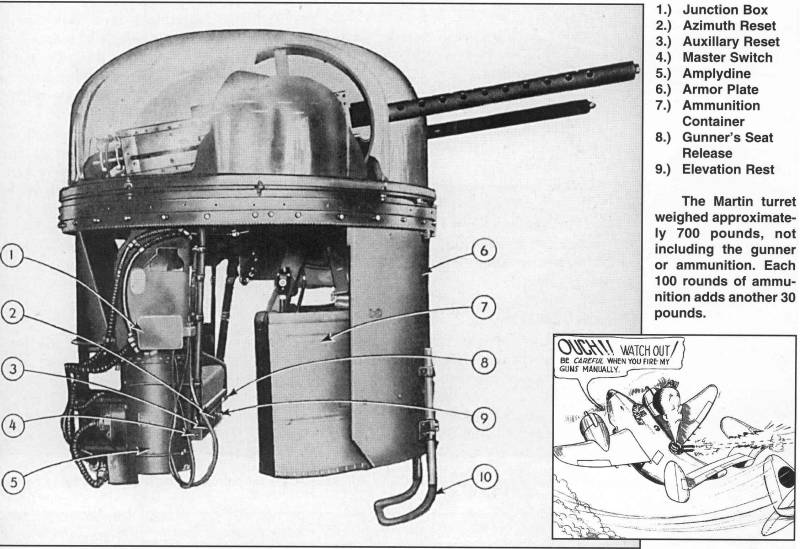
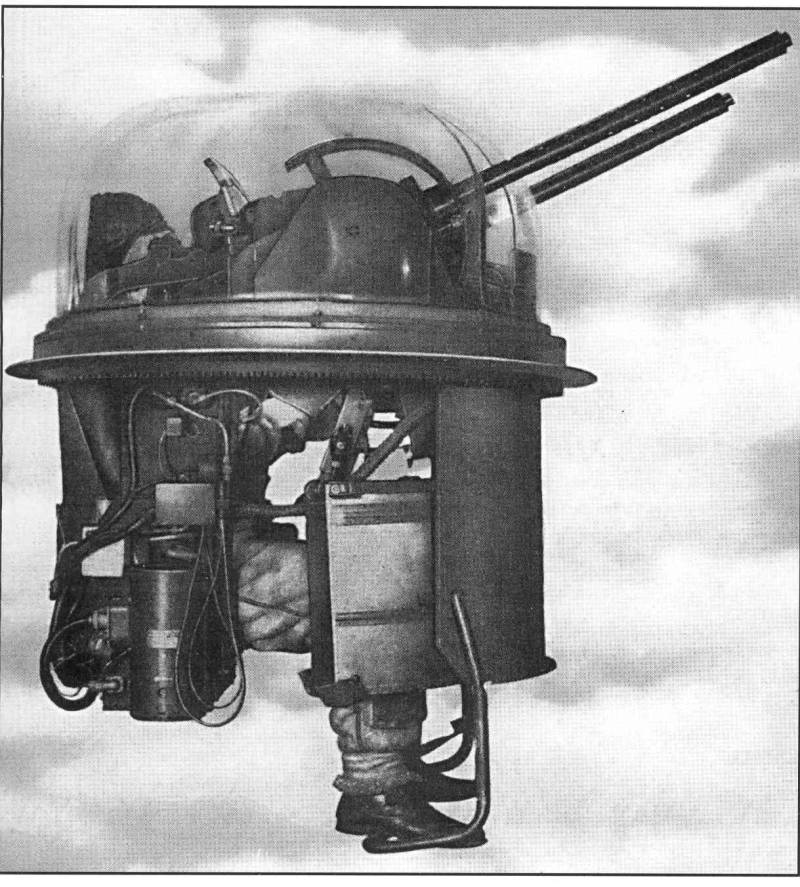
By the spring of 1942 the U.S. Navy had realized that its fleet of amphibious aircraft were too slow and lightly armed to protect themselves from enemy aircraft. A hasty procurement began with the service obtaining a quantity of surplus B-34's and B-24's from the Air Force. The PV-1 (Patrol Vega) was similar to the B-34 / MK IIA except for the installation of the ASD-1 search radar, navigational instruments and additional fuel tanks increasing the range to 1660 miles. Early versions carried two fixed 50 caliber guns in the nose, two in the Martin upper turret and two 30 caliber guns in the ventral position. Later models had three 50 caliber guns in a chin package under the nose which replaced the bombardier station and rocket launcher rails under each wing. The prototype PV-1 flew in November of 1942 and between December of 42 and May of 44, approximately 1600 aircraft were produced. The British acquired 387 of them in a similar configuration designating them the GR Mk V.
In service the British were generally disappointed with their aircraft, however they initially used them as daylight bombers instead of maritime patrol bombers and they took a beating at the hands of the Luftwaffe. Not that the British were ever happy with any of the aircraft they obtained from the U.S. The Navy on the other hand found the aircraft to be quite satisfactory with plenty of power and maneuverable enough to suit its purposes and rugged enough to get its crews home in adverse situations.
Now to answer the the question "Why is a patrol bomber included with night fighters"? Well it seems that Marines decided they needed night fighters to protect newly won bases from night attack and to chase off or destroy nuisance attacks that kept troops from getting any rest at night. Unfortunately there wasn't much available. The Air Force was attempting to use the A-20 converted to the P-70 and the P-61 was still on the drawing boards and the likelihood of procuring any Beaufighters or Mosquitos from the British was slim to non existent. The Navy tried using the radar in Corsairs and Hellcats but found that asking the pilot to be both pilot and radar operator was a bit too much multitasking. About the only multi-engined aircraft available was the PV-1. They installed in it the MK IV radar that the British were using and added four additional 50 caliber guns in the nose and reduced the crew to three, Pilot, radio / radar operator and turret gunner. While it took a while to get up to speed on all the new technology and methodology in the end they were way more successful with the PV-1 than the Air Force was with the P-70 finishing the war with 12 confirmed kills versus 2 for the P-70s. Reading about the exploits of this big pseudo night fighter got me hooked so I decided to add it here even though it doesn't exactly match the criteria.
The Kit
The Revell kit
comes in a rather over sized box for the amount of
plastic
in it with OK artwork on the top of the top open box. Inside the box
one finds four bags of sprues. Two large bags, one with two sprues and
the other with three. One mid sized bag has five small sprues and a
small bag with the clear parts. In spite of all the sprues stacked
together everything seems to have survived the journey in my kit. The
plastic parts are molded in a light gray plastic and feature a smooth
almost glossy surface with recessed panel lines and surface detail.
The
only raised surface detail were the fuel filler caps on the upper wing
surface and a couple access hatches on the top of the fuselage with
recessed fastener detail around their circumference. The only surface
defect I found was the copyright Revell Inc. 2011 KOREA in raised
letters on the bottom of the horizontal tail plane. Fortunately
the letters are small and should sand off easily.
Revell
has done a good
job of keeping
ejector pin marks out of areas where they might be seen. All of the flight
control surfaces are
molded in the neutral position. There is no attempt to simulate fabric
on the control surfaces. The short tail stubs outside of the tail
fins are molded integral with the fins so no fit issues
there.The
panel lines are a bit wider than what has been the norm on state of
the
art kits lately but not so much that I think it will detract from the
model when painted. One nice touch is openings for the fixed leading
edge slats. The main gear bays have nice molded in structure detail, a
tank and some molded piping. The main gear doors have some nice
lightening hole detail. The interior of the fuselage in the area of
the
rear gunners station features molded structure, but there is very
little if any detail molded into the fuselage in the cockpit area. The
cockpit area features the floor, pilot and copilot seats, a center
console, control columns, instrument panel with integral rudder
pedals,
throttle quadrant and rear bulkhead. It looks a little sparse but the
parts are nicely molded although the instruments themselves have no
internal markings. Fortunately the cockpit glazing are not that
extensive so things in there will be some what hard to see when
complete.
There is a floor behind the cockpit
bulkhead that serves as
the roof of the bomb bay and features some structure detail and
wiring.
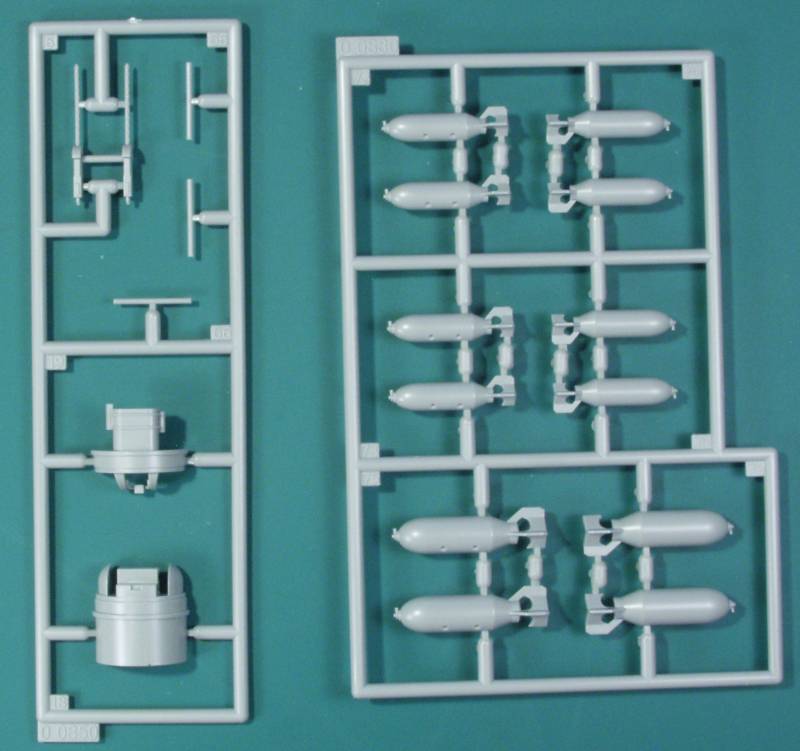
Bombs are supplied in the kit if you should desire to display the kit
with the bomb bay open. The Bomb bay doors operate like bifold doors
so there are four of them that need to be aligned and fitted if you
want the bomb bay closed. There is structure detail on the insides of
the doors but the way they mount when open little of it will actually
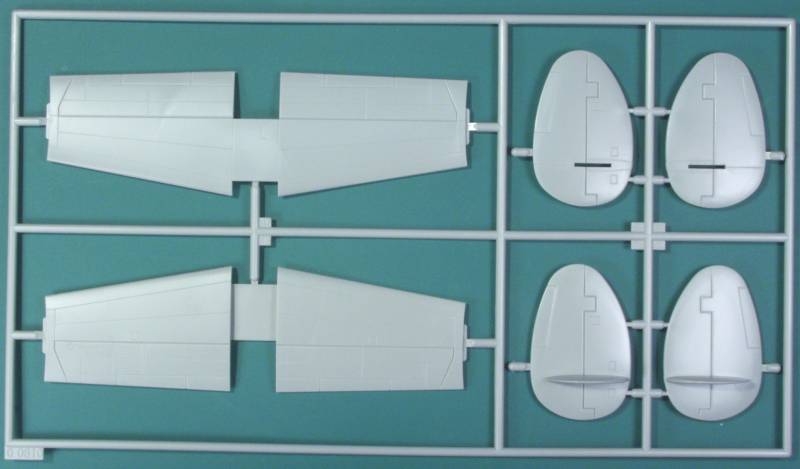
be seen. There is a short wing spar as well as tabs on the wings that
slot into the fuselage which should provide a solid mount for the
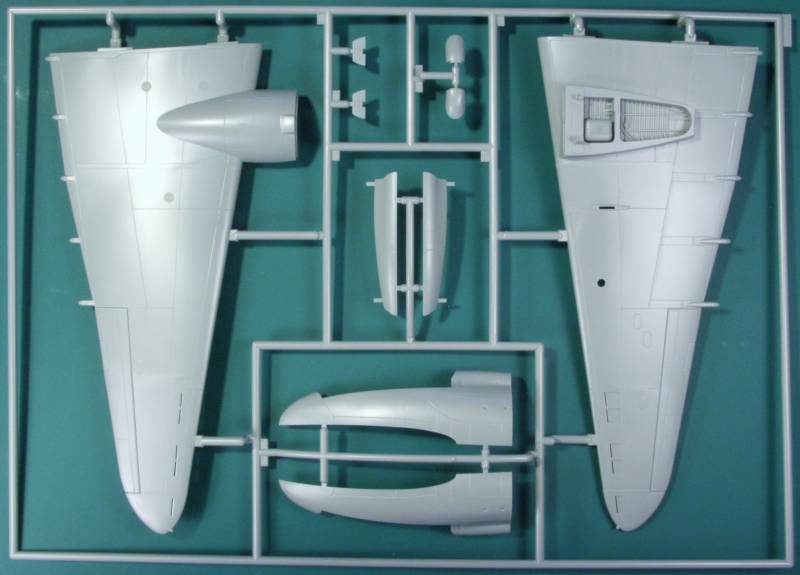
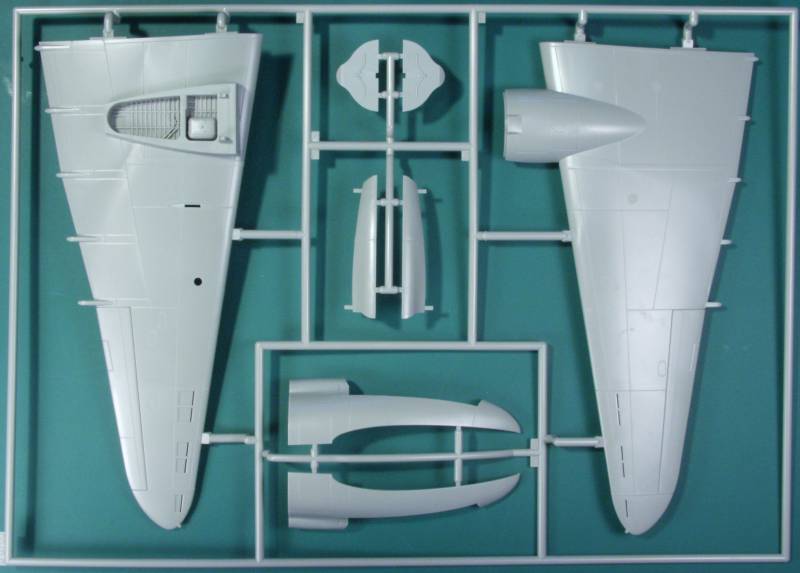
wings. The nose is molded separately as is the panel that the turret
mounts in suggesting the possibility of different versions in the
future. Fortunately these mount along panel lines.
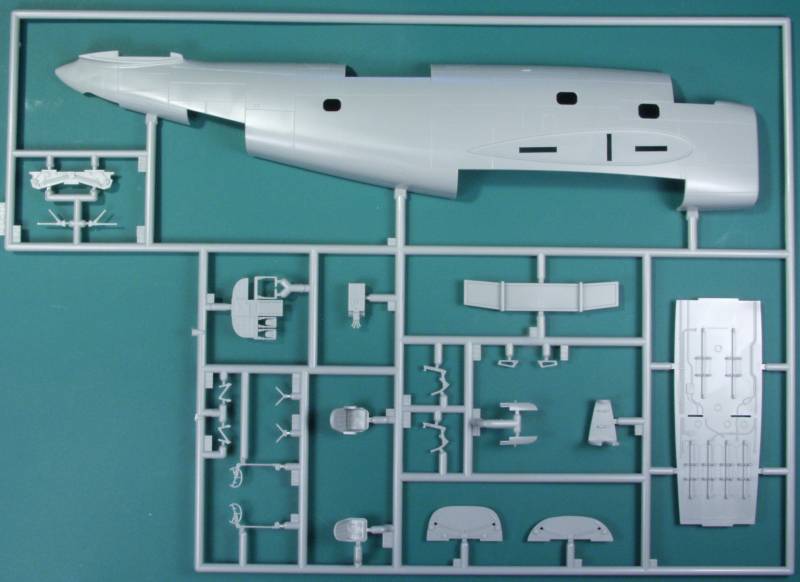
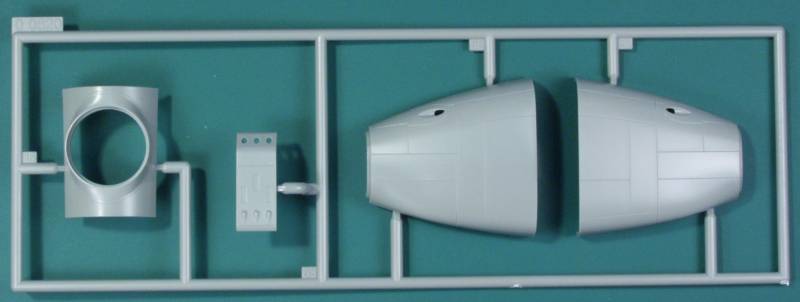
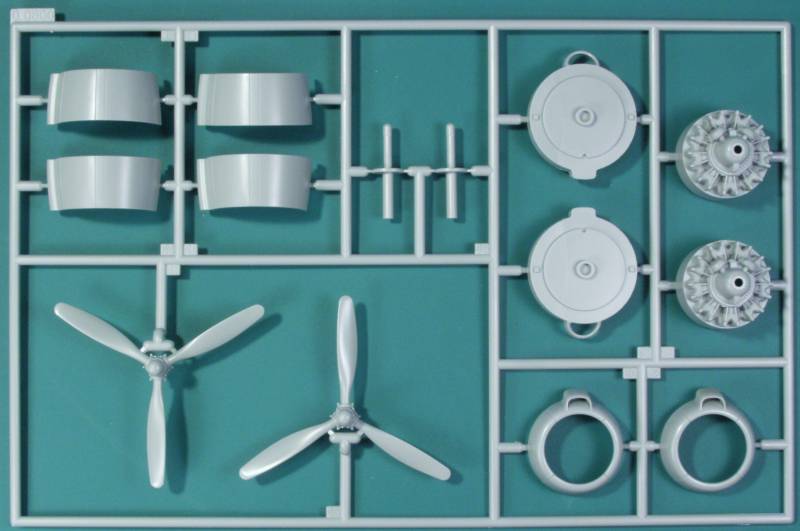
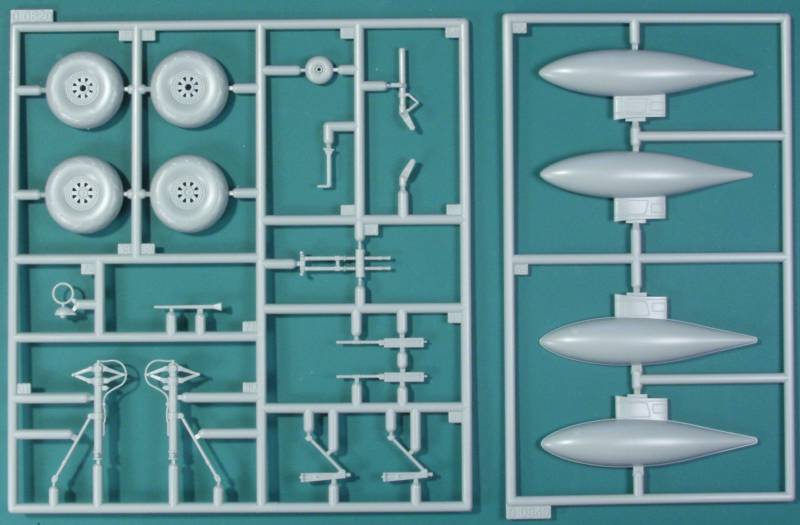
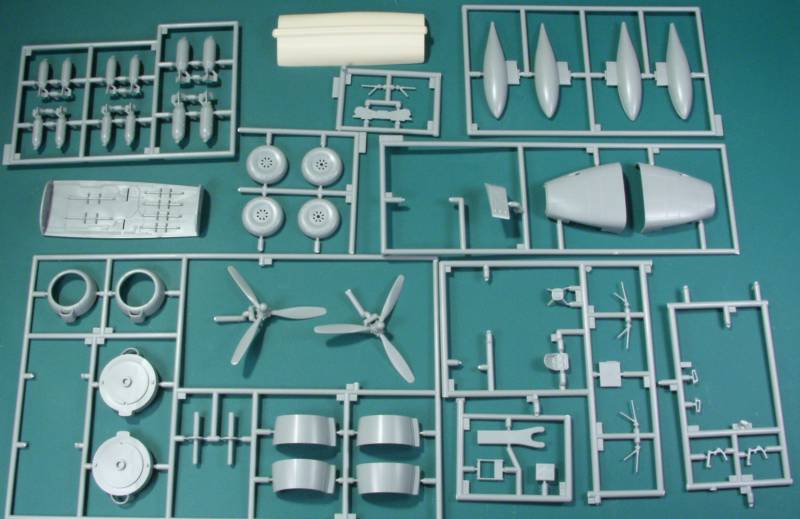
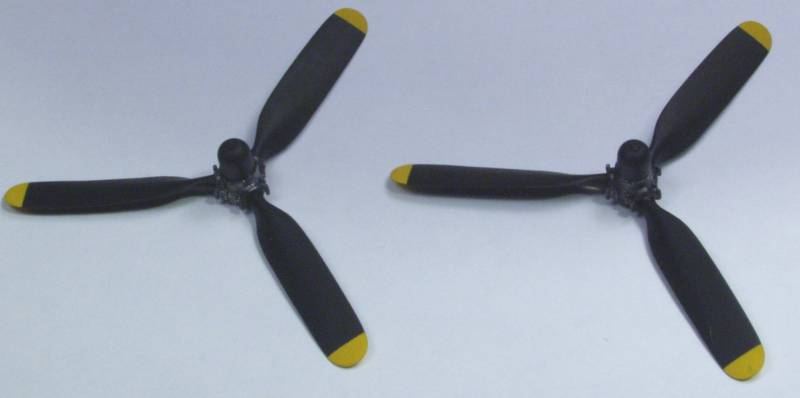
The engines are molded as one piece with integral push rods. Probably adequate as the cowls are pretty tight fitting. Probably the biggest short coming of the kit is the propeller blades which are too narrow in cord as a result of Revell using a restored Canadian aircraft as their pattern for the kit. Fortunately the after market folks have come to the rescue and these will be discussed later.The turret interior is pretty simple and would probably benefit from some additional detail. The gun barrels aren't bad but are not hollow ended and would look better replaced with metal barrels. A set of under wing fuel tanks is supplied, if you don't want to use them you will need to fill the slots and recesses in the bottoms of the wings. The main gear are nicely molded with very petite integral brake lines. The main wheels are not weighted and feature a diamond tread. All of the parts are nicely molded and I could only find a small amount of flash. Mold parting lines are tolerably light. The box states that the kit contains 143 parts in gray and there are 15 clear parts. Sprue photos are below
The clear parts are not as thin and clear as I would like to see but will probably look OK with a dip in Future. My canopy has what appears to be a molding defect that appears like a scratch but seems to be internal, like a hair or something got molded in. I hope a Future dip will make it less noticeable, The turret part was on a separate sprue, another hint of other variants to come but because it was loose with the other parts it did show some scuffing that will need to be buffed out. Other than the main glazing two landing lights and a piece with three formation lights are included. See below.
![]()
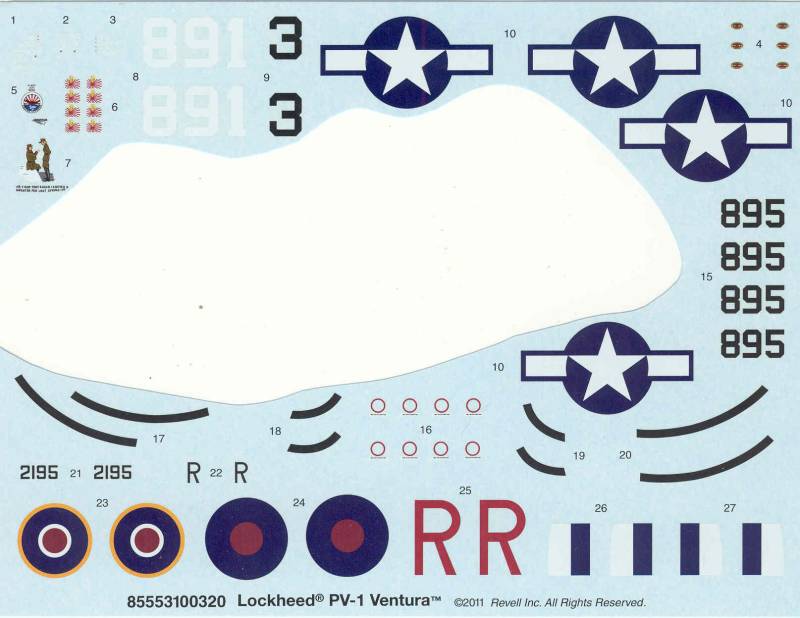
The decals seem to vary a bit depending on whether you got the Revell release from the US or the Revell of Germany release. My kit was from the US release and contains markings for three aircraft, one with the octopus. Apparently the set from the Germany release had a color and shape error with the octopus and a correction sheet was included. I did not plan on building the version using the octopus and when someone on a forum asked for them I willingly sent them. Unfortunately I did not scan the sheet before removing the octopus so the scan below has a big hole where the octopus was. The balance of the decals appear thin, are in register and have a glossy finish. Instrument decals are provided for the instrument panel and fuel filler markings and propeller logos are supplied as well. See below.
The instructions are a stapled booklet 8 1/2" x 11" in size. The front page has the aircraft history in English and basic assembly information and customer service information in three languages. Page 2 has a color chart in three languages keying letters shown in the instructions to generic paint color names, decal instructions and an icon chart. Pages 3 and 4 are a complete parts list, I assume for ordering replacement parts. I have not seen anything like this in any other kits. Pages 5 through 13 are the assembly steps broken down into 18 steps. Pages 14 through 16 are the painting and marking instructions for the three aircraft provided on the decal sheet.
After Market Goodies
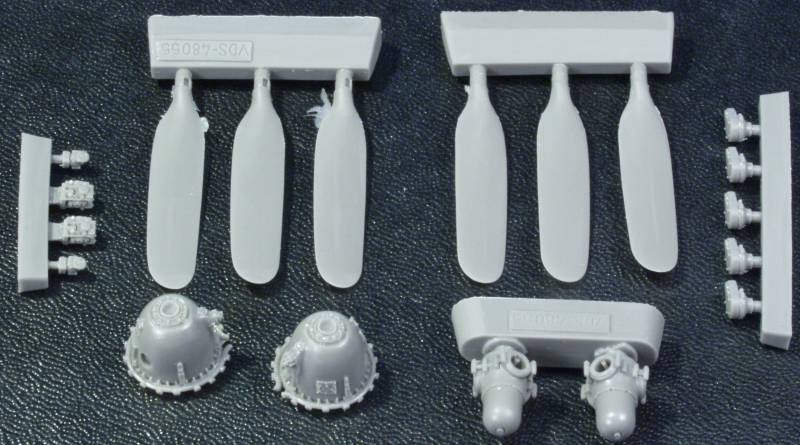
OK, I went a little nuts on the after market stuff here but most of it was justified in my opinion. First up is Vector's corrected propellers and crankcase set. The aircraft Revell used as a reference for their kit was a restored Canadian aircraft and it was fitted with narrow cord propellers that were much different than the paddle blade props used on most US aircraft. This set takes care of that problem and a bit more. The parts are nicely molded with just a hint of flash and no visible surface defects. The blades are keyed to get the correct pitch. The jury is still out on replacing the crank cases. The magnetos on the kit engines appear over sized and the crankcase is missing the ignition loom but cutting off the crankcase and removing the excess of the magnetos looks like quite a chore. It may prove to be easier to just add the prop governor and other detail to the kit crankcase. Vector number for the set is VDS48-055. See below.
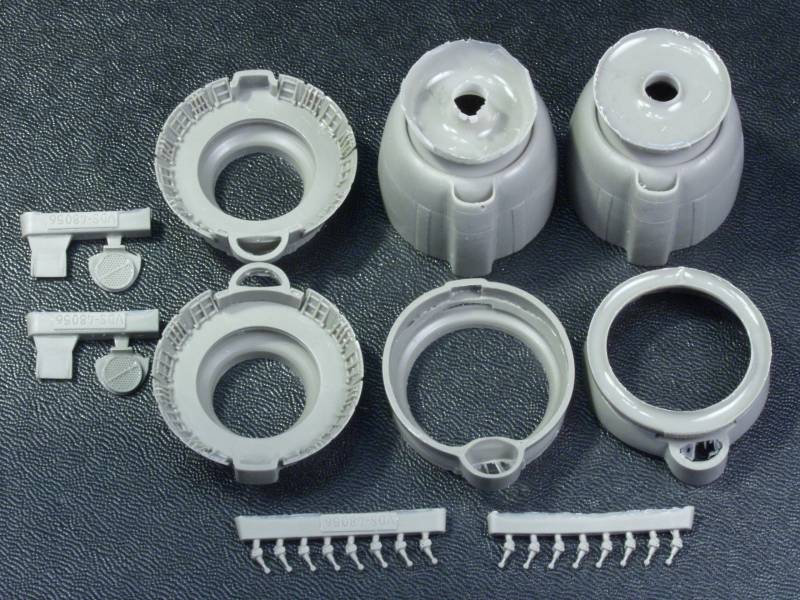
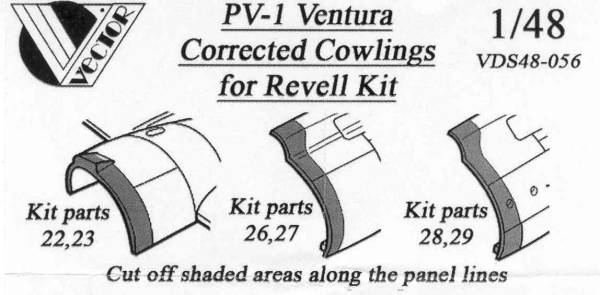
While I was at it I also got Vector's corrected cowling set. The set simplifys the forward cowling but replacing three parts with one and then provides open cowl flaps. It does require cutting off some of the kit parts on panel lines but should provide a really nice look when complete as the cowl flaps include actuators . The castings should be relatively easy to clean up and the only defect I found was the one small air bubble on the front of the one cowling. The Vector part number for the set is VDS48-056. See below.
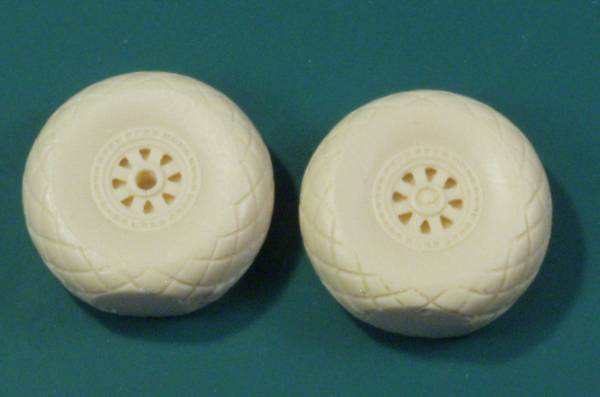
Next, being the lazy person I am I purchased Lone Star's closed bomb bay doors. The kit doors are in four pieces and designed to be mounted in the open position and can be quite fiddly to fit together and into the fuselage if you want them closed. While I was at it I also got their replacement wheels which have nicer tread detail than the kit parts, plus they are one piece with no seam to deal with. Once the mold spur is filed off it will give the tire a bit of weighted appearance. There were no surface defects to be found and the casting block should be easily removed. These are some of the nicest parts I have seen from Lone Star.

Since I was planning on making this the night fighter version I decided to get Owl's conversion kit. I had originally just planned to use the parts from the FM kit but I was informed they didn't fit well. I may end up using some of it anyway. The Owl set comes in a small end flap open box and the parts inside are in zip lock bags.
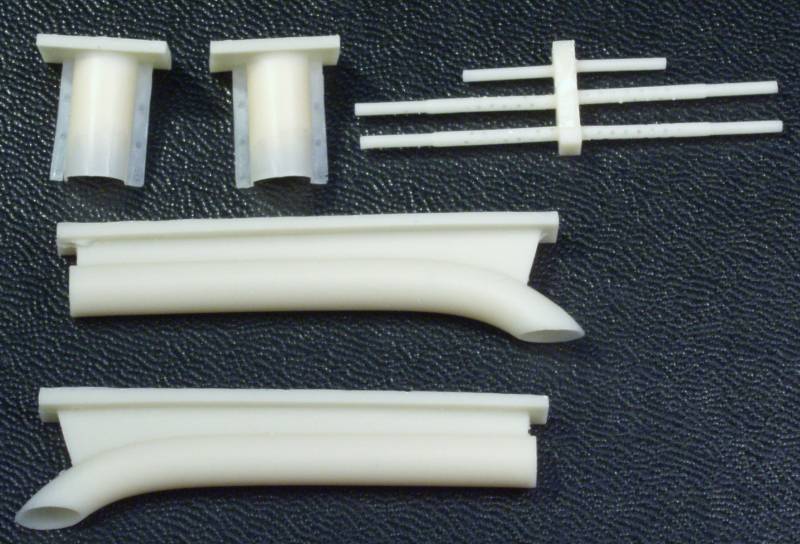
There are ten small resin parts, six gun barrels, and two flame dampening exhausts made up of a forward piece with an air intake and a rear piece. The parts are cleanly molded with a hint of flash. No surface defects were found. The gun barrels are OK but I think I may replace them with metal barrels.
The other part of the set is a complete new nose section to replace the kit nose. This is solid resin and very nicely molded with no surface defects found. The only complaint I have is that the panel lines are a lot finer than the rest of the kit. Resin can be difficult to scribe so it will remain to be seen if that is an option to make it look like less of an add on piece.

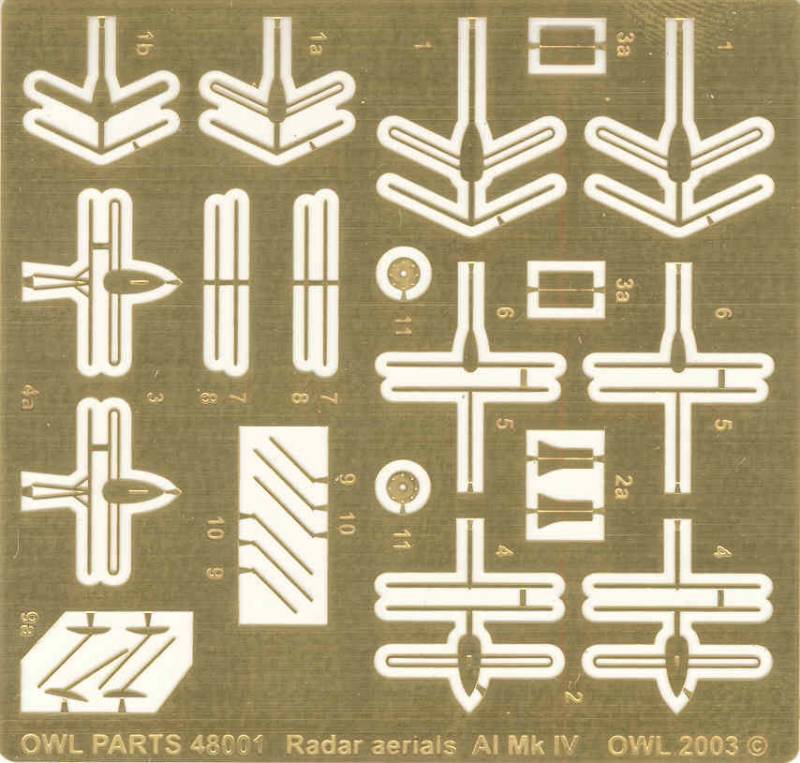
Finally the various antenna for the radar system are supplied as photo etch parts. These are probably a bit one dimensional but the jury is still out on that issue.
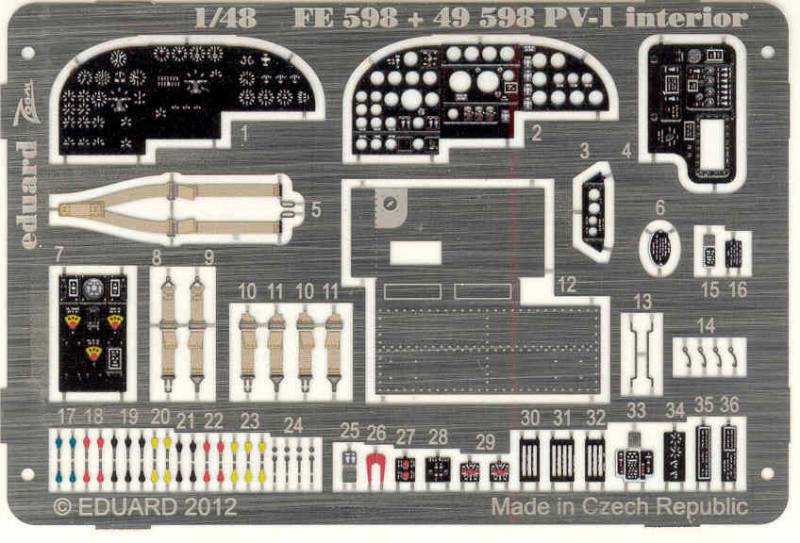
I also wasn't impressed with the instrument panel or the decals for it and opted for the Eduard ZOOM interior set (FE598) which supplies the main panel, belts and harness, some auxiliary panels, some other odds and ends and a lot of those PE levers that every learns to hate. See below.
I also went with a set of canopy masks from Eduard (EX352) as I really hate masking the old fashioned way.
Conclusions
This kit was a bit of a surprise when announced and even more so when the price was announced. It no doubt would have cost three or four times as much had it come from one of the Chinese based makers. It's a nice kit and by most reports goes together with little in the way of fit issues. Detail is simplified in a few areas but it will be a great canvas for those wishing to detail it further yet at the same time its easy enough for a beginner to assembly and end up with a great looking model. This kit basically renders the to previous kits, the Koster vacuform kit, which is a nice kit if you are into the vacuformed type of kits, and the horrible Foundrie Miniatures kit obsolete. Highly recommended.
Links to kit build or reviews
A build / review can be found here.
References
PV
Ventura / Harpoon
Units of
World War 2 by Alan C. Carey
The Empire Express by Charles L. Scrivner
PV-1 Ventura in Action by Charles Scrivner and Capt. W.E.
Scarborough,
USN (Ret.)
Vega Ventura, The operational History of Lockheed's Lucky Star
by John
C. Stanaway
Back to the Nightfighters Page
The Build
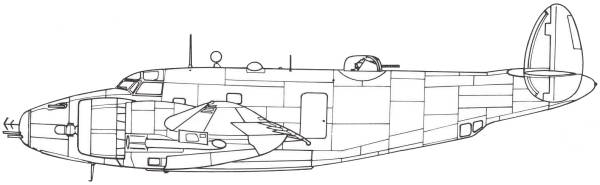
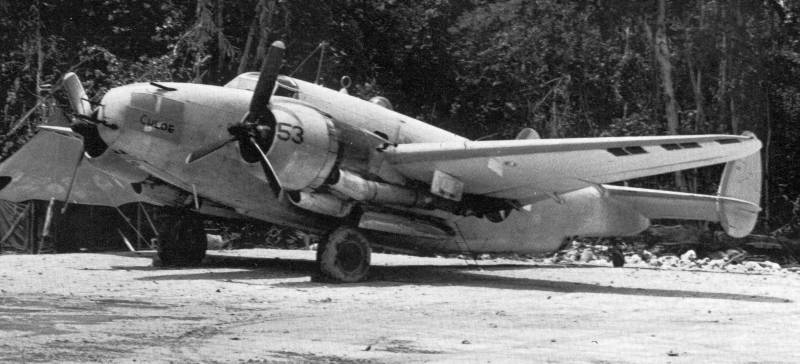
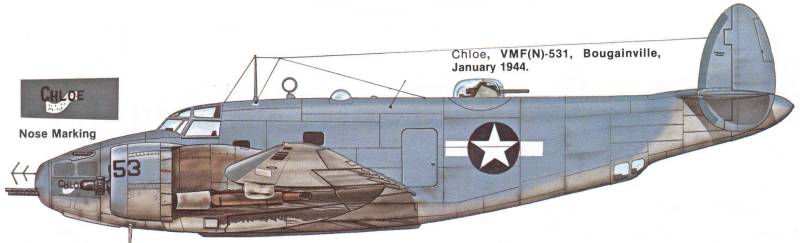
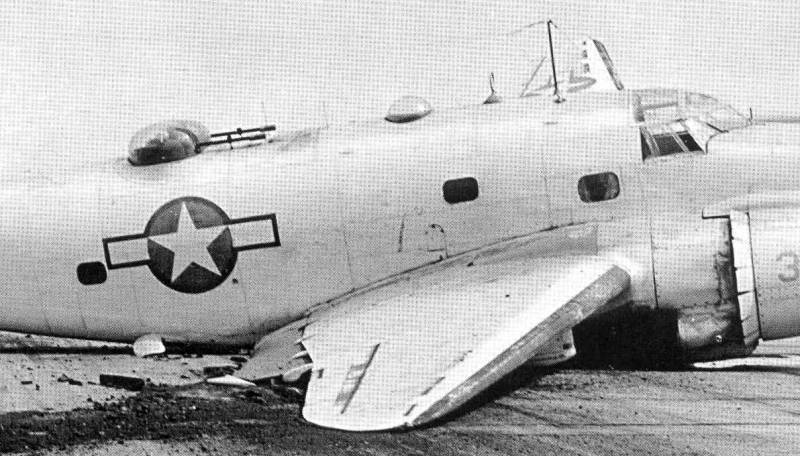
I wanted to do the night fighter version of the PV- 1 and shown below is a photograph and profile of the specific aircraft I'm building...
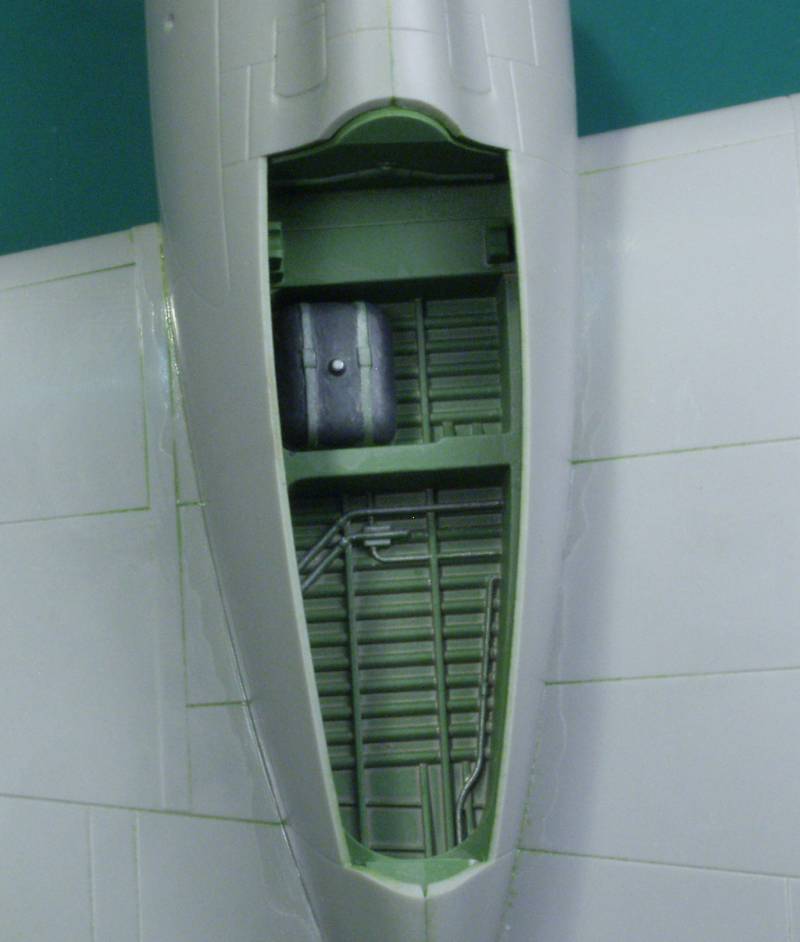
The first thing I like to do when working on larger kits is sort through and remove all the parts that for one reason or another I am not going to use so I don't keep sifting through them when I'm looking for a part. In this kit there are a fair number. Note that the photo shows the bomb bay assembly and at this point I'm still on the fence as to whether it will be used. I may put it in just to add some additional strength to the fuselage.
You may have also noticed the resin bomb bay doors in that photo. At the time I bought them I had read several places that the doors were fiddly to install in the closed position so I thought I would save my self some grief. Well when test fitted with the fuselage halves taped together, I found the resin door was too wide and about 1/16" too short. Fixable, yes, less trouble than dealing with the kit doors, no. Some test fitting indicates that if the bomb bay doors are glued in place on each fuselage half prior to assembling the fuselage they should fit fine and will allow them to be glued from the inside and positioned with ease. Problem solved.
Next thing I did was to see what could be put together quickly and that turned out to be the wings and tail. Only thing that needed to go inside the wings was landing light lenses.

Next I wanted to deal with getting some of the other resin parts cleaned up. First the wheels, these were from Lone Star, I thought the tread looked better than the kit wheels and I hate cleaning up seams on wheels molded in halves. Also they weren't bulged or weighted so they don't look flat like True details tires often do. I did sand a flat on them to give some weighted appearance.
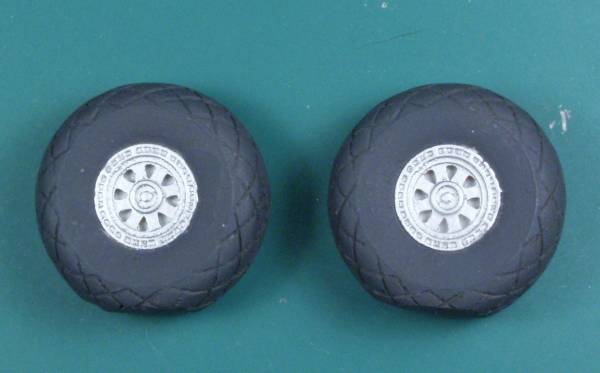
Wheels and tires painted up ready for weathering.
Next up was the cowling set. This was from Vector and the molding plugs had me worried that cleanup would be a bear. But it turned out that it was as easy as a light scribe around the outer edge of the plug with a tip of an X-acto and it popped right out. A little trimming and they were ready for use.
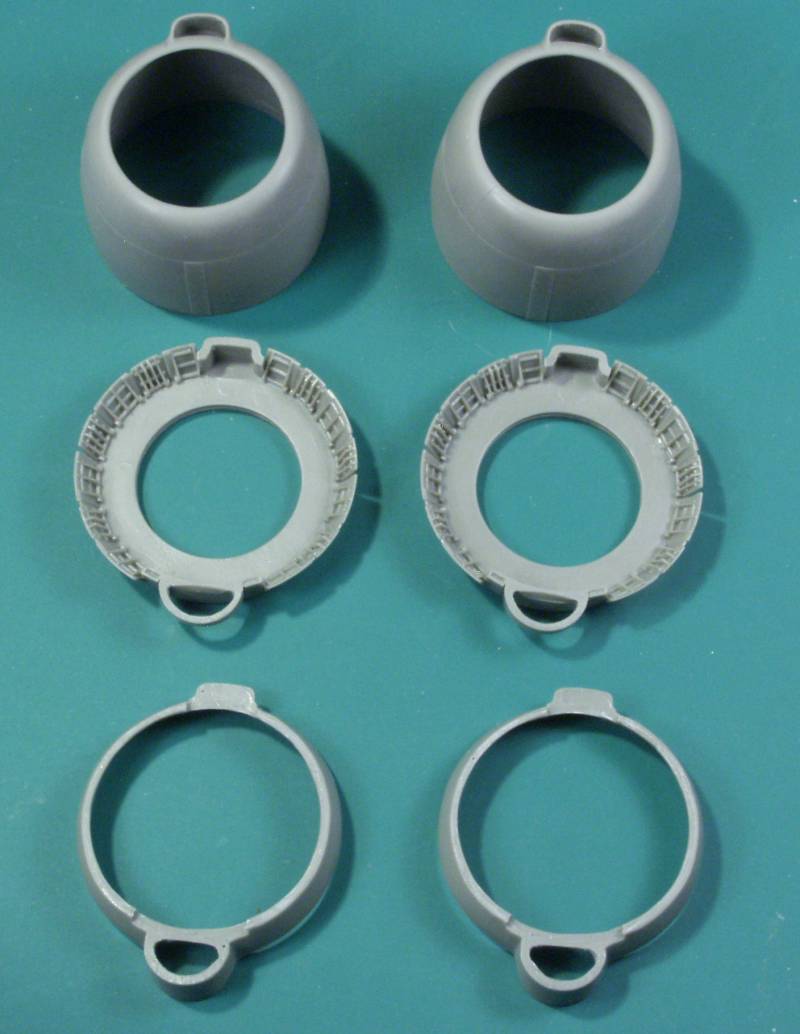
The set provides open cowl flaps which most PV-1 photos show open when on the ground. With the actuators installed, some paint and grunge they look the part.
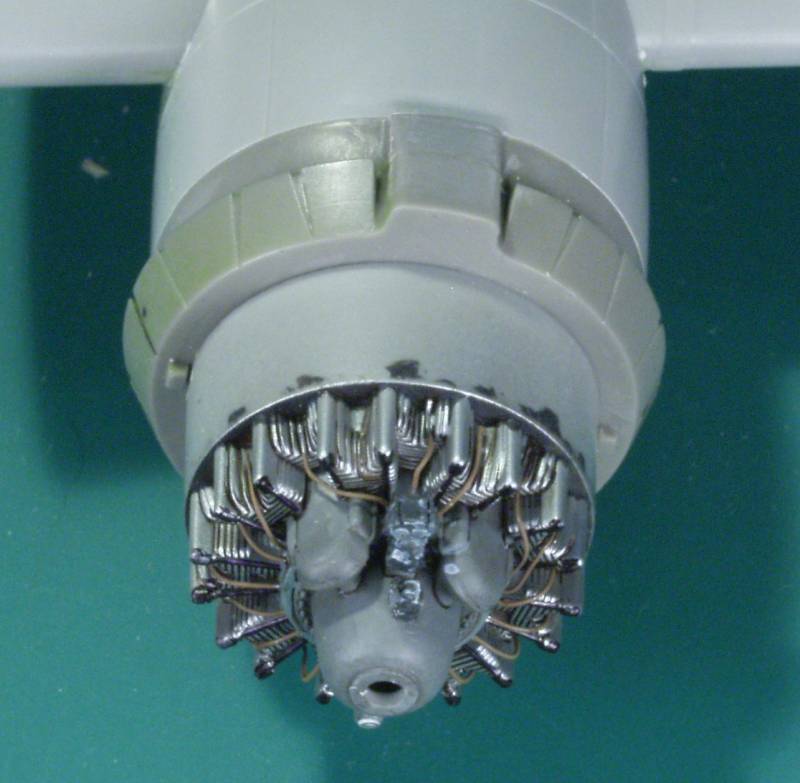
The Vector engine set shown in the review contained a new gear reduction housing, to use the it one would need to cut off the old. Not a big deal but the magnetos on the kit part extend clear back between the cylinders and removing all of them didn't look practical to me. See kit part below...
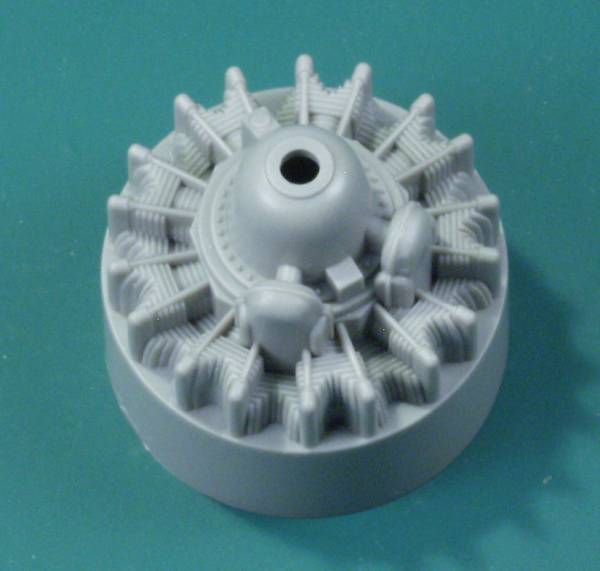
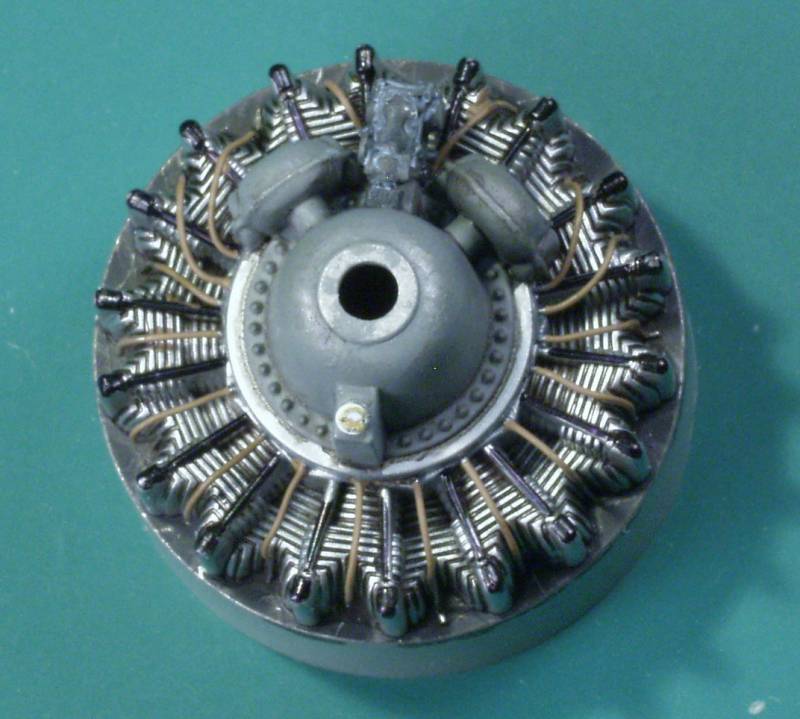
Since it's not all that easy to see once in the cowling I decided to take a different route. I went with the kit part, added some token wiring and added the prop controls and called it a day. Due to the way the part was molded in one piece doing a prototype wiring job was really not possible so I added just enough that when view from the front it gives the impression of wiring or at least I hope so. The push rod tubes were done with a Sharpie.
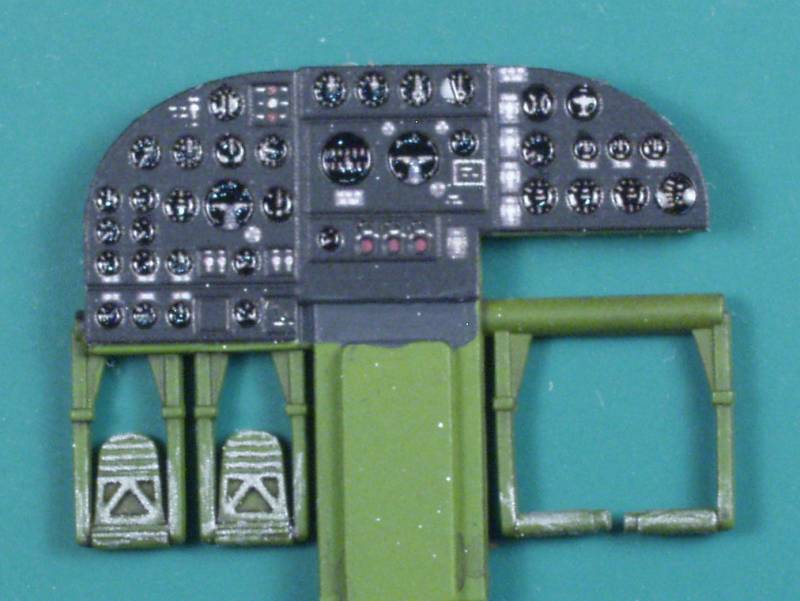
On the Eduard PE I found that with the exception of the main instrument panel, the other auxiliary panels more closely matched those in the PV-2 so I went with the kit parts for them. I have found that giving the panel a flat coat before using Future in the dial faces seems to eliminate most of the grainy effect on the Eduard parts.
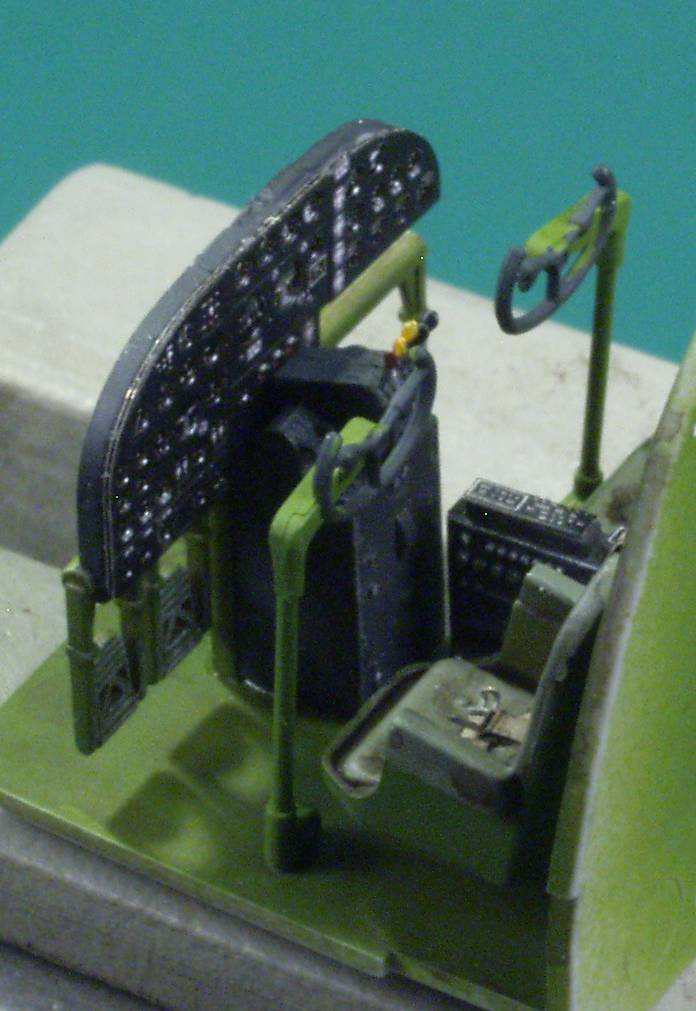
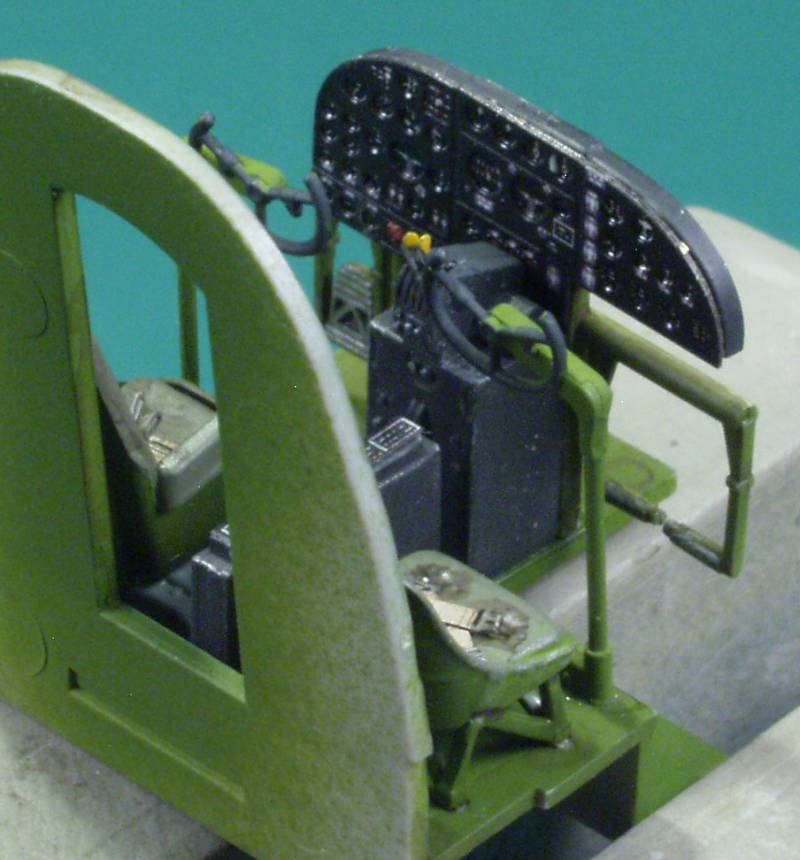
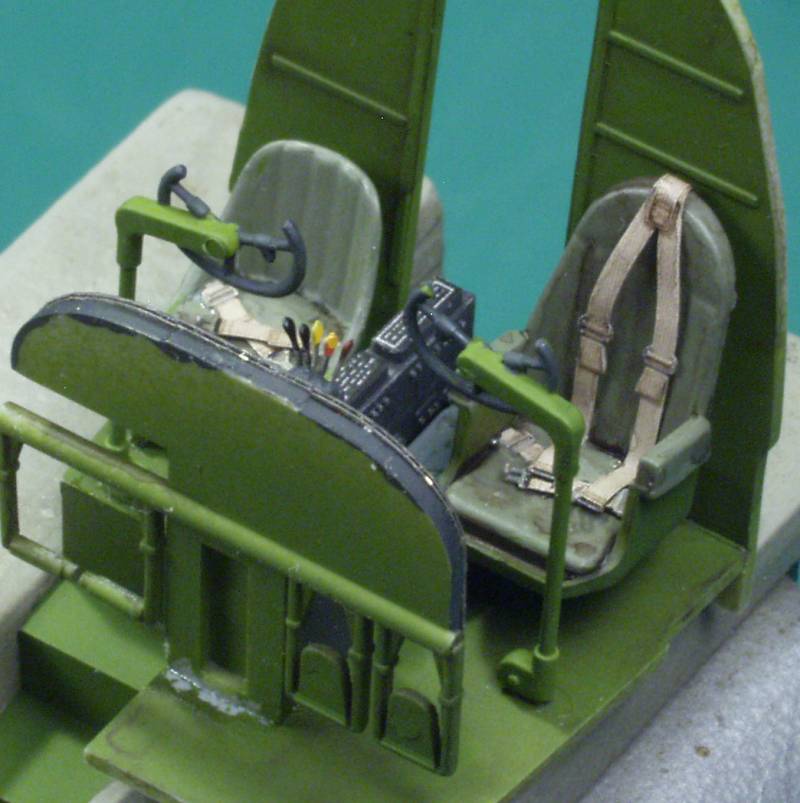
To me the
kit cockpit was a bit lack luster. The
control columns appeared to be too tall to me but when I looked at
photos of the real thing they seemed to be in the right height based on
their proximity to the throttle quadrant and IP and I came to the
conclusion that the seats are just too low or everything else is too
tall. My emphasis on this build is primarily the exterior so I decided
not to get off track fixing things that won't easily be seen anyway so
I left it as is. Due to its small size it was difficult to photograph...
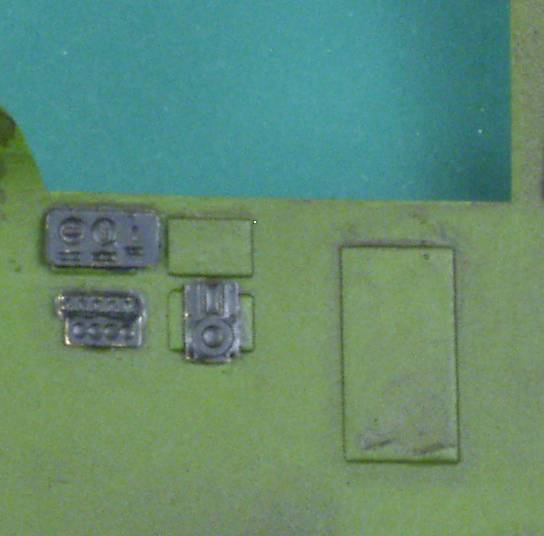
The cockpit side walls were pretty plain with just some molded in squares that could be almost anything and didn't seem to match any of my references. I had hoped to use the resin side wall panels that came with the Foundrie Miniatures kit but alas they didn't match references either. Do the kit designers just make this stuff up ? So I resorted to some creative gizmology. On the pilots side I repurposed a couple of the unused Eduard parts, not correct by a long shot but better than molded in blobs.
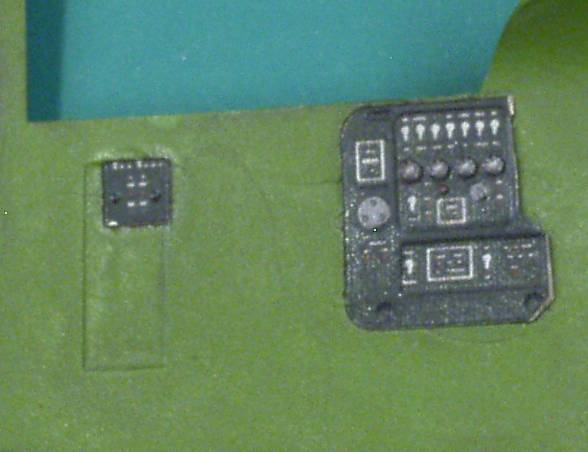
On the
copilots side I used some panel parts from the
Airscale cockpit detail PE fret. Again not really correct but better
than nothing in my book anyway.
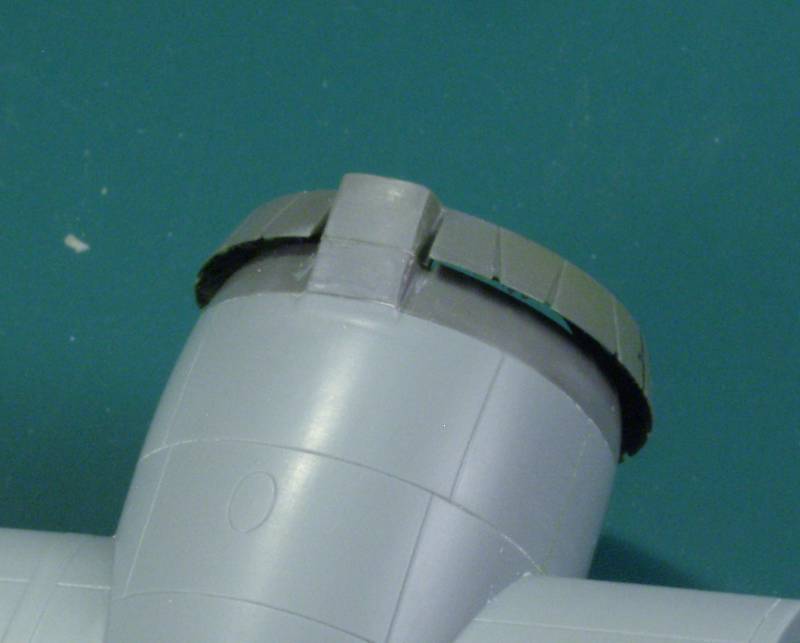
Getting back to the airframe, in order to use the Vector cowlings some cutting is required so if you are squeamish about this sort of things you may want to pass on the cowlings.
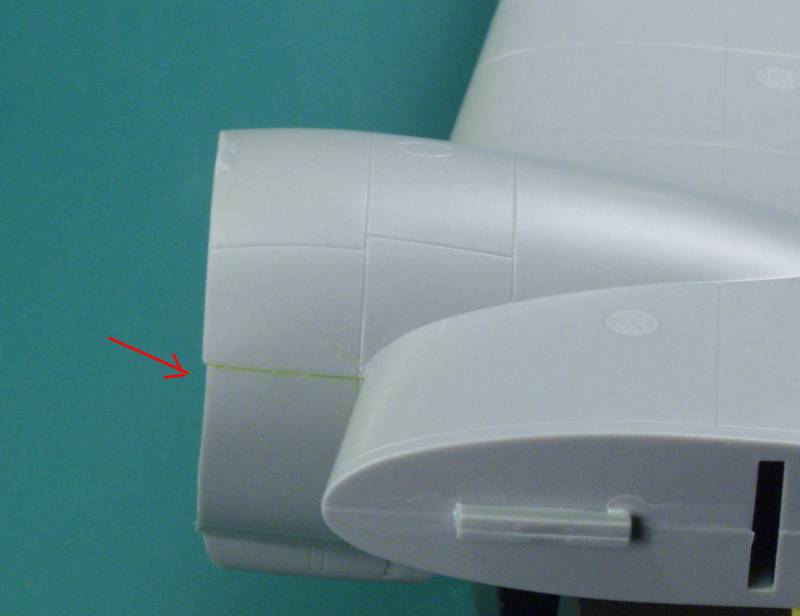
Fortunately the cuts follow panel lines, unfortunately four of the cuts have a curved section. I spent a lot of time doing this to make sure I stayed on the lines. I cut straight across on the parts with the curves and carved into the lines with an X-acto. Every thing looked good until I glued the parts to the wing. On both sides I ended up with a step...
I was going to cut a wedge to fit but before attaching the first of the cowling rings I sanded the front surface on some sandpaper on a flat surface and that got rid of most of the step. Since this area was on the side facing the fuselage I decided any gap could be filled as it wouldn't be all that visible anyway. When I attached the first cowl ring I tacked it at the top then did a progressive glue around the outside. In the end it fit pretty good although I do have a bit of a step between the resin and plastic in a couple places as if the ring were slightly too small. If I had to do it again I think I would cut just ahead of the panel lines and sand down to them, then I think the ring would be just about perfect.
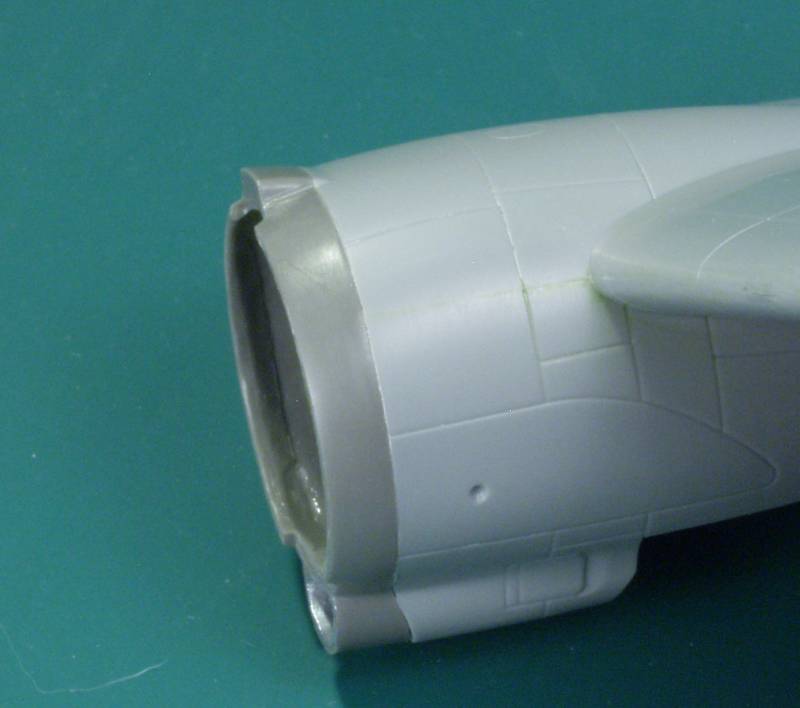
The worst of the fit was on the bottom where I did the hand carving, nothing that some filler won't fix.
At this point I also did some preliminary wheel well weathering.
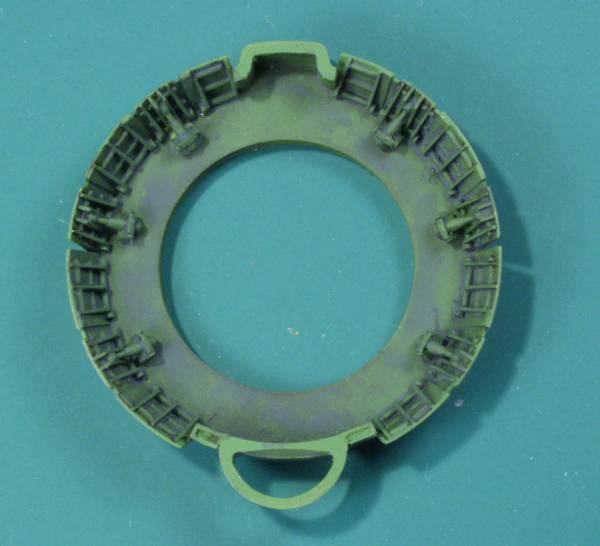
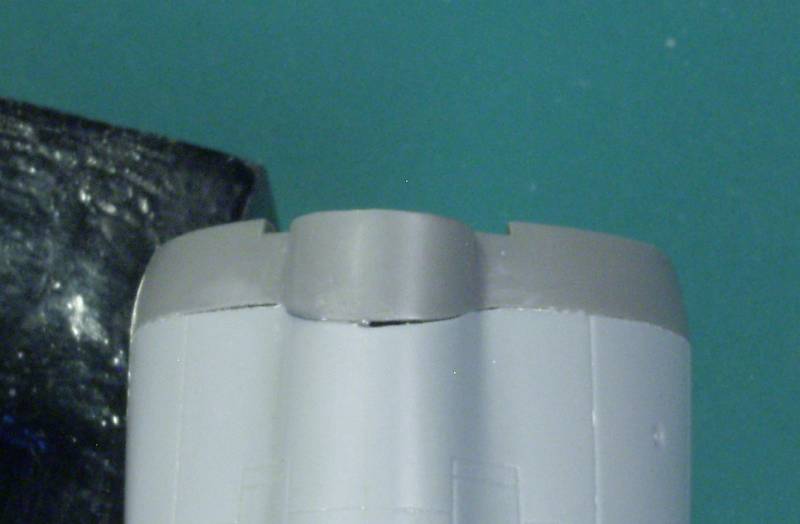
While on
the subject of the cowling mine had
something I don't usually see on Vector resin and that was a big old
bubble hole. This one went all the way through. I probably could have
gotten a replacement but didn't want to wait, besides big holes are
much easier to fix that the tiny bubble holes.
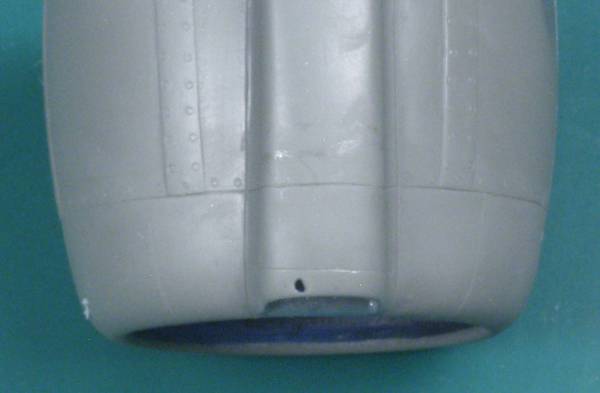
In this case I enlarged the hole to fit the smallest styrene rod I had on hand, dipped the end into some thin super glue and stuck it in the hole. When set I trimmed it off inside and out and with a spot of Mr. Surfacer it will disappear.
I glued the bomb bay doors to the fuselage halves. Still fiddly but much easier I think than trying to do it after the fuselage is together as you can work from both sides. The fit was actually pretty good.
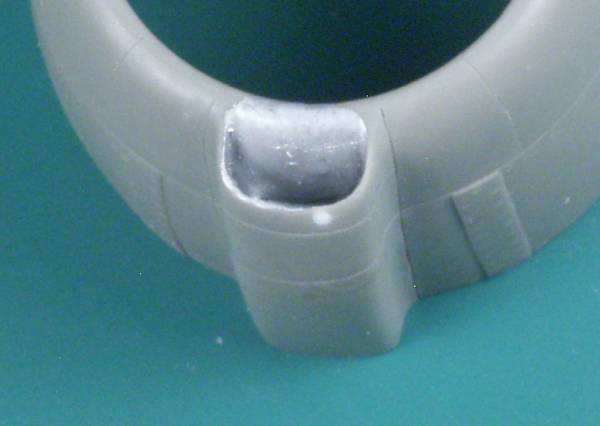
Once I filled the various gaps around the rear most cowl piece I glued the cowl flap section to it. This only makes contact in two places so make certain your mating surfaces are clean and flat. One thing I hate about resin stuff is gluing them with super glue. No matter how well things fit it always seems that once the super glue is applied things don't line and you have so little time to make things right. Well I got lucky on these and every thing went together well.
Just a bit of sanding top and bottom and things were good to go. Next up the kit engine keys into the from of the cowl flap section, no issues here.
Next the cowlings are installed. These have two spacer nubs to center them but they still need to be rotated to the proper orientation and even using slow setting super glue I had my moments with these but in the end they ended up where needed.
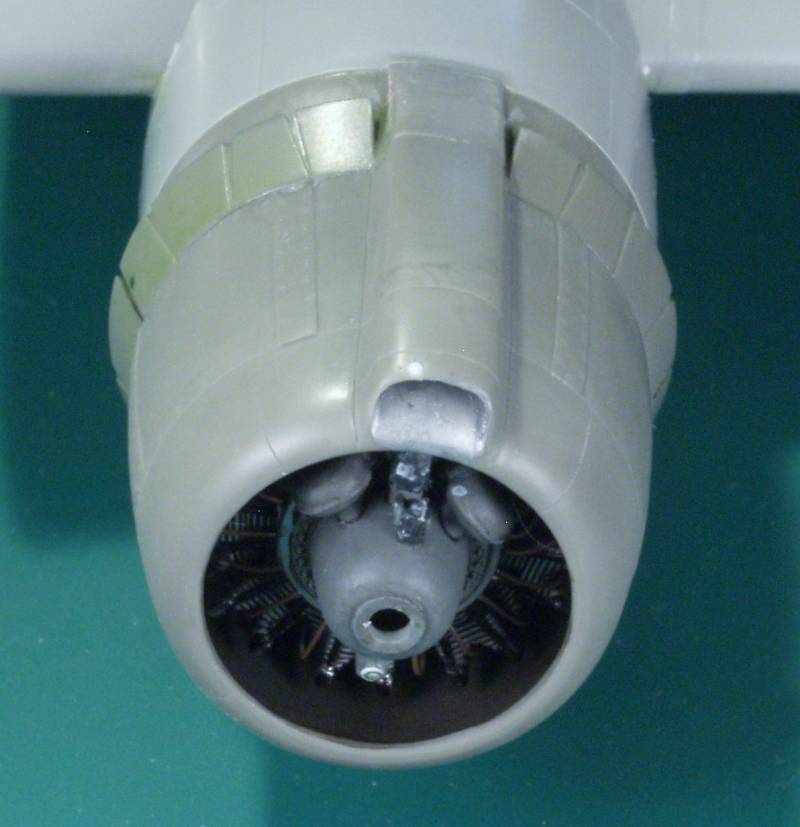
Fit was good and a sanding stick took care of a bit on excess glue. With the wings done as far as need be for now I moved to the fuselage. I did end up using the the bomb bay piece. I'm not sure it adds a lot of strength but felt it might be insurance against seam cracking when installing the wings. The fuselage went together well but I did need to reach in through the nose and pop the bomb bay piece into it correct position. The halves fit well with no other issues with interior parts. I did not like the idea of putting the astro dome in at this stage and sure enough as soon as I started working on the bottom seam I knocked it out. So this will need to be addressed some where down the road.
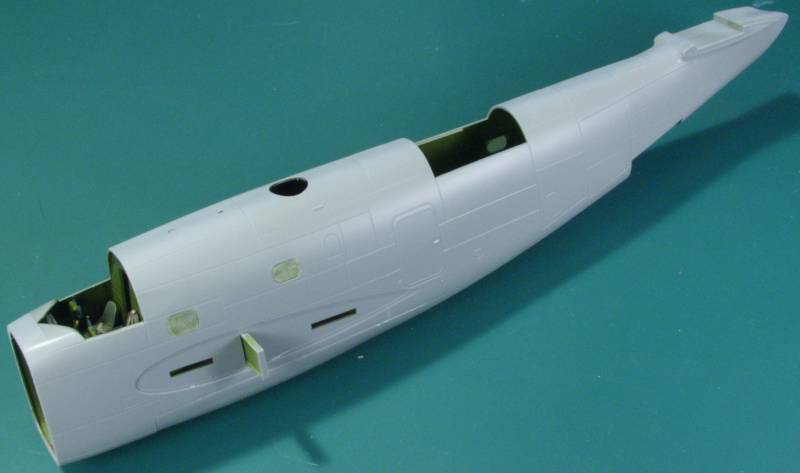
Once the fuselage had time to set up I cut the nose mounting flange off the front and smoothed it up a bit. Test fitting the resin nose showed it was just a tad larger than the fuselage so using sandpaper on a flat surface I sanded it down until it matched. As I mentioned earlier I really hate glue large pieces with super glue and in this case there were no alignment aids. I foresaw trouble in this an decided to use a different adhesive. In this case it's something I suspect most have never used in modeling. I have used it a few times primarily on parts that I was concerned that super glue would be to brittle.
I put a bead around the outside of the fuselage being careful not to over do it as I did not want a mess to clean up, installed the nose and once positioned (which this stuff gives you plenty of wiggle time I let it set up over night. Everything fit tight and solid and I had only a couple squeeze outs to clean up. There were a couple places that did not meet perfectly but a little sanding on either the nose or fuselage too care of those.

Just as a reality check on the seat height if you compare this photo
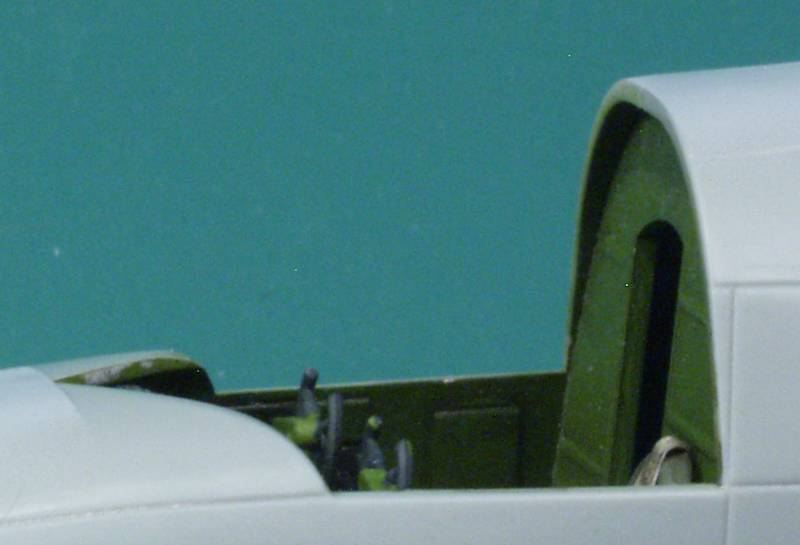
With this line drawing
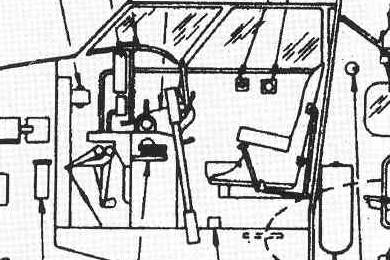
It appears that Revell got it right on the seat height and my earlier supposition was wrong assuming the drawing is correct.
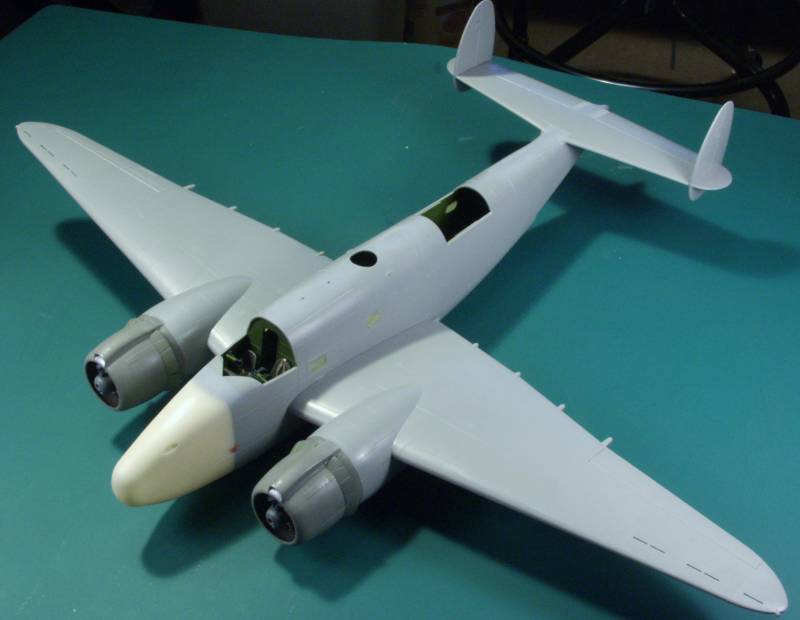
. With the nose on it was time to start bringing things together. The wings were attached. The fit was great, I wish everyone would use recesses for mounting wings, it just makes every thing so much easier. The tail was also attached. This fit so tight I could have gotten by not gluing it but I decided to anyway. So now at least it looks a bit like an airplane.
The Resin props were painted and assembled. The kit provides Hamilton Standard decals for the props but they aren't visible in the photos I have of the ship I'm building and appeared only on about half the other aircraft I had photos of so I decided to leave them off, which also reduced the number of finishing steps required.
Next I decided to mask the canopies. I find this to be a mind numbing job even with a mask set and typically go into a coma during the process. I was nearly finished with the last item, the turret, when I decided to check some references. Well, it seems that Eduard has you masking for external frame lines where none exist.
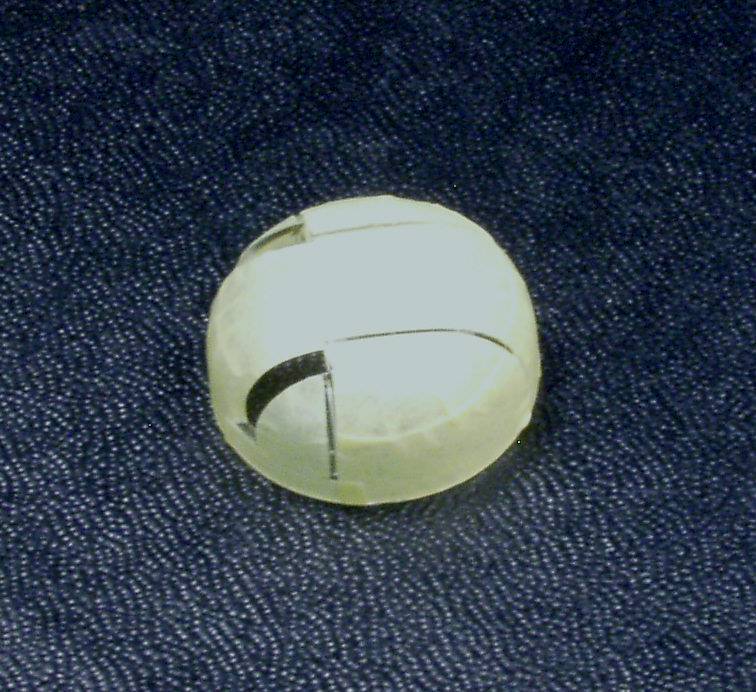
Photos from the manual show the glazing as a blown bubble with no exterior framing...
and many photos show the same...
I did
find some photos that appear to have external
framing but I think what you see is some internal stiffeners, probably
also made of plex and Revell has these molded inside the turret. So I
decide, since the turret isn't visible on the plane I'm doing, I'm not
going to paint any external frame lines. Right wrong or otherwise. An
additional note, once masked the turret won't fit in the opening so it
would need to be painted separate from the air frame anyway.
I did manage to get the astrodome glued back in place through the hole
that the turret mounts in.
Next up I decided to look ahead a bit to the radar antennas. The Owl
kit provides two short PE parts to mount the receiving antennas to the
engine nacelles back near the wing.
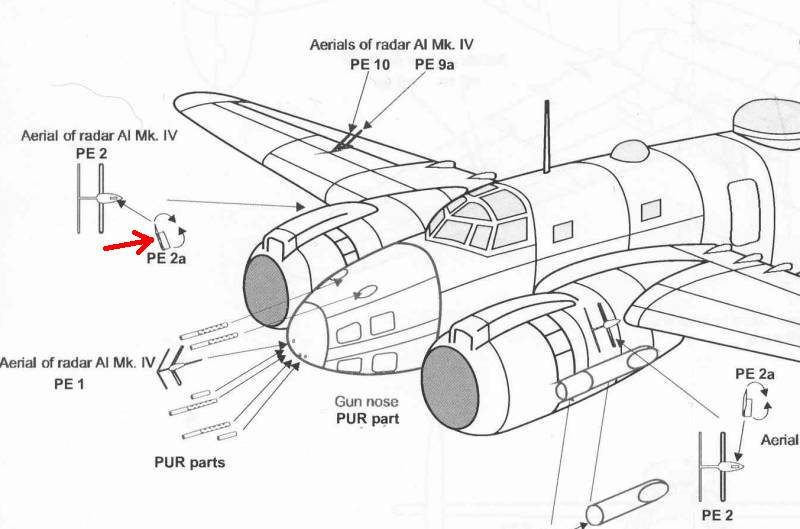
Somehow this didn't seem right to me as the antennas if mounted there would barely clear the cowl flaps and would be located behind the spinning propeller blades. I would not think this would be an optimum place for them, however they were very difficult to see in most of the reference photos I have, that is until I noticed this one...
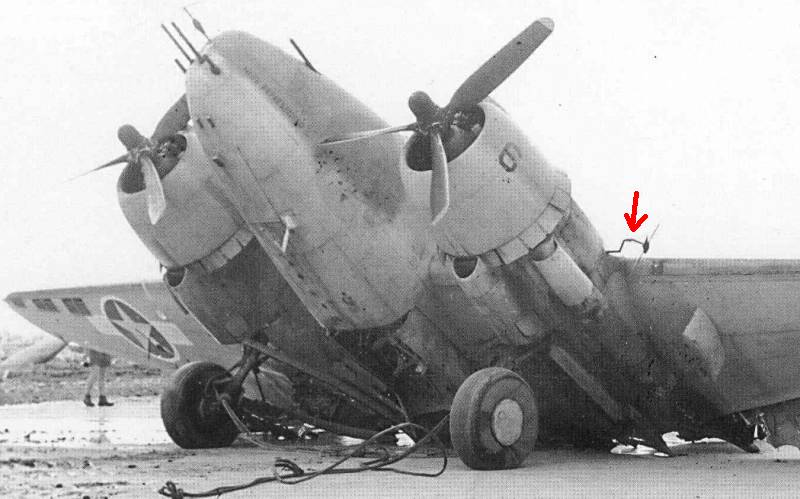
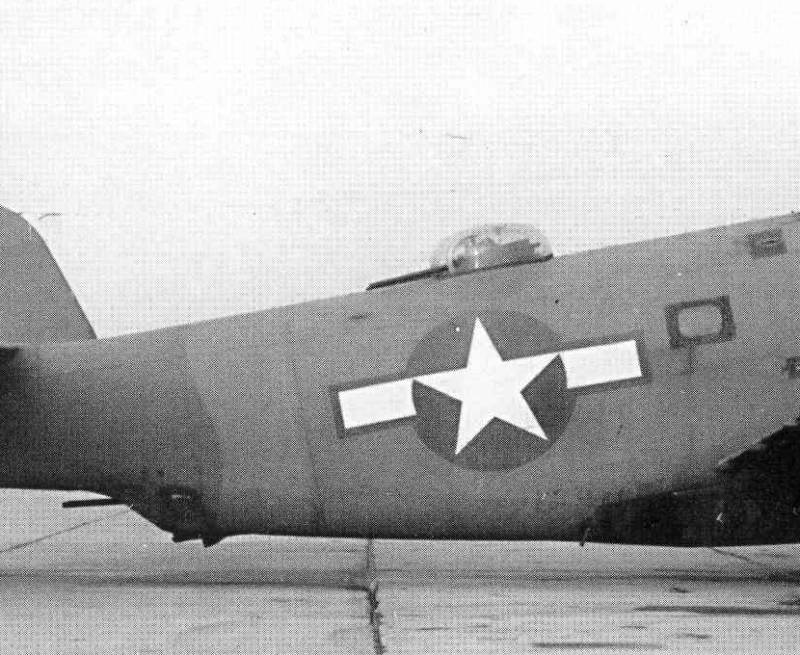
This PV-1 had the misfortune of being cut in half by a runaway Corsair but viola, it shows the correct mounting for the receiving antenna !
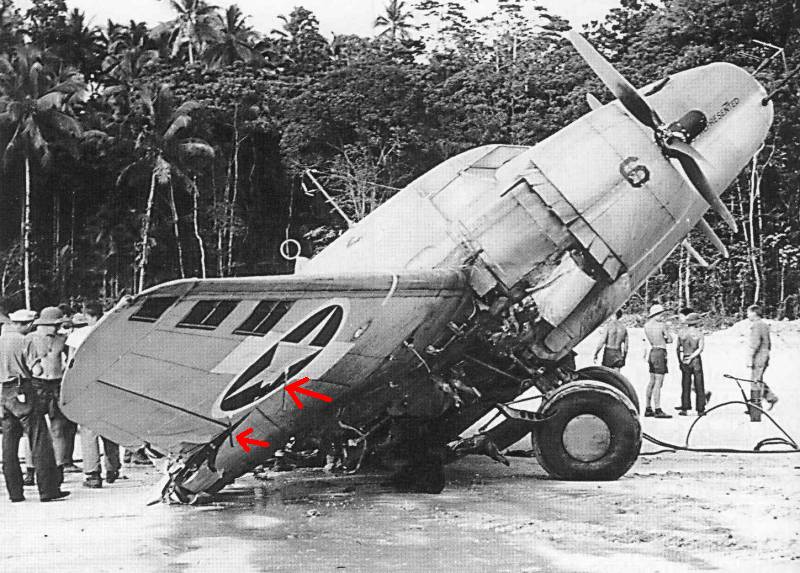
A photo of the same aircraft from the other side also shows two blade antennas on the lower wing.
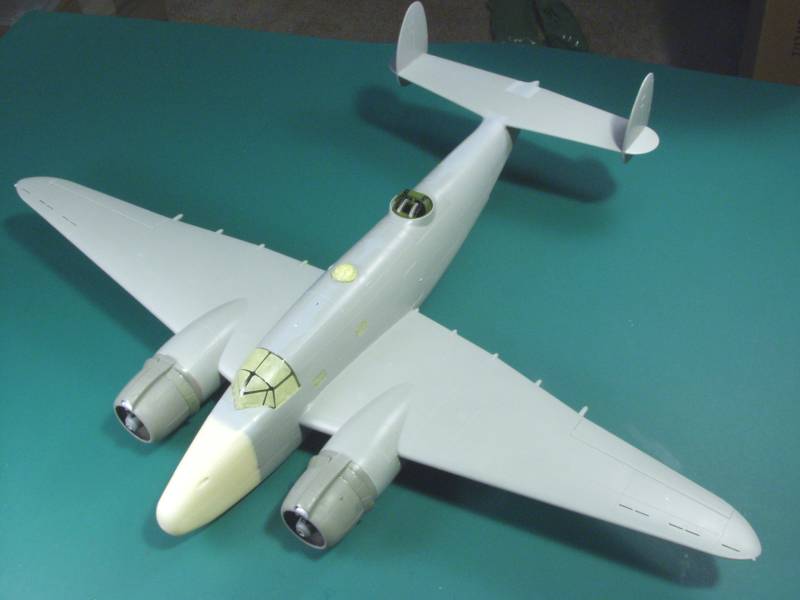
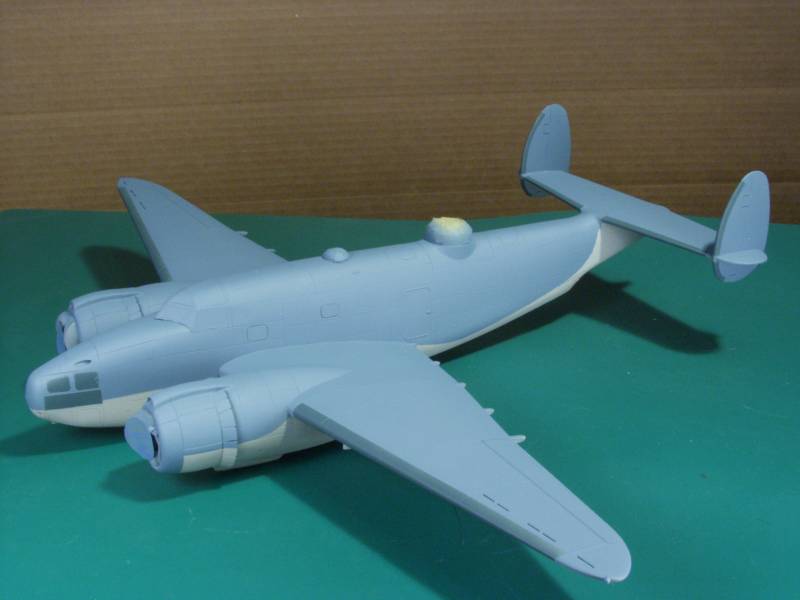
This is
how things look at this point, just about
ready for paint.
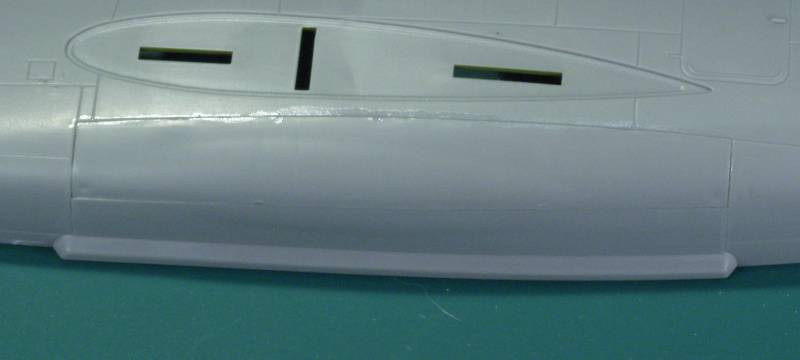
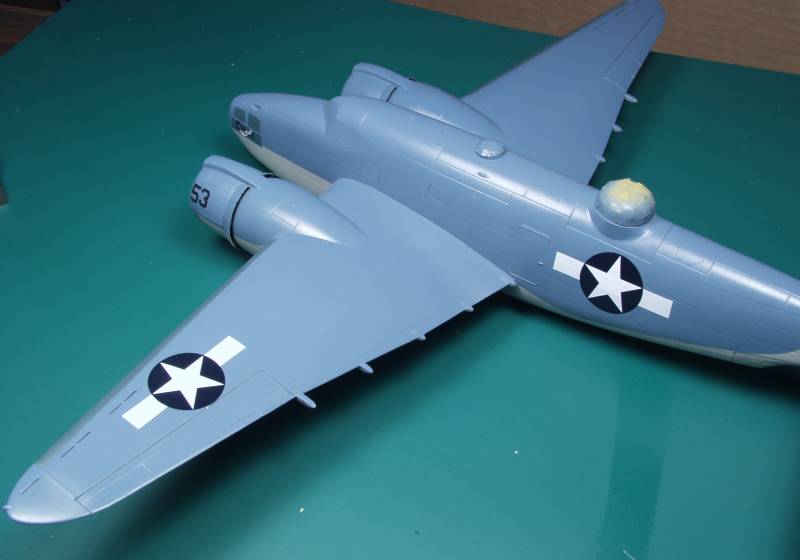
The primary paint colors are on. In retrospect I wish I had made the line aft of the wing a bit softer edged but I always seem to have an issue with soft edges and went with a hard edge instead.
I had
none of the Marine style decals but they
seemed to be a cinch to make, a simple bar of white decal stock and an
early war star in a ball. I had some Yellow Wings stars and since I had
heard nothing but good things about them, decided to use them. All went
well until they dried out and I noticed the blue top color darkened the
area of the star that wasn't over the white bar. I was a bit
disappointed in the Yellow Wings stars as I assumed they would be more
opaque. Makes me wonder if the white would look more cream color if
used on a plane with yellow wings. I didn't however feel inclined to do
anything about it at this point as it isn't all that noticeable at a
normal viewing distance and I hope once it gets a good amount of
weathering it won't be that noticeable, to others anyway.
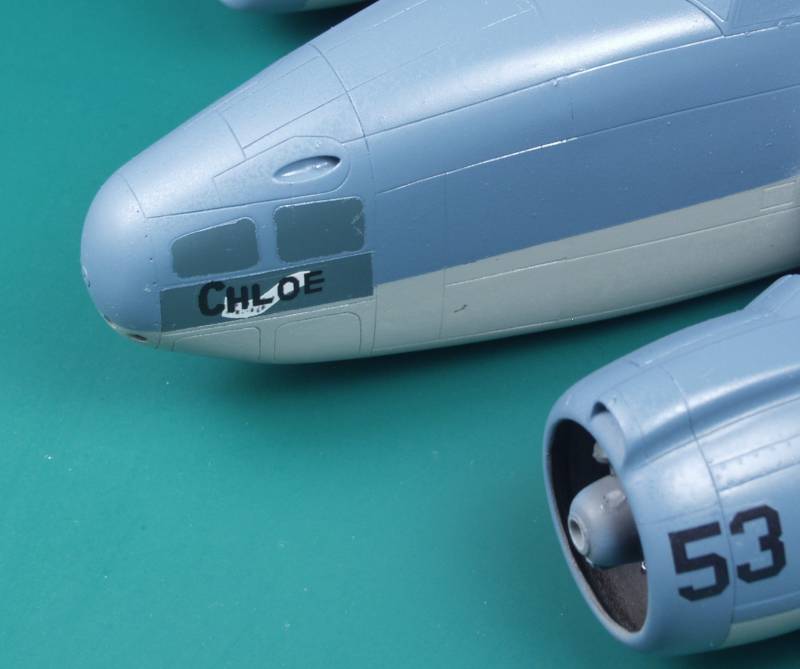
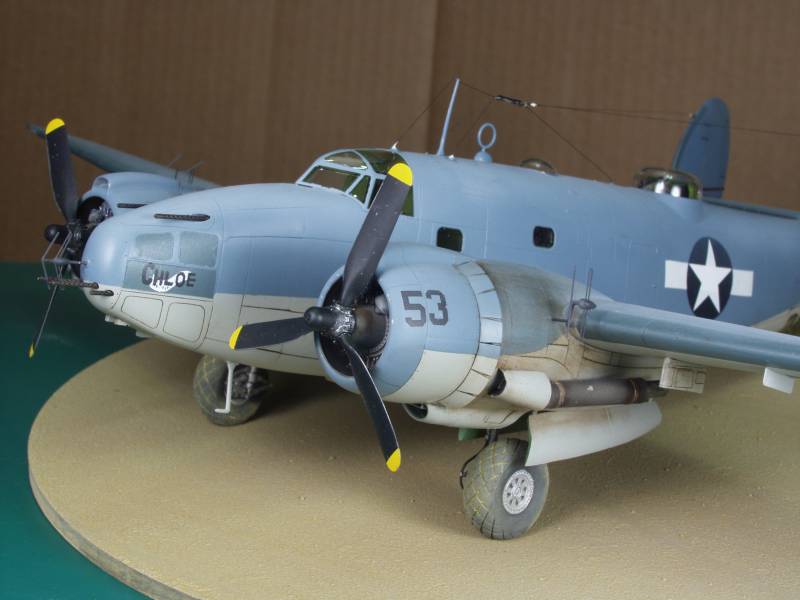
The other decal issue was making the nose art. I only had an artists
recondition that was included with the profile I was using. I suppose
if I had an ounce of talent I could have whipped something up. Instead
I scanned the profile at high resolution. This resulted in a highly
pixelated scan that I spent hours in Paint Shop Pro cleaning up and
separating the white part from the name, doing a lot of this one pixel
at a time. I eventually ended up with something I could use once scaled
and printed them out. It doesn't quite match the artwork on the plane
but the one in the profile didn't either and overall I was pleased with
how it came out.
Not a lot of markings on the aircraft, photos and the profile show
something on one of the tail fins, too small to read on either, most
likely a serial number. I did not include it.
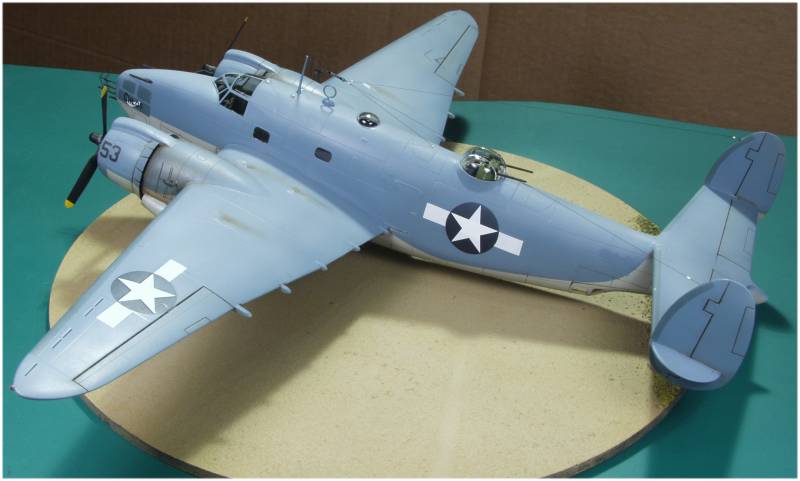
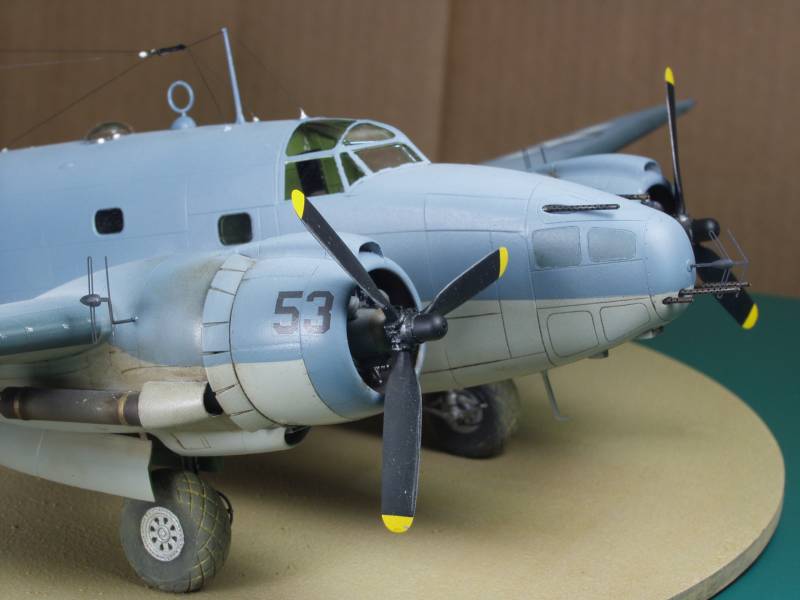
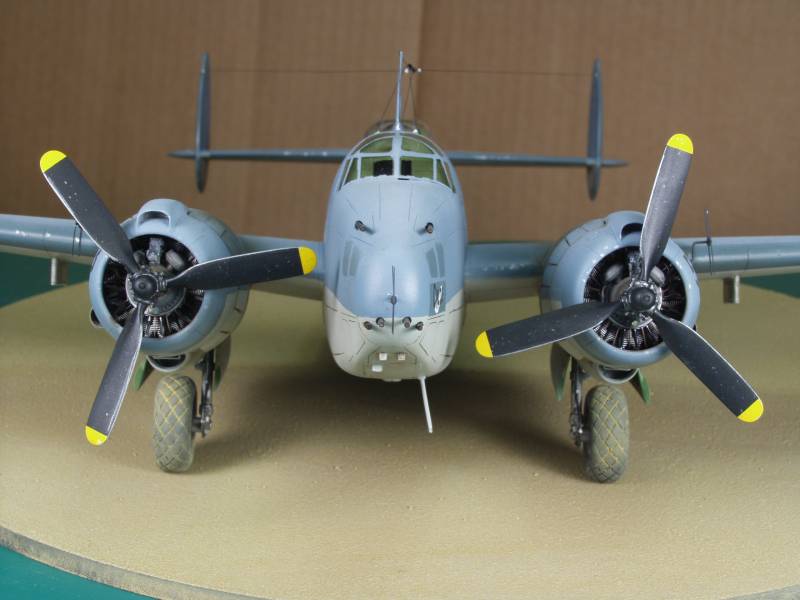
I really got out of sync with this kit, the long time period between paint and decals got me off track. I had intended on doing some fading coats but forgot about it until I already had the decals on. I did go back and do some but I didn't lighten the coats enough so although I can see it in person it doesn't show well in the photos. Like most builds there were some things that didn't go my way and things I would change if I built it again but overall I'm pleased and it will make a nice addition in my display case. Anyway, here she is, warts and all...
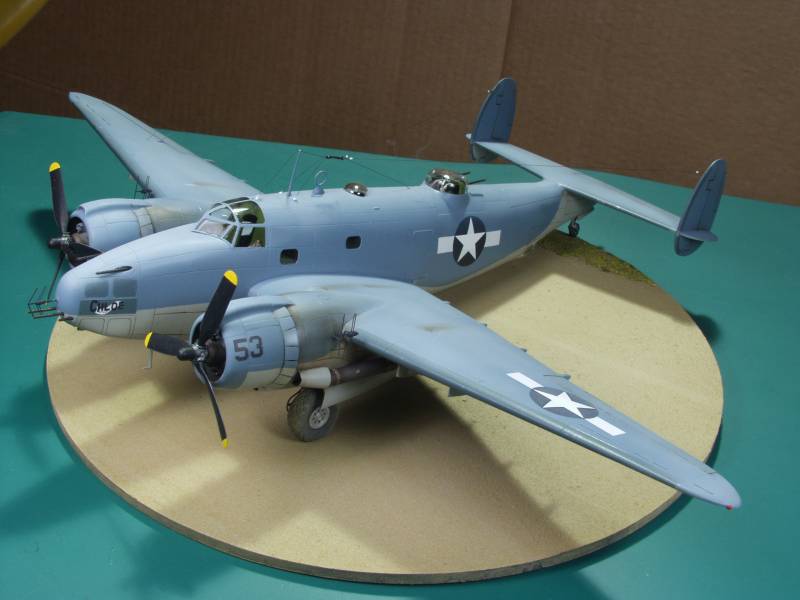
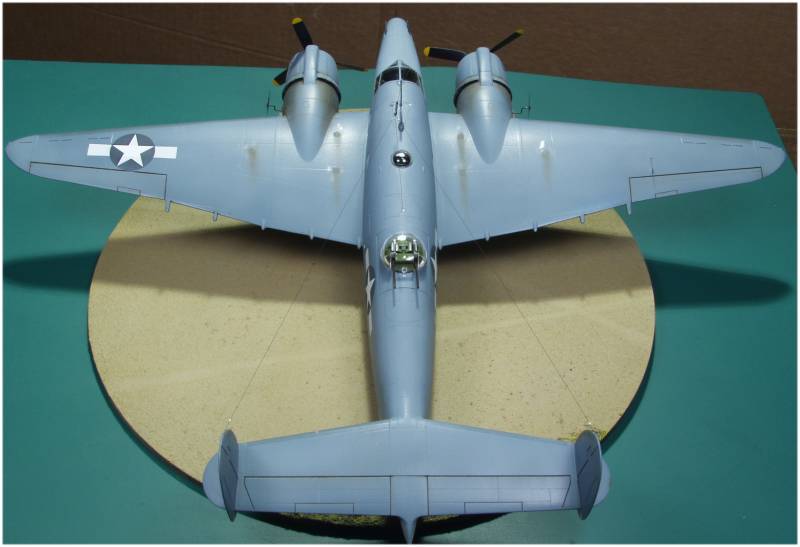
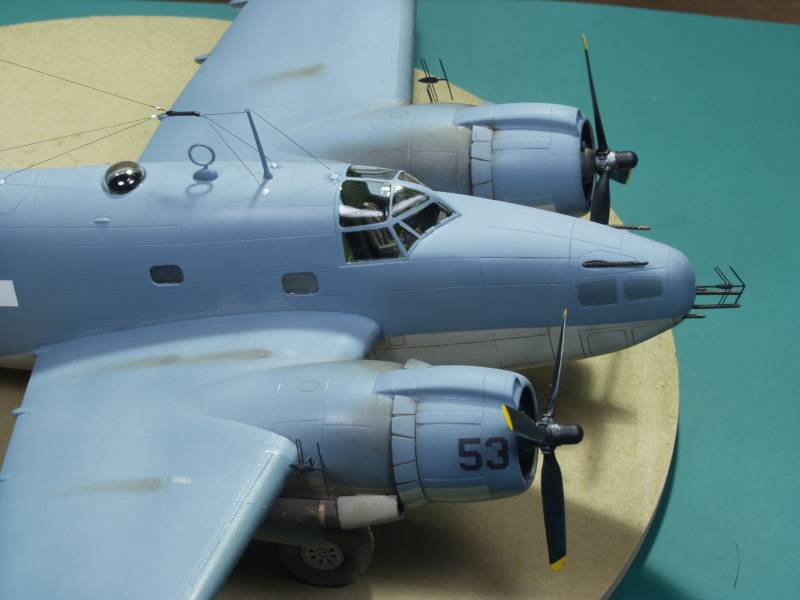
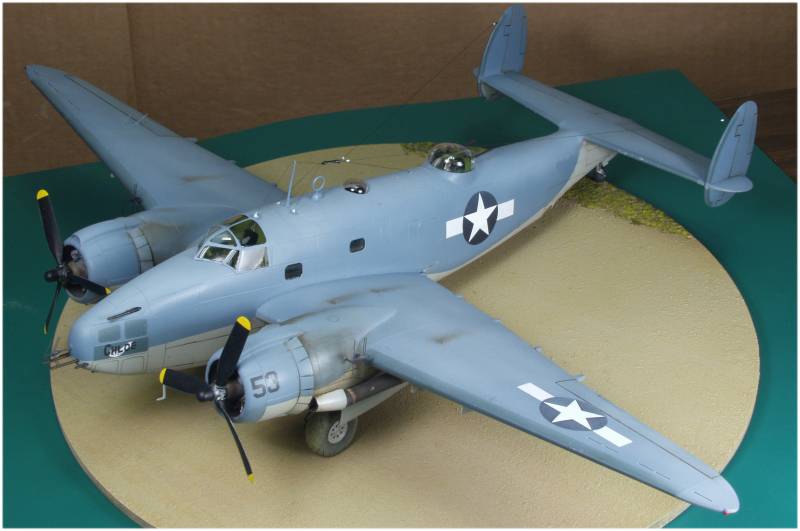
Tough to get bottom shots, too much delicate stuff on top.
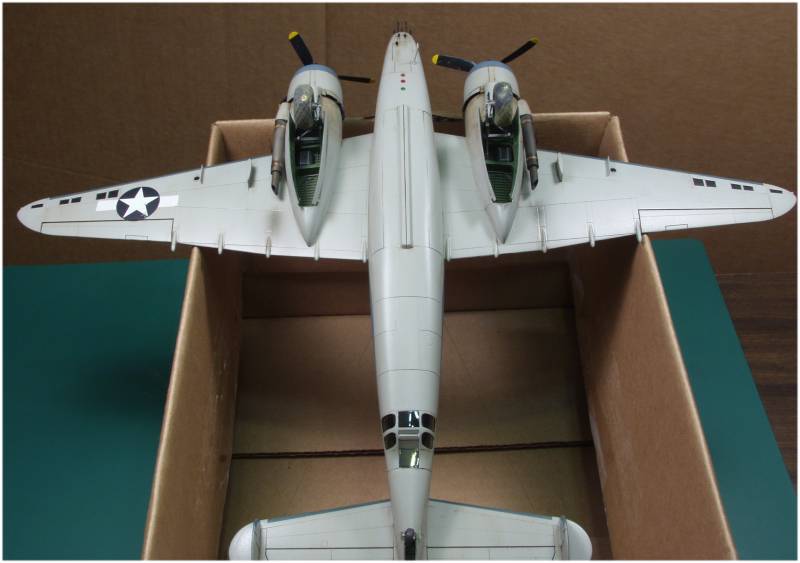
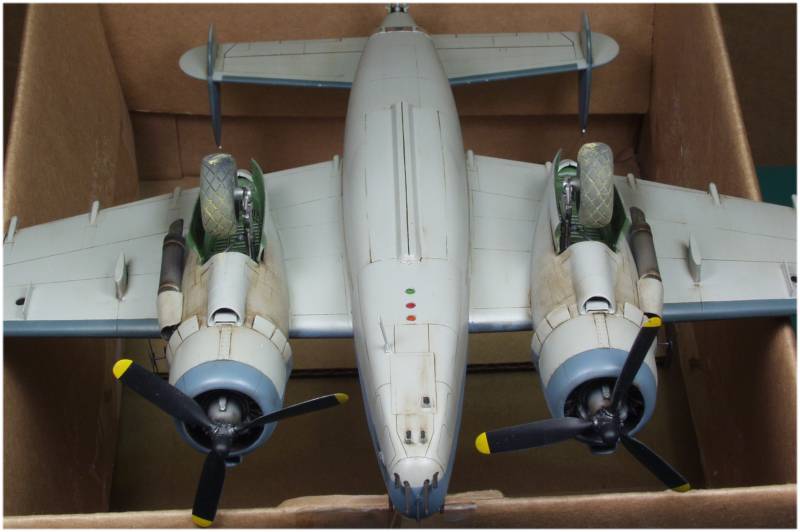
I really enjoyed building this kit, the fit for the most part was excellent and I would build another in a heartbeat. Most of the issues I had were those created by the necessary modifications needed for this night fighter version. Highly recommended.
Back to the Nightfighters Page