Reggiane
Re.2005
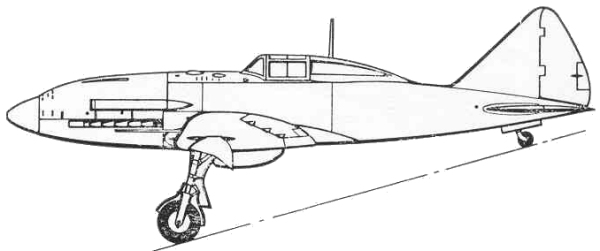
The Reggiane Re.2005 Sagittario
was one of the best fighters produced by the Italian aircraft industry
during the Second World War. The prototype, powered by a Daimler-Benz DB
605A engine, was first flown in September 1942. Although the Sagittario
possessed the same wing plan form as the earlier Reggiane fighters, it
embodied extensive structural redesign and employed outward retracting
main landing gear first tested on the Re.2002bis. Production deliveries
commenced in 1943, the production model having a Fiat built version of
the DB 605A known as the Tifone (Typhoon). Of the forty-eight fighters
delivered, the majority were allocated to the 22° Gruppo Caccia which
was initially assigned to the defense of Rome and Naples and one
Squadriglia, the 262°,
participated in the defense of Sicily. The initial production series of
300 machines reached an advanced stage, but construction was halted by
bombing.
The
Kit
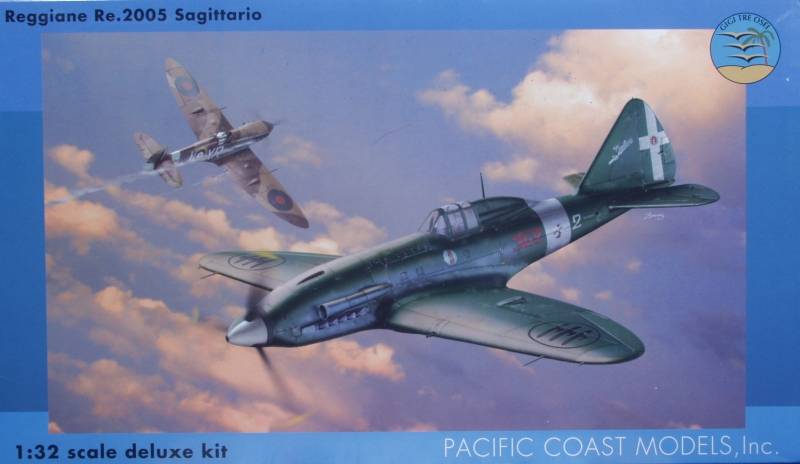
The Pacific Coast Models kit
comes in a medium sized top open box with nice artwork of the Re.2005
dueling with a Spitfire. The box is not overly sturdy but adequate. Just
a quick note about Pacific Coast Models, they are distributor as well as
a facilitator for new kits. The kit is actually tooled and molded in the
Czech Republic by Sword, who molds kits for others and does their resin work as
well and the kit includes decals by Cartograpf and photo etch by Eduard.
Inside the box is one large zip lock bag with all the parts. The resin
parts were in their own zip lock bag as were the photo etch fret and the
clear parts were in a sealed bag. As you can see in the photo below this
is a rather simple kit, however it contains every thing one needs to
create a nicely detailed model without a lot of fiddly parts added just
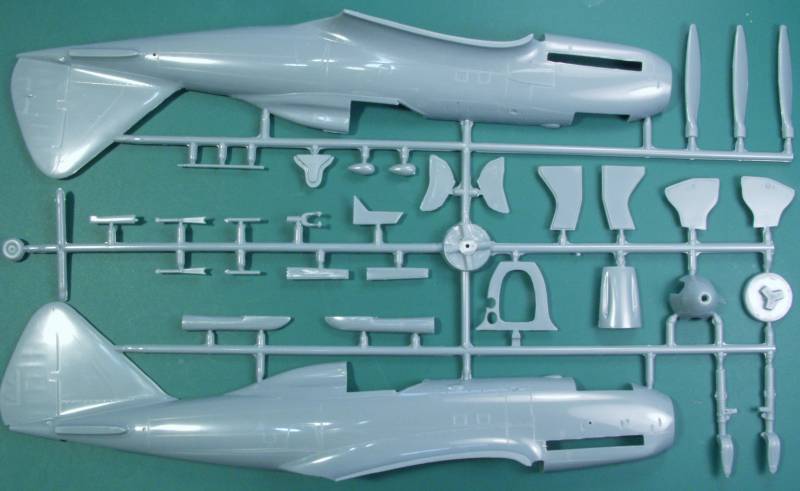
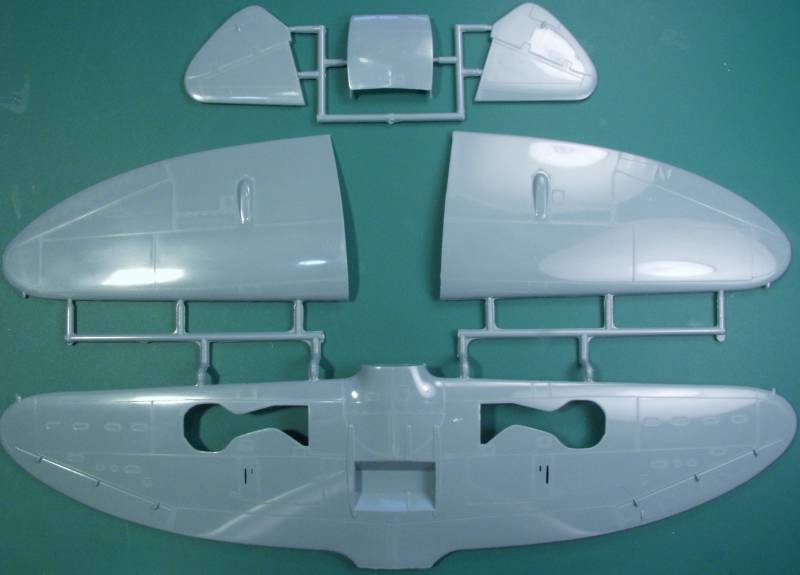
to boost the parts count. There are just three sprues of injection
molded parts in a medium gray color. One sprue has the upper and lower
wings, one the tail surfaces and bottom side radiator and the third has
the fuselage halves and the balance of the parts. The parts have a
smooth glossy finish and features recessed panel lines and fastener
detail. There is some raised detail as appropriate, mostly hinge lines
for access panels. Typical of limited run kits there is a small amount
of flash present and some of the sprue attachment points are quite heavy
and would best be dealt with using a razor saw. I found no surface
defects on any of the air frame surfaces. All of the flight control
surfaces are molded in the neutral position and the fabric surfaces are
very discretely done. The smaller parts tend to have a bit more flash on
them and the mold parting lines will require a bit more work to clean up
than main stream kits. The propeller has separate blades but unlike many
limited run kits, these are keyed to give you the correct blade angles.
I found no ejector pin marks that will show when the kit is built up.
There is a total of 39 parts molded in gray. See below.
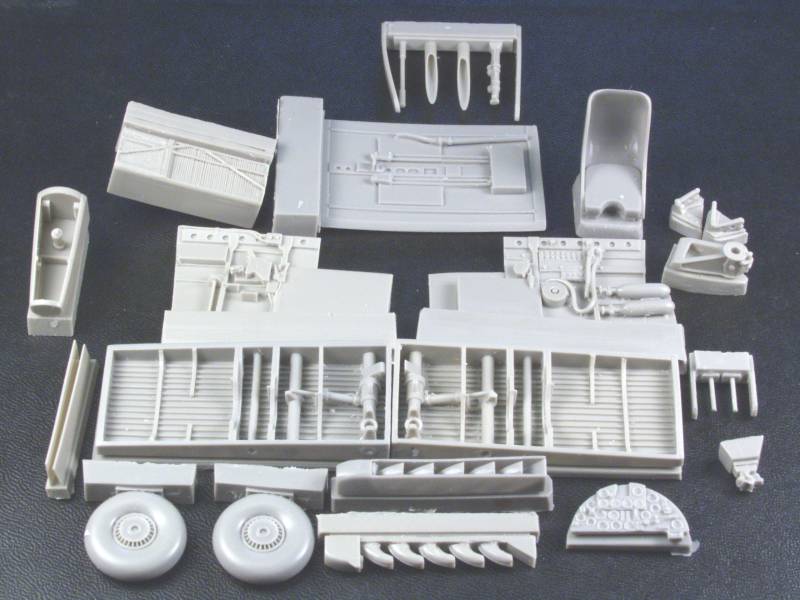
The kit comes with a nice supply
of parts molded in resin. The resin parts include the cockpit floor, two
side walls, seat, instrument panel, control stick, rudder bar, main and
tail wheel gear bays, tail wheel mount, weighted main wheels. radiator
core, gun sight, blast tubes for the cowling (optional) torque scissors
for the landing gear and exhaust stacks. There are also machine guns for
the wing but these would best be replaced by some hypo tubing or an
after market product. The resin is beautifully molded with no short
shots or visible pin holes. One of my torque scissors was broken and the
piece was MIA. The exhaust stacks were a mystery as one had shrouds
molded on both sides and one had no shrouds. The instructions show a
shroud on one side of each. Nothing that a little styrene won't fix.
Most have heavy pour blocks to remove so care will be require when
removing these. See below.
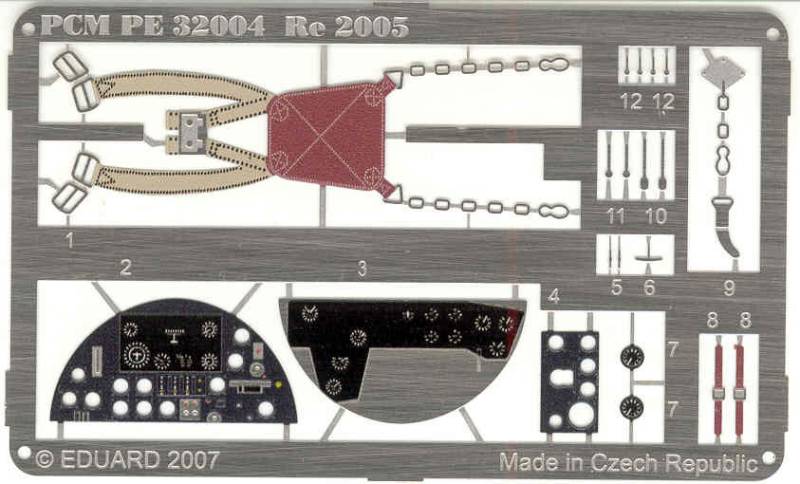
The
kit
also includes a small color photo etch fret with the rather unusual
Italian seat harness and belt, a two part instrument panel, foot
straps for the rudder bar and an assortment of levers for the
cockpit. Using the instrument panel will require removing the raised
detail on the resin instrument panel. It's always a toss up in this
scale whether to go with the nicely prepainted but one dimensional
IP or spend the time to paint up the nicely molded 3D resin part.
See Below.
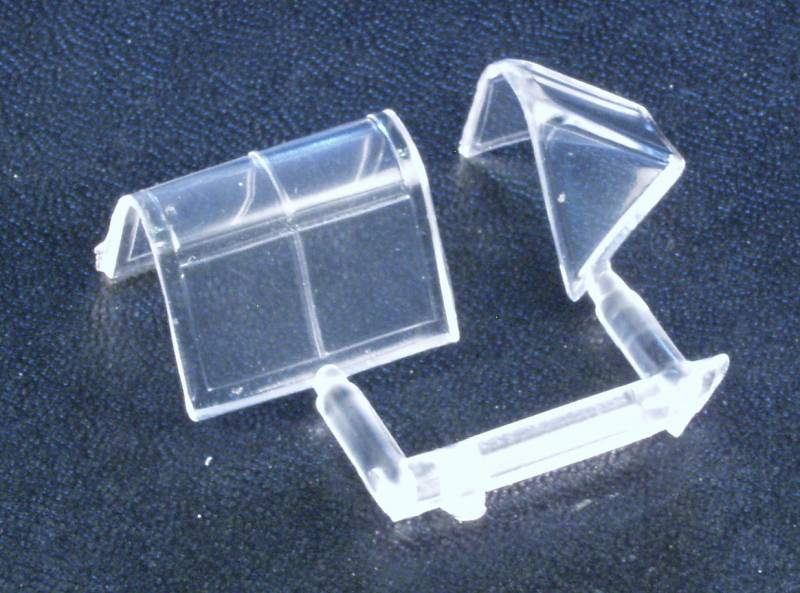
The
clear
parts are reasonably thin and clearer than they appear in the
photo below. Frame lines are nicely distinct and should make
masking and painting easy. See below.
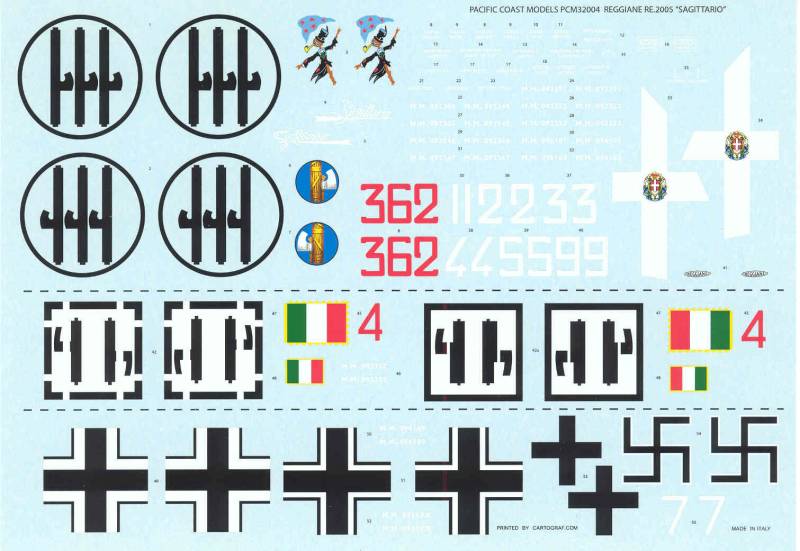
The
decals
are thin, glossy and well registered with minimal excess clear
film. Marking are provided for five aircraft although some of
them are from the same group but with different numbers. A fair
amount of stencils markings are provided. These are printed by
Cartograph, one of the premier decals printers in the world so I
would expect no problems applying these. See Below.
The
instructions
are printed on two small pages folded and
stapled to create a small booklet with printing on
seven pages. The front page has a brief history,
the second a parts map, the first part of the
third page has an icon chart and color call outs
using color names only, the balance of the book is
assembly steps. A separate page printed in color
and folded to create four pages has the painting
and decal information. The last page of this has a
decal guide, a reference list and an Italian paint
guide listing all the commonly used Italian colors
with FS 595 numbers, Humbrol, Tamiya, Gunze, Model
Master and Life Color equivalents. A very handy
guide to have, don't toss this when the kit is
finished !
After
Market
Goodies
Not really any need for these
unless you want a canopy mask or replacement gun barrels.
These should be easy enough to find if available by searching
the major on line stores line Sprue
Brothers and Squadron.
Conclusions
This is a very nicely detailed
and complete kit and will build into a lovely model of the
Re.2005. As limited run kits go this is one of the better
ones. Just bear in mind that with this type of kit that
trial fitting all parts before gluing is a must and expect
to need to do some minor reshaping and filing as you go.
Recommended to modelers with a few limited run kits under
their belts.
Links
to kit build or reviews
Another in box review can be found here,
and a build review here.
References
Back
to the 1/32 Scale Italian Aircraft page
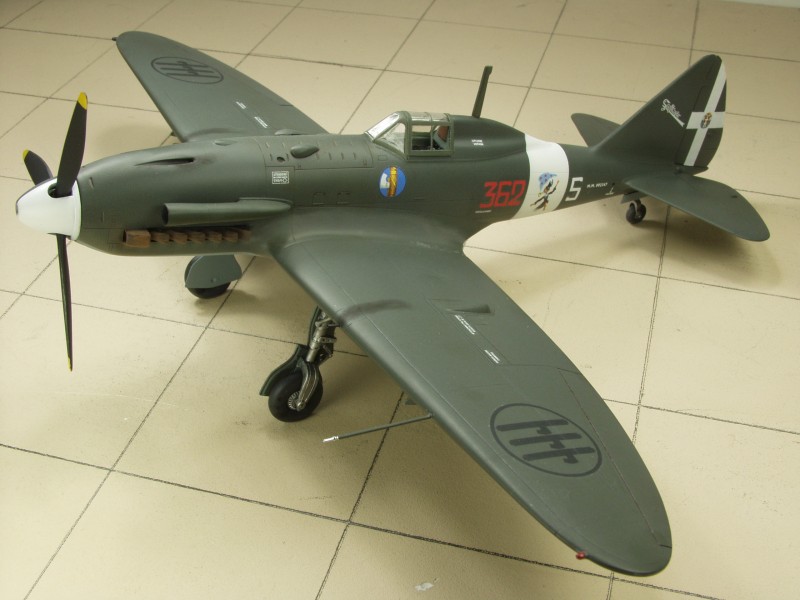
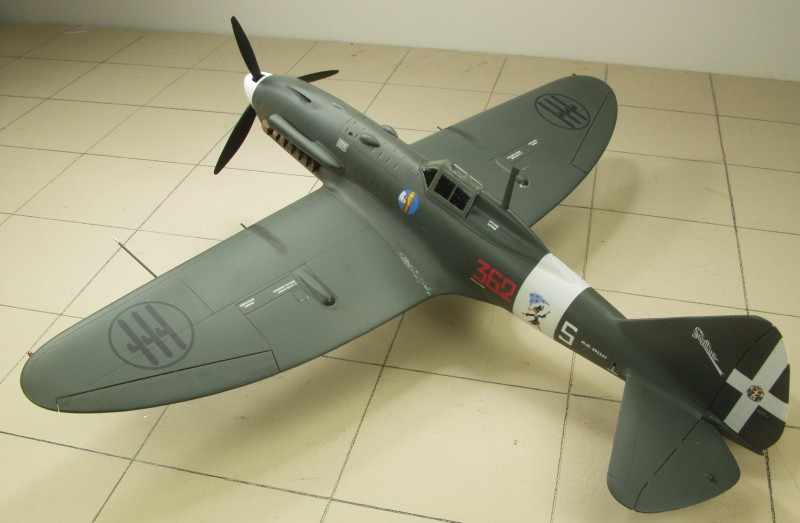
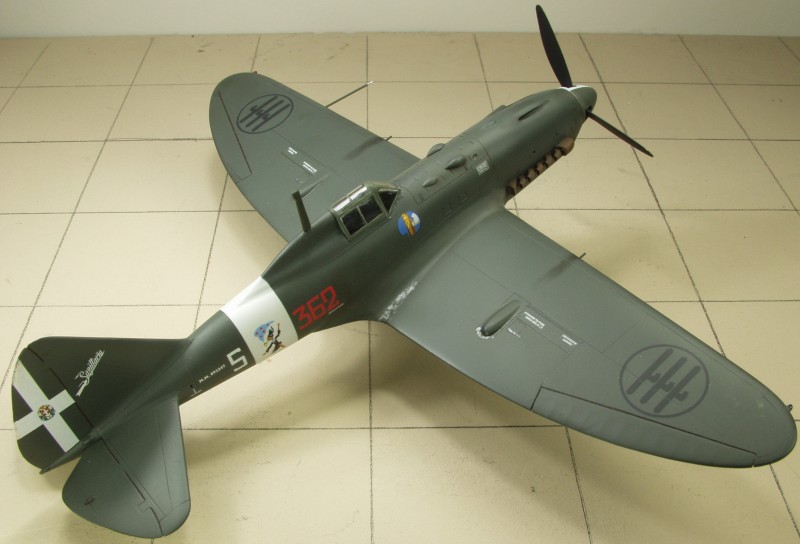
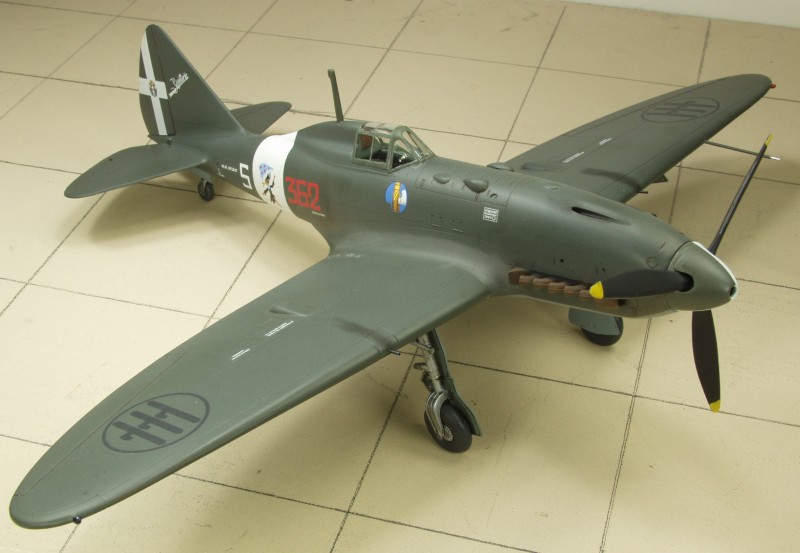
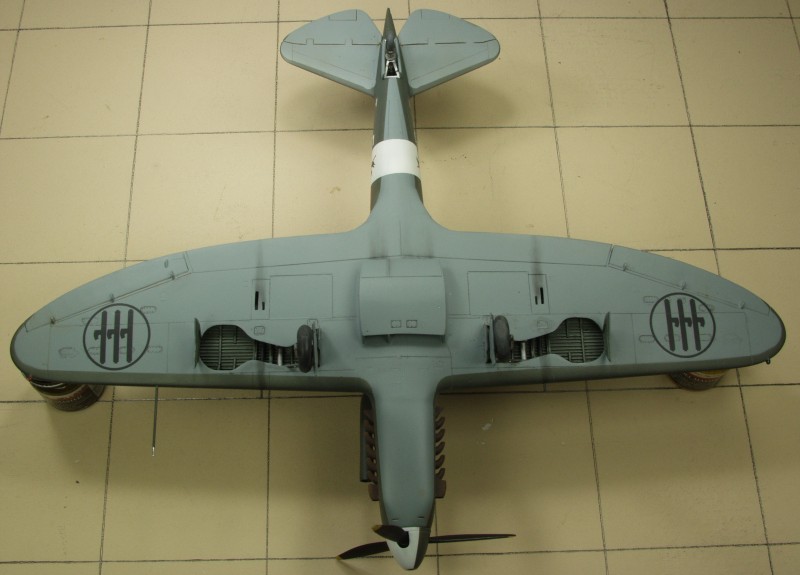
The
Build
Well, it doesn't really count as a
build since I didn't take any in progress photos but I will make some
comments about the kit and how it went together. Overall fit of the
injection molded parts was good, better than some of the other Pacific
Coast Models kits. I found the resin cockpit to be the most
frustrating part of the build as the parts themselves did not key
together all that well and didn't want to fit in the fuselage once
together. The detail level is quite nice but in the end not much of it
can be seen. I left off the back bulkhead, the seat fills most of the
space so its absence is not that noticeable and the nice looking
instrument panel ends up mostly hidden up under the cowl. The seat and
the chain seat restraint is about all you'll see through the canopy.
The fitting of the resin gun troughs in the upper cowling is quite
tedious and though it looks better than the molded ones if I had to do
it over I would go with the ones molded in the fuselage, and just
drill them out. The resin gear wells actually fit with little effort
but the fact that they are resin and the gear itself is plastic
necessitates using CA glue on them which provides little time to get
them properly orientated. The fit was wonky and the retraction struts
if not adjusted in length will make the wheels toe in and set the
angle of the gear wrong and it took several attempts on my part to get
them close to looking right. Not the kits fault but due to the amount
of clear film on the decals I used muptiplecoats of clear gloss to
guard against silvering. This worked well but filled the very nice
fine panel lines to the point that they didn't want to accept a
weathering wash. Your experience may vary. Anyway it is done...
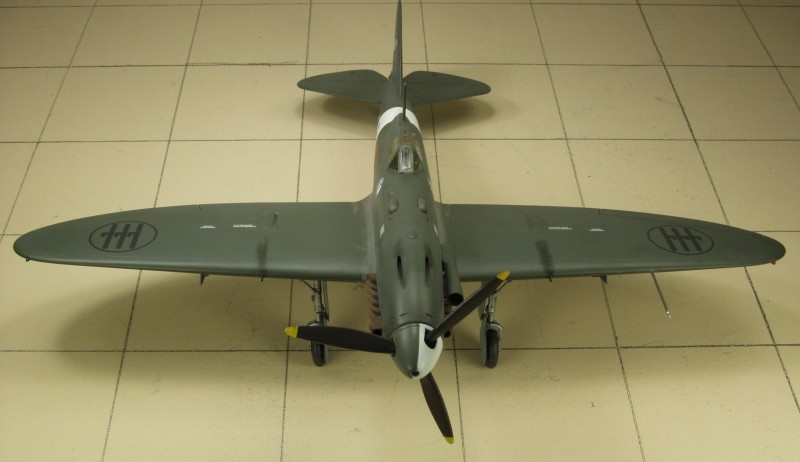
These aircraft didn't reach active
service till just before Italy capitulated so saw only limited
service, for that reason I kept the weathering and wear and tear
light.