
Yak-3
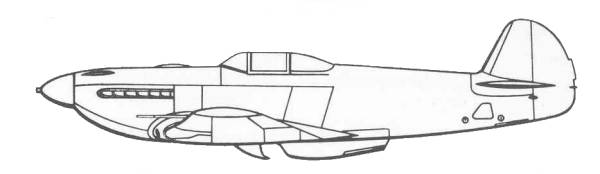
The Yak-3 was the result of a second line of development, which based on the Yak-1, aimed at obtaining the highest possible performance with the M-105PF engine. Various improvements were embodied in an experimental aircraft the Yak-1M. The rear fuselage was cut down in the style of the Yak-7B and an all around vision cockpit canopy was fitted. The wing span was reduced by two feet and the loaded weight was reduced by 600 pounds. Trials with the 1M led to the design of the Yak-3 which was placed into production in the summer of 1943. The Yak-3 was powered by the M-105PF-2 engine rated at 1,222 h.p. for takeoff. The oil cooler intake was transferred from below the engine to the port wing root and the antenna mast was eliminated. An exceptionally fine finish was obtained on the wings by applying a thick layer of polish which proved to hold up extremely well in service use. Performance was superior to that of early Yak-9's with a maximum speed of 403 m.p.h. The handling characteristics of the Yak-3 were excellent and pilots who had flow early versions of the Spitfire claimed that the Yak-3 was lighter on the controls and smoother to fly. The stall speed was relatively high and takeoff and landing could be a problem for novice pilots. Armament consisted of one 20-mm. ShVAK cannon and two 12.7-mm. Beresin machine guns. The Yak-3 made its operational debut during the German Kursk offensive and by early 1944 several VVS fighter regiments had been equipped with the type. Such was its success that Luftwaffe pilots received instructions to avoid combat with Yakovlev fighters lacking an oil cooler beneath the nose below 5000 feet. The total production of the Yak-3 numbered 4848 aircraft by the time the last one left the factory in early 1946.
The Kit
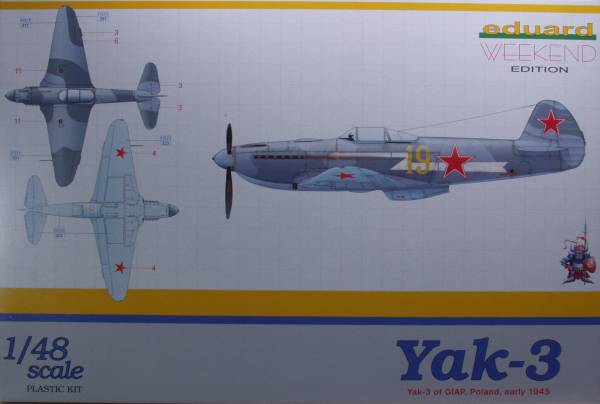
The Eduard Yak-3 comes in a sturdy two part top open box with a three view profile on the front that also serves as markings locater. Inside the box is a single bag that contains two sprues and a second bag with the clear parts. The Weekend Edition series of kits is a simplified version of their Profipak kits, which include in addition to their plastic parts, also contain some photoetch and resin parts. I had hoped to find the Profipak version of this kit but had no luck so I purchased a separate PE package for the kit as I wanted some additional details in the cockpit.
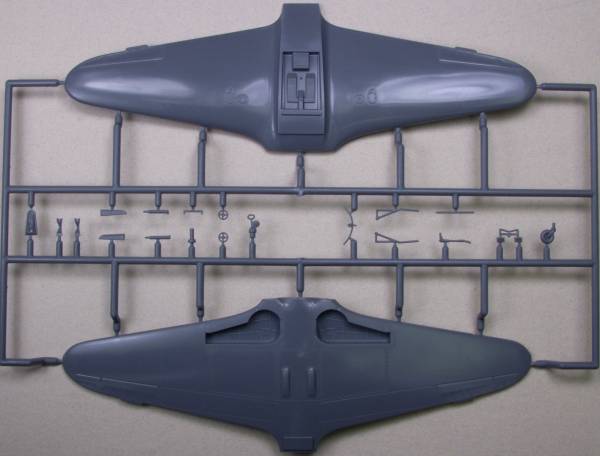
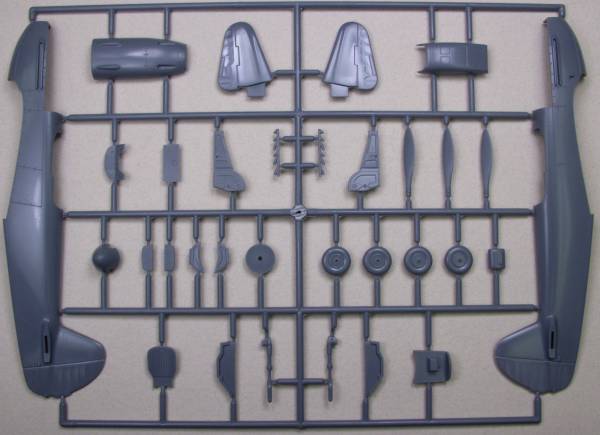
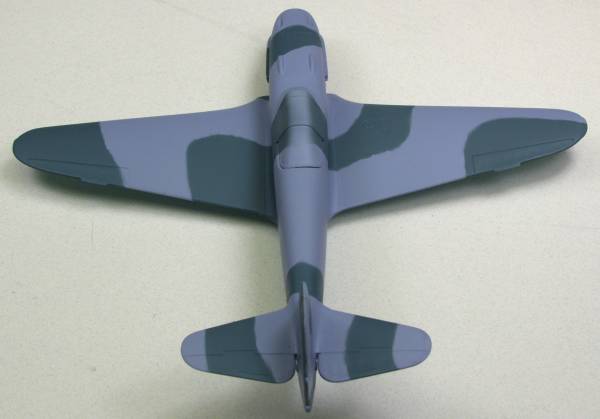
The kit is molded in a medium gray color with recessed panel line and fastener detail. since most of the aircraft was skinned in plywood there aren't very many panel lines. The parts are very cleanly molded with only a hint of flash on the major parts and some parting line marks on some of the smaller parts. I found no surface defects on any of the parts. There were ejector pin marks on the inside of the two cockpit side consoles, but there was no other detail there so removing them is just a matter of some quick work with a sanding stick. There are some ejector towers that will need to be removed from the insides of the wing surfaces. The tail planes are one piece. The fabric detail on the control surfaces is very nicely done.
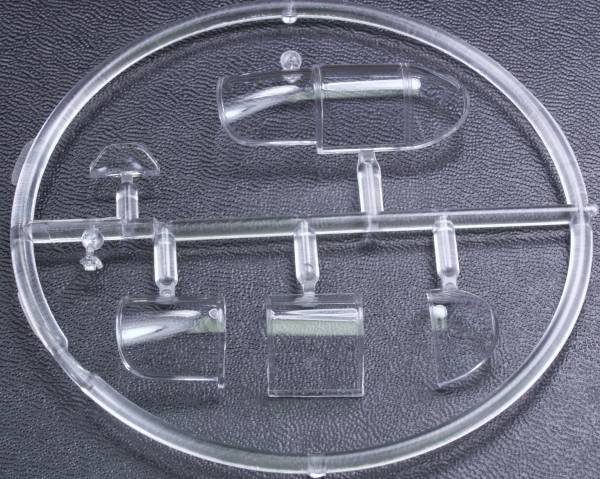
The cockpit is built up on the top of the upper wing surface which has the floor pan molded into it. The main gear bays are enclosed and feature structural details and the cockpit walls molded into the fuselage also are detailed. The cockpit is reasonably well detailed with the supplied kit parts but I think some photoetch would dress it up a bit. The instrument panel has raised gauge bezels but no internal detail on the instrument faces. The gear doors are detailed on the inside. The propeller is the build it yourself style however the blades are fitted with pins that should keep the blades properly oriented. The kit has no alignment pins but all sources indicate that fit of the kit parts is good so that shouldn't be a hindrance. The gun ports are not drilled out on the upper cowl nor are there any guns barrels to mount there. All together there are 53 parts in gray. The clear parts are thins and nice and clear. Two canopies are provided, a one piece closed version and a three piece open version. There is a separate piece of clear armored glass that fits behind the pilots head. altogether there are 5 clear parts for a total of 58 in the kit, see photos below.
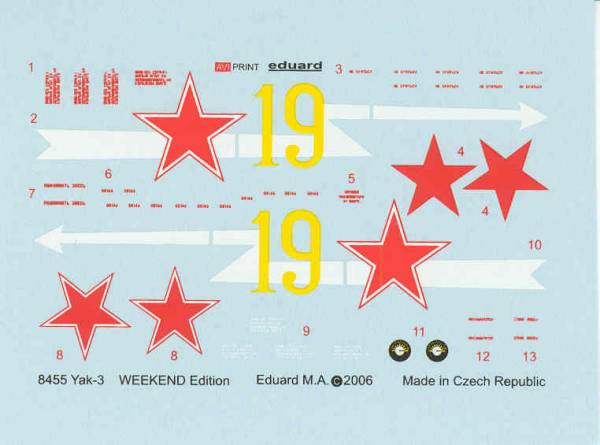
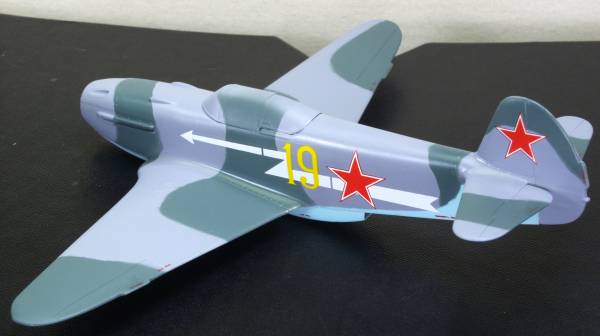
The decals are thin and registered and include marking for one aircraft. There are just enough in the way of stencils for adequate detailing without going over board. See photo below.
The instructions are printed on an A4 sized sheet folded in half to make four pages. The first page has a parts map, the usual warning about reading the directions, a paint chart calling out Mr. Hobby colors and an icon chart. The next three pages covers assembly. The external camouflage and markings location are shown on the outside of the box.
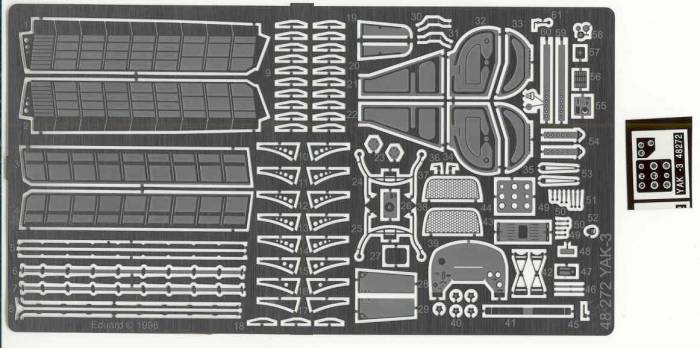
As for after market, since the Weekend Edition came with no photoetch, I wanted some to dress up the pit so I ordered the Eduard PE set [48272]. It includes a bit more than what I wanted as I have no intention of dropping the flaps and about half the fret is devoted to that, however it does have a nice assortment of goodies for the cockpit including a complete replacement instrument panel so one doesn't need to carve all the molded detail off the kit piece. I like the look of the gear doors which are probably close to scale thickness but I'm not sure how durable they will be. See photo below.
Conclusions
This from all appearances and from other reviews is an excellent kit. Fit is reported to be good and it has a nice level of detail right from the box. Recommended to modelers of most skill levels.
Links to kit build or reviews
Reviews / builds can be found here,and
here. Note
only the second link is a Weekend Edition kit.
References
Famous Fighters of the Second World War by William Green
Soviet Aces of World War 2 by Hugh Morgan
Soviet Air Force Colours 1941 - 1945 by Erik Pilawskii
Back to the Russians are Coming page
The Build
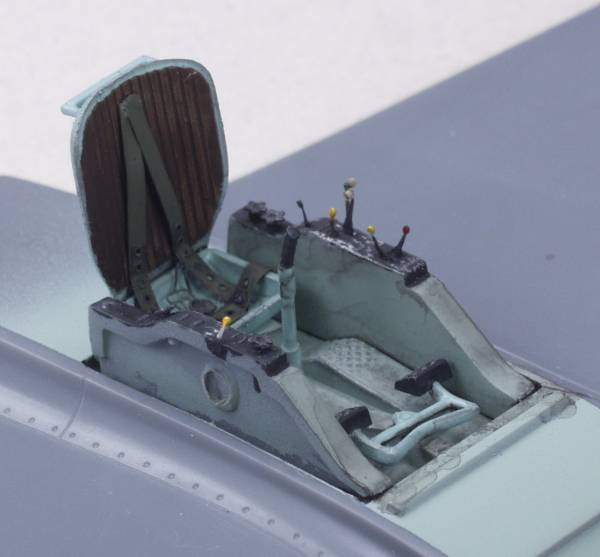
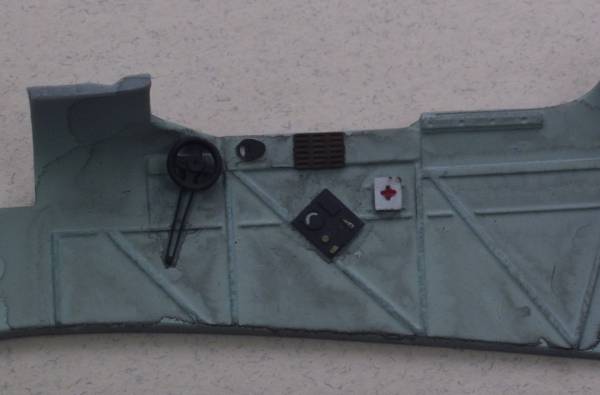
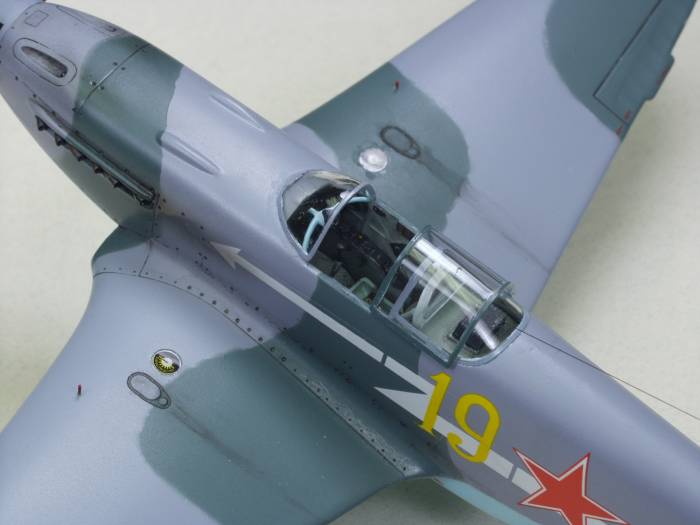
As with most kits construction begins with the cockpit. After reading Erik Pilawskii's book on Soviet Air Force colors I decided to do the interior in ALG-5 gray metal primer with selected parts done in IMUP, industrial metal primer, both of these from White Ensign Models. I sprayed the floor, which is part of the upper wing and the inside of the fuselage where it will show and a few other parts such as the radio rack and side consoles. Inside the fuselage I highlighted the framework with the IMUP color. I painted the rudder bar, seat back and bottom and the joystick with this as well. The WEM paint seemed about the right consistency right out of the tins for hand painting. The seat was assembled to the floor along with the consoles, rudder bar and joystick. Once that was done I began adding the interior photoetch, the side wall parts, and the various knobs and levers for the console. The PE radio was folded up, with some difficulty as Eduard did not mark where to fold it. The seat belts and harness were painted and installed and everything was given a sludge wash and highlighting was done with a silver pencil. Once everything was in place and painted up it was time for some photographs. See below for cockpit and side wall photos.


Unfortunately I got carried away during the session and got the lighting a bit too close to the subject and the end result is shown below.
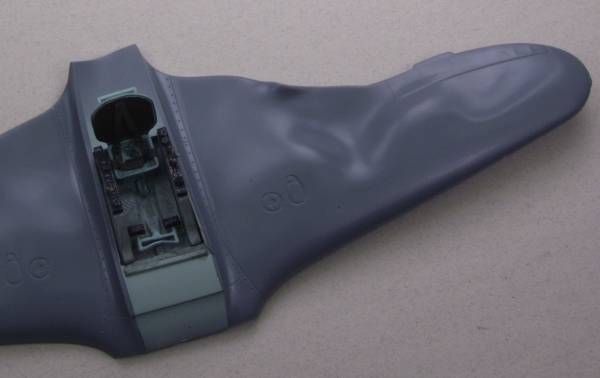
I knew the Eduard plastic was a bit soft but now I know it also has a low melting point ! Not many other options here, I ordered a new kit and hope that I can salvage most of the parts without destroying or losing the PE parts.
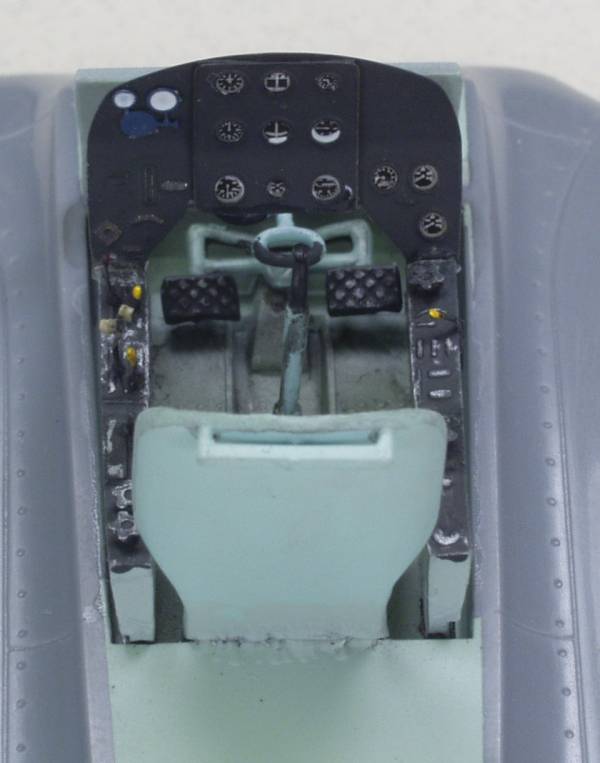
OK, the new kit arrived in short order and much to my surprise I was able to salvage everything without damage to the PE parts. The next photo shows the pit reinstalled on the new wing and the instrument panel in place.
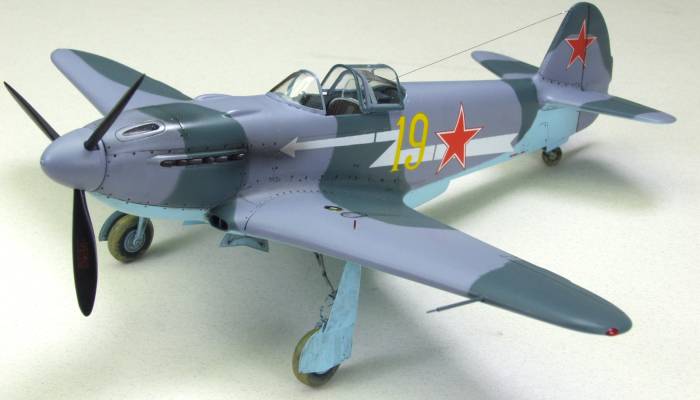
Following that the fuselage and stabilizers were attached, the closed canopy was installed as a paint mask and all filling and priming was done then the main colors were added using White Ensign Models paints.
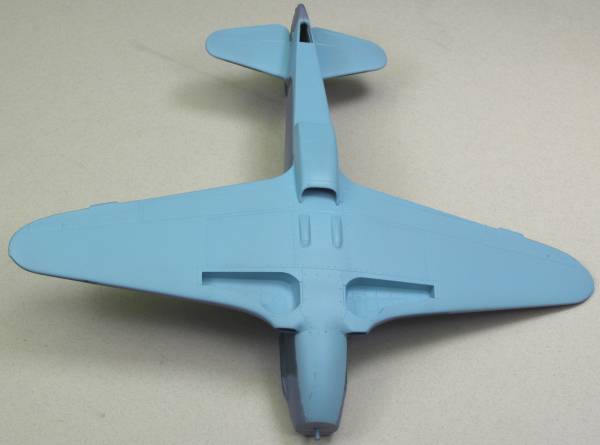
After that a coat of Future was applied followed by the decals.
Once the decals were sealed then the fun of installing all the fiddely bits begins. The kit only supplies decals for the wing fuel gauges and that just didn't look right so I spent some time figuring out how to recess them and punch a clear cover. That turned out to be a project in and of itself but I finally figured it all out. The exhaust stacks were installed then the rivets and panel lines were highlighted with a wash. The landing gear was installed along with the PE landing gear doors and torque sissors. The pitot tube from the kit was replaced with two pieces of telescoping tubing. Gear down indicators were made from some brass wire and the antenna was made from invisable thread. Exhaust stains were done with Tamiya smoke


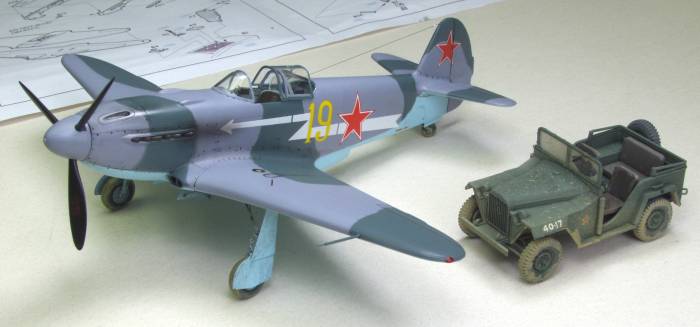
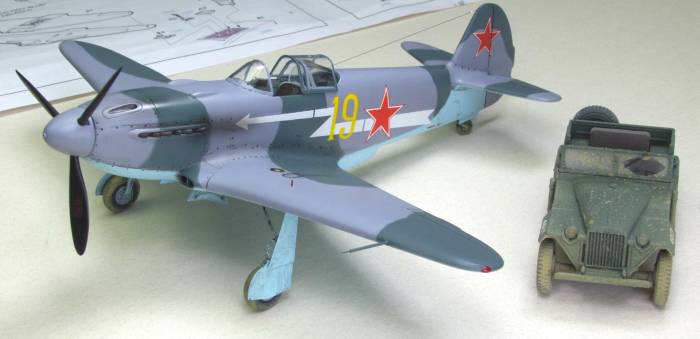
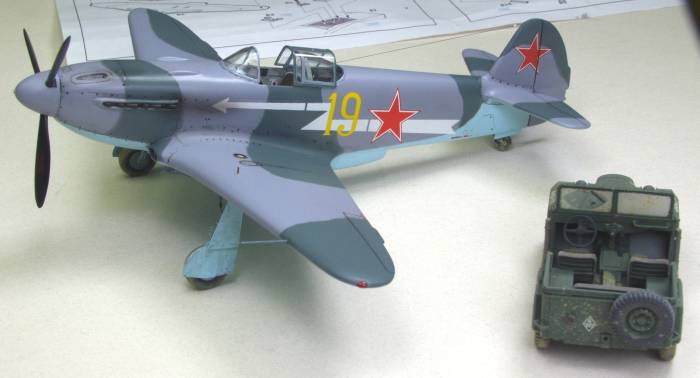
To add some scale to the photos I have included a Russian Gaz-67 that I built in parallel with the Yak
Back to the Russians are Coming page
Updated 4/13/08